If you are using the LCD monitor, open it. The LCD monitor can also be rotated. When the LCD monitor is tilted 180 degrees, the displayed image is automatically flipped and reversed (the Reverse Display function) so that it appears correctly from in from of the lens (you can disable the Reverse Display function).
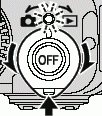
Aim the camera at the subject.
Use the zoom to achieve the desired composition in the LCD monitor (or viewfinder).
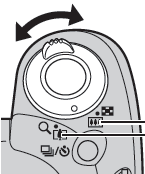
Turning the zoom lever toward magnifies the subject (telephoto). Turning the zoom lever toward decreases the size of the subject (wide angle). The speed at which the magnification change is determined by the way the zoom lever is turned. Turning the zoom lever in one swift movement completely to the right/left enables fast zooming. For slow zooming, slowly turn the zoom lever halfway.
The angle of view can be adjusted within the 36 to 432 mm range, in 35mm film equivalent.
The combined use of the digital zoom and optical zoom enables magnified shooting up to approx. 48x. The digital zoom cannot be used with some shooting modes. Images become coarser the more they are digitally zoomed.
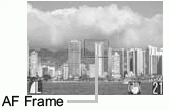
Lightly press the shutter button (pressing halfway) to focus. Two beeps will sound when the camera has finished focusing, and the AF frame appears green.
The AF frame will light yellow and the beep will sound one time if the subject is difficult to focus on. When the AF frame is set to Auto, it will not appear.
The shutter speed and aperture value are automatically determined and show on the LCD monitor (or viewfinder). The exposure compensation and focus are also automatically set.
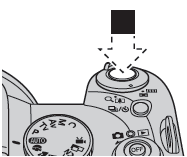
Press the shutter button all the way. You will hear the shutter sound when the shot is complete. Do not move the camera until you hear this sound. The picture appears for two seconds.
The LCD monitor and viewfinder have a field of vision of approximately 100% of the actual shooting image.
Images are first saved into the camera's memory before being recorded onto the memory card, allowing the next images to be taken immediately as long as sufficient space is available in the memory.
The indicator blinks red while data is recorded onto the memory card.
The beep and shutter sound can be set to On/Off using the menu.
If the shutter sound is set to [Off] and the mute option is set to [Off], the camera will beep once when the shutter button is pressed all the way.
Shots cannot be taken while the flash is charging.
You can change the length of time images show on the LCD monitor after shooting, or set it so they do not show at all.