Printing an Index of photos in Easy-PhotoPrint EX
| Article ID: ART119336 |
| |
Date published: 05/12/2015 |
| |
Date last updated: 08/17/2015 |
Description
Printing an Index of photos in Easy-PhotoPrint EX
Solution
|
 Preference Dialog Box Preference Dialog Box
You can specify the settings for Photo Print in this dialog box.
To display the Preferences dialog box, select Preferences... from the File menu.
The following settings are only available in the Photo Print mode.
Print tab


| 1 |
Spool print job page by page |
Allows you to specify whether or not to spool a print job page by page. Check  to spool the job page by page. to spool the job page by page. |
| 2 |
Number of copies |
Set the number of copies to be printed in the range of 1 to 999. |
| 3 |
Printing Order |
Specify print order of images. Select By Date to print in chronological order by the date the photo was taken. Select By Name to print in alphabetical order by the file name. Select By Selection to print in the order of selection from the Image Selection screen. |
| 4 |
Amount of extension of borderless printing |
Specify the amount of extension for borderless printing among Default, Large, Medium, Small, and None. |
| 5 |
Print Quality |
Select print quality from Default and Quality Priority. Images are printed with high quality but a little slowly if Quality Priority is selected.
Selecting either option may result in the same print quality depending on the combinations of the settings. |
| 6 |
Option... button |
Displays the Print Quality Options dialog box to set Print Quality.
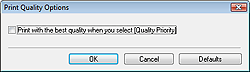
The Option... button does not appear depending on the printer. |
| Print with the best quality when you select [Quality Priority] |
Check this check box to print with the best quality when Quality Priority is selected for Print Quality. |
| 7 |
Defaults button |
Return the setting to the default value. |
Advanced tab

| 1 |
Image |
Color correction for printing |
Enable Auto Image Fix |
Optimize images based on Exif information when printing. If Exif information is not stored with the image, color tones of the photo imported from digital cameras or scanners will be corrected. |
| None |
Select this when you want to print images without color correction. |
| Enable ICC Profile |
You can select from the following two options:
Perceptual: Select this when you want to print photos using color tones that people favor.
Relative Colorimetric: Select this when you want to print in colors that are close to the original image. |
| 2 |
Apply Rotate/Crop to the same images in the same manner |
Check this check box if you want to apply the rotation and cropping effect you specified for an image to all copies when you print more than one copy of the image. |
| 3 |
When landscape images are rotated depending on the selected layout |
When you select a portrait layout, such as Borderless (x2) and Bordered (half) for a landscape image, select a desired rotation.
Layouts requires the image to be rotated:
(e.g.)
 |
 |
| Borderless (x2) |
Bordered(half) |
Rotate to the left
 |
Original image
 |
Rotate to the right
 |
 |
|
 |
Portrait images rotate opposite to the selected direction. |
| 4 |
Layout |
Always crop images when selecting a layout with margins |
Set whether or not to always crop images when you select a layout with margins. The image is always cropped when Borderless Layout is selected. |
| 5 |
Set margins to the minimum when you select the layout with the margins |
Set whether or not to print the portion exceeding the recommended printing area. Uncheck  this checkbox to print within the recommended printing area. Check this checkbox to print the portion exceeding the recommended printing area. this checkbox to print within the recommended printing area. Check this checkbox to print the portion exceeding the recommended printing area.
The image may be printed improperly in the margins of the paper if the printer, paper size or media type does not support borderless printing. |
| 6 |
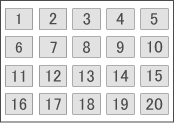
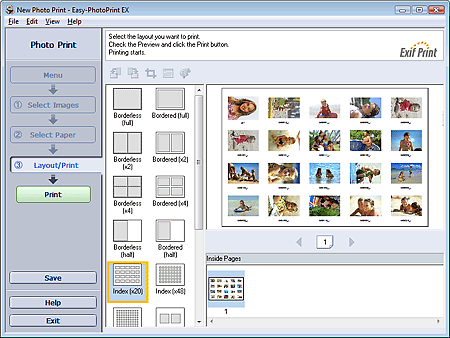
Print filename when you select the index in layout |
Select whether or not to print the filename under each image in an index print. |
| 7 |
Preview all layouts of A4 and Letter |
On the Layout/Print screen, set whether or not to preview all layouts of A4 and Letter. Uncheck this checkbox to display a part of layouts in Others. To view some hidden parts at a time right-click Others. |
| 8 |
Defaults button |
Return the setting to the default value. |
|


 Index print will be disabled if you select any of the following paper sizes.