How to remove the print head / ink tanks
Click here for reinstall instructions.
Remove the print head or ink tanks properly following the procedure below.
- Confirm that the printer is powered on and open the paper output tray by pressing the
 button (A).
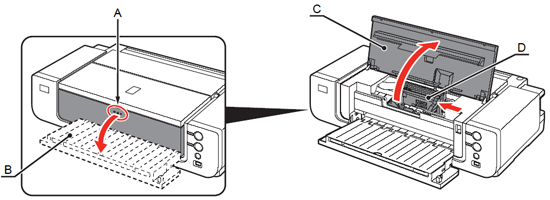
- Open the Top Cover (C). The Print Head Holder (D) comes out to the replacement position. The Print Head Holder makes a noise as it moves. This is normal operation.
Note: When the top cover is opened more than ten minutes, the print head moves to the right side.
If this occurs, close the top cover, and open it again.
Note: When installing the print head, proceed to step 3.
When installing the ink tanks, proceed to step 6.
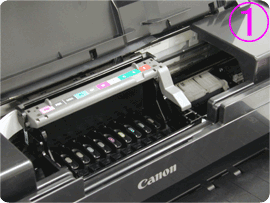
- Remove the ink tanks by pressing the tab of each tank.
Note: Handle the ink tanks with care so that your clothes and surrounding area do not get soiled. When replacing multiple ink tanks, make sure to replace one by one.

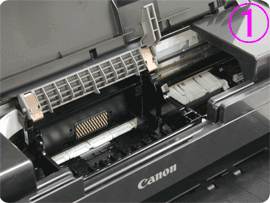
- When removing the print head, raise the print head lock lever first.
To reinstall the Print Head and Ink Tanks
- Place the print head in the holder and lower the print head lock lever carefully until you hear a click.
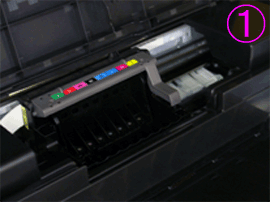
- Insert ink tanks into the print head.
Press the mark 'PUSH' on the ink tank firmly until you hear a click.
3. Ensure that all the ink tanks are installed properly and the ink tank lamps light red.
Note: <Ink Tank Lamp> You can check the status of each ink tank according to the way its lamp flashes.
- On: The printer is ready to print.
- Slow flashing (at about three second interval): Ink is low. Prepare a new ink tank.
- Fast flashing (at about one second interval): Ink tank is empty, or the printer is not ready due to an error.
- Off: An error has occurred and the printer is not ready to print.
4. Put back the inner cover and close the top cover.
Note: When starting printing next time, the print head cleaning launches automatically. During the print head cleaning, the Power lamp flashes green. Do not do other operations until the flashes stops.
