Printing with the customized color and brightness using Easy-PhotoPrint Pro
Article ID: ART120729
|
Date published: 05/12/2015
|
Date last updated: 08/17/2015
Solution
Adjusting Color Balance Using Sample Patterns
You can print a pattern of an image and adjust the color balance of the image based on the pattern.
Note: The screens below are from Easy-PhotoPrint Pro version 2, which is available for download for all models that supported version 1.
Check that the photo you want to print is displayed in the bottom right area of the screen.
Click Color Adjustment... in the Printer Settings window.
The Color Adjustment dialog box appears.
Click Pattern Print....
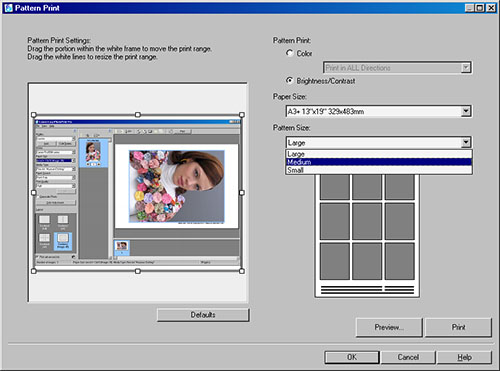
The Pattern Print window appears.
Select Color for Pattern Print, then select the color direction in which you want to adjust.
Note: Select Print in ALL Directions to print a pattern of the image adjusted in the following six directions. (The image with the current color balance values is printed in the center.) Use the pattern to determine the color direction in which you want to adjust the color balance.
R (upper right) direction
Red
Y (upper) direction
Yellow
G (upper left) direction
Green
C (lower left) direction
Cyan
B (lower) direction
Blue
M (lower right) direction
Magenta
Select a specific direction such as Print in Direction R to print a pattern of the image adjusted in the selected direction. (The image with the current color balance values is printed at the bottom left.) For example, select Print in Direction R to print a more detailed pattern of the portion in the R direction of the pattern for all directions (the portion outlined in red in the figure below). This allows you to check more variations than in all directions.
Select Paper Size and Pattern Size.
Note: You can crop the image before printing the pattern. Move the white frame in Preview to change the cropping area. Click Preview... to display the print preview in a different window in which you can check the settings before printing. See Help for details on the Pattern Print window.
Click Print. The pattern is printed.
Click OK.
Select the image with the desired color balance from the printed pattern and enter the values indicated below the image into Color Balance.