Untitled Document
How to install or remove ink cartridges
To print normally, install or remove ink cartridges in an orderly procedure.
How to install ink cartridges
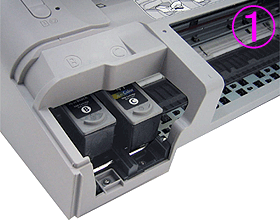
1. After confirming that the printer is powered on, open the front cover. The ink cartridge holder moves to the replacement position.
2. Take out an new cartridge from its casing and gently remove the orange protective tape in the direction of an arrow.
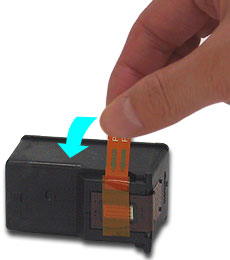
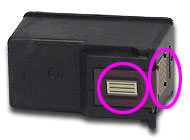
Caution: Do not attempt to reattach the protective tape once you have removed it. Do not touch the gold electrical contacts or the print head after removing the protective tape.
3. Insert the color cartridge into the right slot and then the black cartridge into the left slot.
Note: Push up on the nearest side of the cartridge until it clicks into place.
4. Confirm that the ink cartridges are installed properly.

(A) The ink cartridge is not installed properly.
(B) The ink cartridge is installed properly.
5. Close the front cover. Wait until the preparatory operation is complete; it takes about one to two minutes.
How to remove ink cartridges
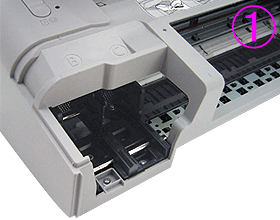
1. After confirming that the printer is powered on, open the front cover. The ink cartridge holder moves to the replacement position.
2. Remove the ink cartridges.
Note: Handle the ink cartridges carefully to avoid staining clothes and surrounding work area.