After downloading the printer driver from our website, the driver needs to be installed. Follow these directions to properly install the printer driver.
Solution
Installing the printer driver in MAC
Make sure that the printer USB cable is not connected to the computer until all of these steps have been completed.
Download the printer driver file from our website ("UFR_II_V150_MacOSX.dmg").
Double-click on the file and it will self- extract the necessary files to a folder on the desktop.
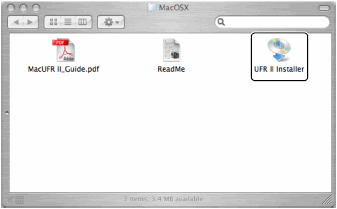
Open the following folders: [UFR II] [us_eng] [MacOSX].
Double-click the <UFR II Installer> icon. The [Authenticate] dialog is displayed.
Enter the administrators name and password click <OK>. The installer starts.
Depending on the system environment, the [Authenticate] dialog box may not be displayed. In that case, skip to step 6.
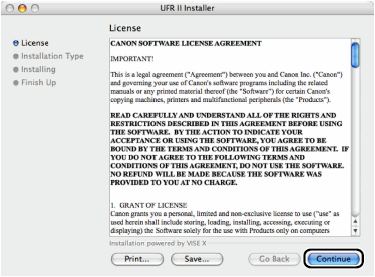
Read the software license agreement carefully click <Continue>.
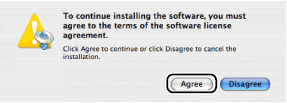
If you agree to the terms of the software license agreement, click <Agree>.
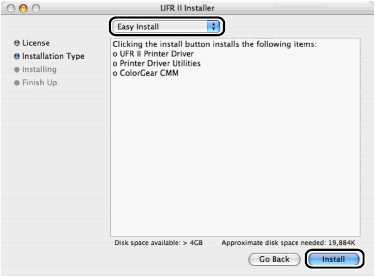
Confirm that [Easy Install] is selected click <Install>.
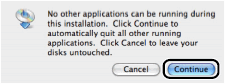
Click <Continue> in the message box to proceed. Installation starts.
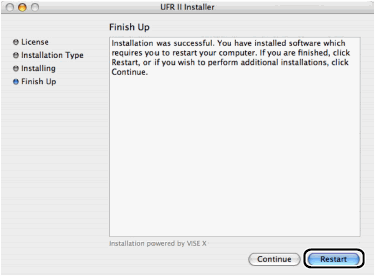
Click <Restart> when the confirmation message below appears. The computer is restarted.
Installation is complete.
The printer utility software "UFR II Print monitor" is installed simultaneously.