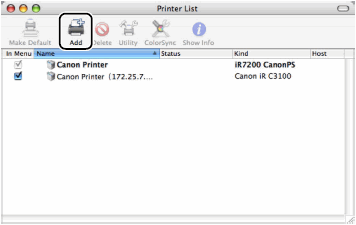
After installing the printer driver, you need to specify the printer you want to use in the Printer Setup Utility in order to print a document.The Printer Setup Utility is called Print Center on Mac OS X 10.2.8.
Confirm that the printer has been added in the [Printer List] dialog box close the dialog box.