Perform Bottom Plate Cleaning (Windows)
Instructions to perform Bottom Plate Cleaning. If the printer interior is dirty with ink, the print jobs may be smeared. Perform Bottom Plate Cleaning to remove the ink. If Bottom Plate Cleaning is not effective, use a cotton swab to remove the ink inside the printer.
Instructions to perform a Bottom Plate Cleaning:
-
Ensure that the printer is powered on and then pull open the Paper Output Tray.
Illustration shows a PIXMA MP600.
-
Open the printer Properties. (Click here for detailed instructions.)
-
Click the Maintenance tab and click 'Bottom Plate Cleaning'.
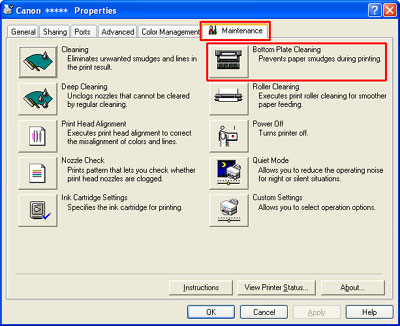
*The layout of the Maintenance sheet varies depending on the printer you are using.
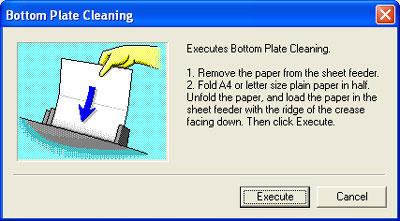
Note: The dialog for Bottom Plate Cleaning will be displayed with on-screen instructions.
-
Remove all paper from the sheet feeder.
-
Fold a letter-sized sheet of plain white paper in half.
-
Unfold the paper, and load the paper into the rear tray with the opened side up, and the crease down.
Caution: Do not load the paper folded in half in the auto sheet feeder or a paper jam may occur.
-
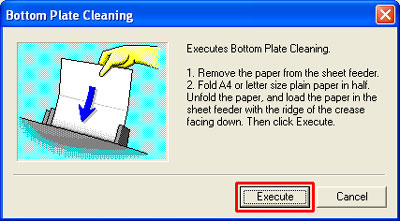
Click 'Execute'.
-
Confirm the message to be displayed, and click 'OK'.
Note: Do not try other operations until the sheet of the plain paper are ejected.
-
When the paper is ejected, Bottom Plate Cleaning is completed.
-
Examine the ejected paper. If it is still smeared with ink, perform bottom plate cleaning again.
Note: If the after performing the Bottom Plate Cleaning up to three times and the paper is still smeared with ink, the protruding rib inside the printer may need to be cleaned. Use a cotton swab to clean inside the printer. (See instructions below).
Instructions to clean the inside of the printer using a cotton swab:
-
Turn off the machine and remove the power plug.
-
Lift the scanning unit (printer cover) until it stops and fix it in place using the scanning unit support.
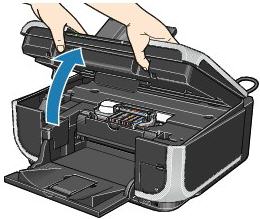
Illustration shows a PIXMA MP600.
-
Wipe ink off the protrusions <1> (shown by the arrows) and their peripheries <2> using a swab.
Caution: Use a dry cotton swab only. Do not touch the transparent film or any metal parts within the machine. Doing so may damage the machine.
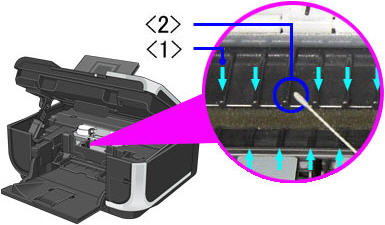
Illustration shows a PIXMA MP600.
Accessing the Printers Folder and Printer Properties
BACK TO TOP
|
Windows 2000
- Click Start - Settings - Printers.
- Right-click on desired printer icon.
- Select Properties.
|
|
Windows XP
- Click Start.
- Select Printers and Faxes.
- Right-click on desired printer icon.
- Select Properties.
|
|
Windows Vista
- Click Start.
- Select Control Panel
- Select Printers under Hardware and Sound.
- Right-click on desired printer icon.
- Select Properties.
|
