Borderless printing (with actual size) MacOS9
*Borderless printing is only available with rolls.
Print Image with Actual Size
- Prints originals at actual size, without enlarging or reducing them.
Originals must be prepared in a size that exceeds the dimensions of the paper by 3 mm (0.12 in) on each side.

This topic describes how to print borderlessly at actual size based on the following example.
Document: Any type
Page size: 10 x 12 inches (254.0x304.8 mm)-Borderless
Paper: Roll
Paper type: Heavyweight Coated Paper
Roll width: 10 inches (254.0 mm)
- Select the printer in Chooser .
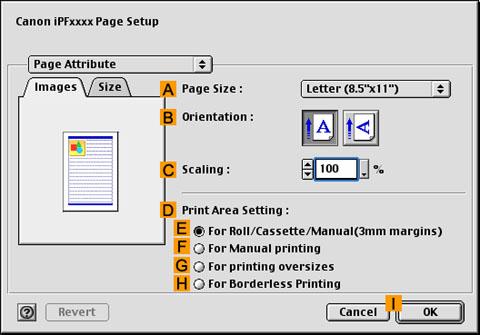
- Choose Page Setup from the application menu to display the Page Attribute dialog box.

- In "D":Print Area Setting , click "H":For Broderless Printing .
- In the "A":Page Size list, choose a paper size supported for borderless printing. Here, click 10"x12" - Borderless .
*Paper sizes supported for borderless printing are indicated by "-Borderless."
- Click "I":OK to close the dialog box.
- In the application, create an original that takes up the entire space of the paper size.
- Choose Print in the application menu.
- Make sure the Main pane is displayed.
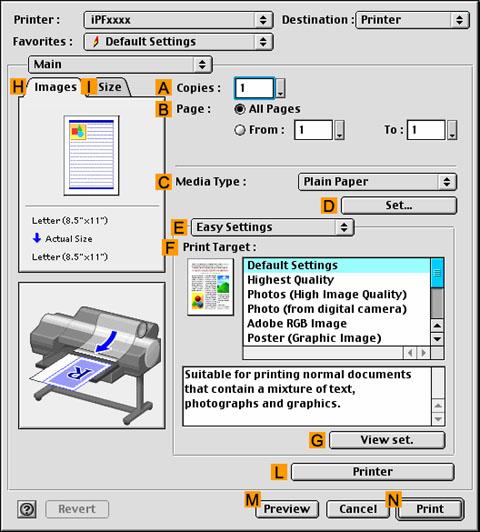
- In the "C":Media Type list, select the type of paper that is loaded. In this case, click Heavyweight Coated Paper .
- Select the print target in the "F":Print Target list.
- Access the Finishing pane.

- Click Roll Paper in the "A":Media Source list.
- Confirm that the roll paper width matches the paper size.
Make sure the width of the loaded roll is displayed in the "B":Roll Paper Width list—in this case, 10 in. (254.0mm) .
- Access the Page Setup pane.

- Make sure the "B":Page Size setting matches the original size as selected in "A":Page Size in the Page Attribute dialog box—in this case, 10"x12" .
- Confirm the print settings, and click "N":Print to start printing.
