Installing the Printer Driver (USB)-Windows 98/ME
The following is the installation procedure for plug and play using a USB port under Windows 98.
Before you install the software, make sure you do the following:
- Connect the machine to your computer.
- Turn on the machine
- Start up Windows 98/Me.
 |
 |
In order to use the printer via USB, your computer must be equipped with a USB port and it is necessary that its operation is approved by the manufacturer. |
| |
|
If the USB class driver is already installed in your computer, proceed to step 8. |
| |
|
USB is not available for Windows 95. |
-
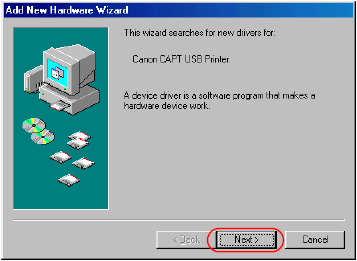
Plug and Play will activate and the [Add New Hardware Wizard] dialog box appears. Click [Next>].
|
|
"Unknown" may be displayed as the name of the device. |
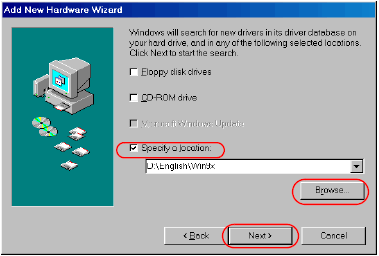
- Select [Search for the best driver for your device (Recommended)] in the [Add New Hardware Wizard] and click [Next>].

- Place the CD-ROM into the CD-ROM drive.
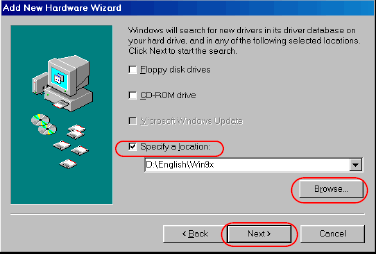
- Select [Specify a location] and click [Browse...] to select the driver in the language that you want to install. For example, if your CD-ROM drive is drive D:, browse to "D:\English\Win9x" then click [Next>].
If you use Windows ME, browse to "D:\English\WinMe".
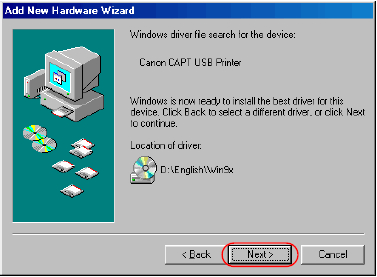
- Click [Next>] on [Windows driver file search for the device].
- When the following dialog box appears, click [Finish].

- The [Add New Hardware Wizard] (Canon iC D Series) appears. Click [Next>].

- Select [Search for the best driver for your device (Recommended)] in the [Add New Hardware Wizard], then click [Next>].

- Click only [Specify a location] and [Browse...] to select the driver you want to install. For example, if your CD-ROM is drive "D", browse to "D:\English\Win9x" and click [OK]. Confirm that the folder to browse is selected under [Specify a location], then click [Next>].
For Windows ME, select [Specify the location of the driver (Advanced)] as "D:\English\WinMe" then click [Next>] in the [Add New Hardware Wizard].
- The screen displays the selected driver file. Click [Next>].
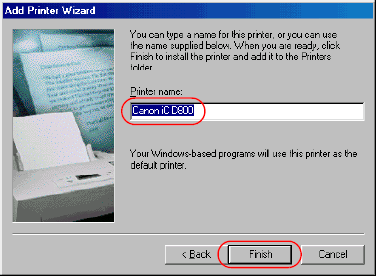
- Type the printer name you wish to use, then click [Finish].
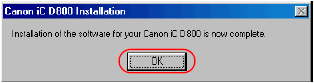
- When the installation is complete, the following dialog box appears. Click [OK] to close the dialog box. Click [Finish] on the [Add New Hardware Wizard].