Scanning with the WIA Driver (Windows XP only)
Scanning from the [Scanner and Camera Wizard] Dialog BoxScanning from an Application
- Open the [Scanners and Cameras] folder.
Click [Start] on the Windows task bar, select [Control Panel], [Printers and Other Hardware], then [Scanners and Cameras].
- Double-click the corresponding WIA driver icon.
- Click [Next>].
- Select a picture type.
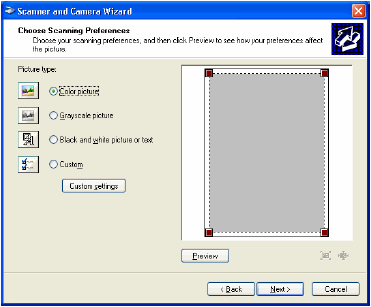
You can select from [Color picture], [Grayscale picture], [Black and white picture or text], and [Custom].
When selecting [Custom], click [Custom settings] to make detailed settings in the [Properties] dialog box.

- Specify the scanned area.
Click [Preview], then drag  to specify the scanned area.
- Click [Next>].
-
Specify a name, a file format, and the location for saving the group of pictures.

|

|
| - |
When you save more than one picture in the same location, sequential numbers are automatically added at the ends of file names. |
| |
|
| - |
You can select a file format from [BMP (Bitmap Image)], [JPG (JPEG Image)], [TIF (TIF Image)], and [PNG (PNG Image)] |
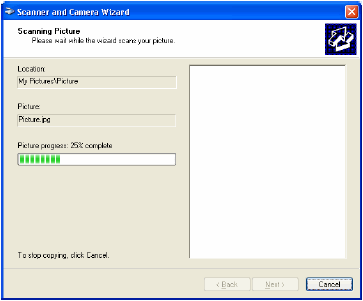
- Click [Next>] to start scanning.
- Click [Next>].

If you want to publish these pictures to a Web site or order printouts online, select the corresponding option.
- Click [Finish].
top
With the WIA driver dialog box open, follow the procedure below.

- Select the picture type.
You can select from [Color picture], [Grayscale picture], [Black and white picture or text], and [Custom Settings].
- If necessary, click [Adjust the quality of the scanned picture].
The [Advanced Properties] dialog box appears.
- Adjust the quality of the image, then click [OK].
- Specify the scanned area.
Click [Preview], then drag to specify the scanned area.
- Click [Scan].
 Advanced Properties

| Appearance |
|
Shows the preview of sample image. |
| |
|
|
| [Brightness] |
|
Specifies the brightness (-127 to 127). |
| |
|
|
| [Contrast] |
|
Specifies the contrast (-127 to 127) (only for color or grayscale scanning.). |
| |
|
|
| [Resolution (DPI)] |
|
Selects the scanning resolution in dot per inch (50 to 600). |
| |
|
|
| [Picture Type] |
|
Selects the scanning color type ([Color picture], [Grayscale picture], or [Black and white picture or text]). |
| |
|
|
| [Reset] |
|
Resets all the current settings to their default values. |
The setting items and default values in the [Advanced Properties] tab vary depending on the type of picture you select.

