Performing the Print Head Alignment - iP1700 (Mac)

Article ID: ART126578 | Date published: 05/12/2015 | Date last updated: 11/04/2015
 

Description

Performing the Print Head Alignment - iP1700 (Mac)

Solution

Untitled Document

Aligning the Print Head - iP1700 (Mac)

1. With the printer on, load a sheet of Letter size plain paper in the Auto Sheet Feeder. Move the Paper Thickness Lever to the left position.

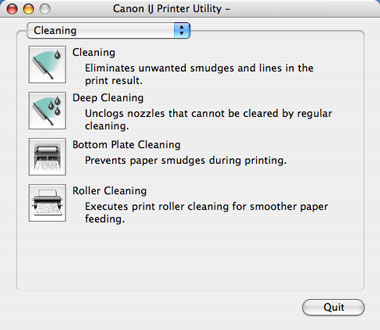
2. Open the Canon IJ Printer Utility dialog box.

3. Print the pattern.

  1. Select 'Test Print' from the pop-up menu.
  2. Click 'Print Head Alignment'.
  3. Click 'OK'.

4. Align the Print Head.

  1. Look at the printout. From the patterns, select the most even and least irregular patterns.
  2. Enter the numbers.
  3. Click 'Send'.


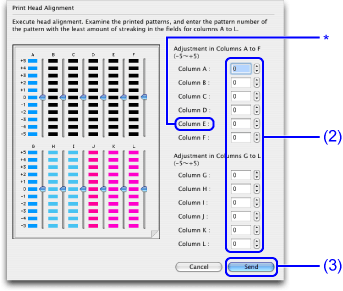
* If it is difficult to determine the best pattern on Column E, then pick a setting that has the least noticeable white stripes.


To open the IJ Printer Utility, perform the following.

Note: After confirming that the cable connects the printer to the computer and the printer is powered on, follow the procedures below.

  • In the Apple menu select System Preferences

    Note: In versions of Mac OS X older than 10.4, open the IJ / BJ Printer Utility from the Library>Printers>Canon>BJPrinter>Utilities folder.

  • Open Print & Fax.

  • Make sure the correct printer is selected and, depending on OS version, click 'Open Print Queue...' or 'Print Queue...'.

  • Click the Utility icon.

  • Select the printer, then click 'Maintenance'.

  • 4. The IJ Printer Utility is launched.

    *Display may vary depending on the printer model.


    top of page


SIMS Doc Id

0

Rate this Article
Was this article helpful?
Yes, This document is helpful
No, This document needs a clearer explanation
 
Please provide your comments