Load paper correctly then press Black or Color button (MP160)
| Article ID: ART126719 |
| |
Date published: 05/12/2015 |
| |
Date last updated: 08/14/2015 |
Description
After correcting the problem that caused the error, press the or button.
Solution
Load Paper Correctly
After correcting the problem that caused the error, press the <Black> or <Color> button.
- Remove paper from the ASF.
- Open the paper output tray. (See <2> in Figure 1 below.)
- Set the paper thickness lever according to the media being used. (See <3> in Figure 1 below.)
Note: For paper thickness lever settings, use the following setings for the media type being used: Right side: Envelopes / T-Shirt transfers. Left side: All other media types.
* Figure 1

Illustration shows the PIXMA MP450
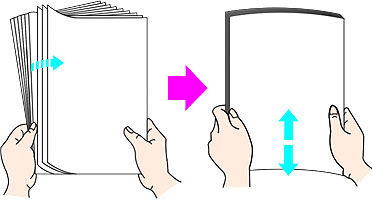
- Divide the stack of paper into two or three piles.
- Fan out the sheets of paper so that they do not stick together.
- Load paper in the auto sheet feeder with the paper's print side facing up. (See <1> in Figure 2 below.)
- Align paper to the right edge of the auto sheet feeder. (See <2> in Figure 2 below.)
- Pinch and slide the paper guide to the paper's left side. (See <3> in Figure 2 below.)
* Figure 2
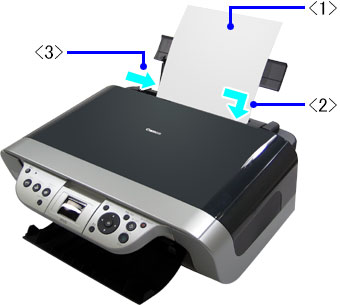
Illustration shows the PIXMA MP450
- Press <Black> or <Color> button to clear the error.
