Perform An Automatic Print Head Alignment (Mac OS X) MP600 / MP960
Article ID: ART127085
|
Date published: 05/12/2015
|
Date last updated: 11/04/2015
Description
Automatic print head alignment instructions using the printer's Mac OS X driver.
Solution
Perform An Automatic Print Head Alignment (Mac OS X)
Follow the steps below to perform an Automatic Print Head Alignment (Mac OS X).
Note: If the Automatic Print Head Alignment does not correct the issue, perform a Manual Print Head Alignment:
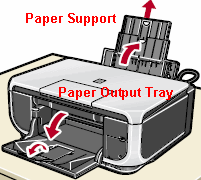
Confirm that the print is powered on and then pull open the Paper Output Tray.
The above illustration shows a PIXMA MP600.
Load two sheets of letter-sized plain paper into the Automatic Sheet Feeder.
Launch The IJ Printer Utility. (For instructions how to launch the IJ Printer Utility, open the attachment.)
From the pop-up menu, select 'Custom Settings'.
If the box for 'Align heads manually' is selected, uncheck the box and click 'Send'.
Click 'OK' to send the settings to the printer.
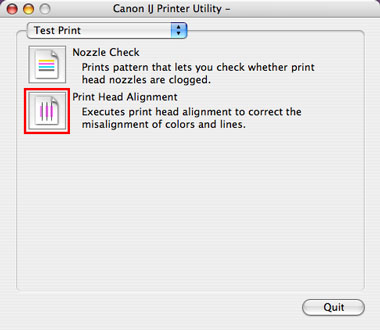
From the BJ Printer Utility pop-up menu, select 'Test Print'.
Click on the 'Print Head Alignment icon'.
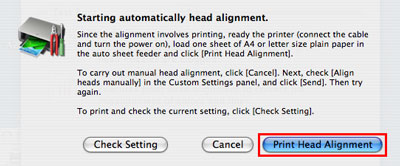
When the message below is displayed, click 'Print Head Alignment'.
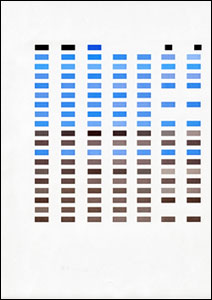
Note: Print head cleaning starts. The power lamp flashes during cleaning operation. Do not perform other operations. After cleaning has finished, the first head alignment pattern will be printed.When the following sheet prints out, Automatic Print Head Alignment is complete.