 Stitch Assist Mode
Large subjects can be split into several shots that can later be merged together.
|

- To create the panorama at your computer, use the PhotoStitch software that came with your camera.
|
Shooting
Images can be shot in two sequences in Stitch Assist mode.
 |
Left to right horizontally |
 |
Right to left horizontally |
1. Select 
- Set the mode switch to
 then press the <FUNC./SET> button.
- Press the
 or
or  buttons to select [P] and press the [FUNC./SET] button.
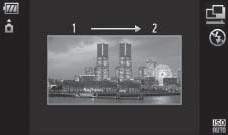
- Press the or buttons to select or then press the <FUNC./SET> button.
2. Take the first shot.
- The exposure and white balance will be set with the first shot.
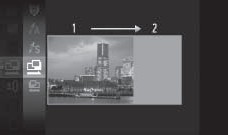
You can select from the following two shooting directions.
Left to right Horizontally
Right to left Horizontally.
3. Take subsequent shots.
- Overlap part of the first shot when taking the second shot.
- Minor discrepancies in the overlapping portions will be corrected when the images are merged.
- You can repeat the procedure for the second shot to take up to 26 shots.
- When you have finished taking shots proceed to step 4.
4. Finish shooting.
- Press the <FUNC./SET> button
- A sequence may contain up to 26 images.
- Once finished press the FUNC./SET button after the last shot to complete the procedure.
5. Merge the images on a computer.

|

- The setting for the first image are applied to the second image onward.
- A custom white balance setting cannot be set in mode. To use a custom white balance setting, first set it in another Shooting mode.
- The settings in place for the first image are locked in and cannot be changed for subsequent shots.
- A TV cannot be used as the monitor for shooting in this mode.
|
