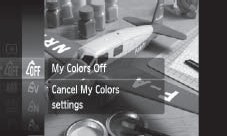
Shooting in a My Colors Mode
A My Colors mode easily changes the colors in an image when it is shot, allowing you to alter the balance between red, green and blue, transform pale or tanned skin or change a color specified in the LCD monitor into a different color. Since they work with stills and movies, these modes let you enjoy producing various image or movie effects.
However, depending on the shooting conditions, the images may appear rough or you may not get the expected color. Before you try to photograph important subjects, we highly recommend that you shoot trial images and check the results.
Shooting in the Custom Color Mode
 |
Vivid
|
Emphasizes the contrast and color saturation to record bold colors. |
 |
Neutral
|
Tones down the contrast and color saturation to record neutral hues |
 |
Sepia
|
Records in sepia tones. |
 |
B/W
|
Records in black and white. |
|

|
Positive Film
|
Use this option to make red, green or blue colors more intense like the Vivid Red, Vivid Green or Vivid Blue effects. It can produce intense natural-appearing colors like those obtained with positive (slide) film. |
|

|
Lighter Skin Tone*
|
Use this option to make skin tones lighter. |
|

|
Darker Skin Tone*
|
Use this option to make skin tones darker. |
|

|
Vivid Blue
|
Use this option to emphasize blue tints. It makes blue subjects, such as the sky or ocean, more vivid. |
|

|
Vivid Green
|
Use this option to emphasize green tints. It makes green subjects, such as mountains, new growth, flowers and lawns, more vivid. |
|

|
Vivid Red
|
Use this option to emphasize red tints. It makes red subjects, such as flowers or cars, more vivid. |
|

|
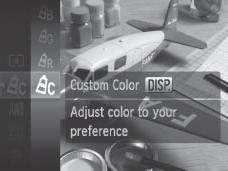
Custom Color
|
Use this option to freely adjust the color balance between red, green, blue and skin tones*. It can be used to make subtle adjustments, such as making blue colors more vivid or face colors brighter. |
Configuring My colors Settings
1. Select a My Colors setting.
- Press the <FUNC./SET> button.
- Use the  or
or  button to select the My Colors icon and then use the
  or
or  button to change the option.
- Press the <FUNC./SET> button to complete the setting.
*The skin colors of non-human subjects may also be altered. You may not obtain the expected results depending on the skin color.
 In the My Colors modes (depending on the scene being shot), the ISO speed my increase and cause noise in the image. In the My Colors modes (depending on the scene being shot), the ISO speed my increase and cause noise in the image. |
Shooting in the Custom Color Mode
This mode allows you to adjust the color balance for red, green, blue and skin tones.
- In the FUNC. menu, select and press the <DISP.> button.
- Use the or button to select [Contrast], [Sharpness], [Saturation], [Red], [Green], [Blue], or [Skin Tone] and the or button to adjust the setting.
- The display will alternate between the original image and the custom color image.
- If you press the <DISP.> button, you will return to the screen where you can select a My Colors mode.
- Press the <FUNC./SET> button.
- The display will return to the shooting screen.
