Loading Paper in the Multi-Purpose Tray
Warning:
Be careful when handling paper:
Handle paper carefully not to cut your hands with the edges of the paper.
Precautions when inserting the paper cassette:
Be careful not to catch your fingers.
Important:
Be sure to align the paper guides with the width of the paper:
If the paper guides are too loose or too tight, this may result in misfeeds or paper jams.
When using paper that has been poorly cut:
If you use paper that has been poorly cut, multiple sheets of paper may be fed at once. In this case, fan the paper thoroughly, and then align the edges of the stack properly on a hard, flat surface.
Do not load the paper stack which exceeds the load limit mark lines:
Be sure that the paper stack does not exceed the load limit mark lines. If the paper stack exceeds the load limit mark lines, this may result in misfeeds.
When printing on envelopes:
Load envelopes with the front side (non-glued side) facing up. You cannot print on the reverse side of envelopes.
Also, be sure to close the flap before loading envelopes.
Size abbreviation on the paper guides of the paper cassette
| Paper size |
Paper guide |
| Legal |
LGL |
| Letter |
LTR |
| Executive |
EXEC |
| B5 |
JIS B5 |
In the Multi-Purpose Tray (MF8350Cdn)
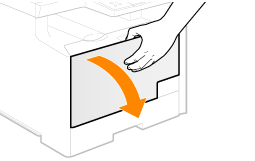
1. Open the multi-purpose tray.
Hold the handle at the center of the tray to open the multi-purpose tray.
2. Pull out the auxiliary tray.

3. When loading long-size paper, open the tray extension.

4. Spread the paper guides a little wider than the actual paper width.

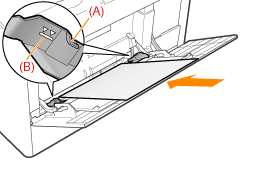
5. Gently insert the paper into the multi-purpose tray with the print side up.
- Load the paper under the load limit guides (A).
- Make sure that the paper stack does not exceed the load limit mark (B).
When loading envelopes
(1) Close the envelope flap.

(2) Place the stack of envelopes on a flat surface, flatten them to release any remaining air, and be sure that the edges are pressed tightly.

(3) Loosen any stiff corners of the envelopes and flatten curls as shown in the figure.

(4) Align the edges of the envelopes on a flat surface.

(5) Gently insert the paper into the multi-purpose tray with the print side up.
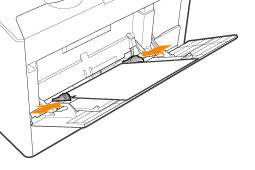
6. Align the paper guides with the width of the paper.
7. Specify the loaded paper size and type.
