|
|
White Balance
| Article ID: ART133288 |
| |
Date published: 05/12/2015 |
| |
Date last updated: 10/22/2015 |
Description
White Balance
Solution
The camcorder uses an electronic white balance process to calibrate the picture and ensure accurate colors under different lighting conditions. There are 3 methods of setting the white balance. Custom white balance: You can use a white object to establish the white balance and set it to one of two custom white balance positions,  Set color temperature: Allows you to set the color temperature between 2,000 K and 15,000 K. Preset white balance: Set the white balance to  (daylight, 5,400 K) or (daylight, 5,400 K) or  (incandescent lamp, 3,200 K). Preset white balance settings can be further fine-tuned within a range of -9 to 9. (incandescent lamp, 3,200 K). Preset white balance settings can be further fine-tuned within a range of -9 to 9.When recording under fluorescent lights, we recommend setting the custom white balance. Operating modes:  NOTES The [Color Matrix] and [White Balance] custom picture settings take precedence over the white balance settings. You can use the [Other Functions] > [Custom Function] > [Shockless WB] setting to make the transition look smoother when you change the white balance settings.
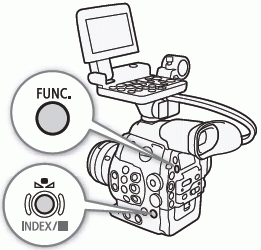
Setting the White Balance 1 Set the white balance mode using the direct setting mode. Press the FUNC. button to highlight the white balance icon and select the desired white balance mode. To apply the setting as it is, press SET. To establish the custom white balance, fine-tune the preset white balance settings or change the color temperature, continue the procedure as described below before pressing SET. For details refer to Using the Direct Setting Mode
If you selected one of the custom white balance settings  If a custom white balance has not yet been stored, the custom white balance icon  and default value (5,500 K) will flash slowly. and default value (5,500 K) will flash slowly. To establish the custom white balance: 2 Point the camcorder at a white object so that it fills the whole screen. • Use the same lighting conditions you plan to use when recording. 3 Press the  button. button.• The  icon will flash quickly. icon will flash quickly.• Make sure the white object fills the screen until the procedure is completed. • After the icon stops flashing, the procedure is completed and the camcorder will exit the direct setting mode. The setting is retained even if you turn off the camcorder. If you selected one of the preset white balance settings,  or or  You can fine-tune the preset values within a range of -9 to 9. 2 Press the  button. button.On the screen: The adjustment value ±0 will appear next to the white balance icon, highlighted in orange. On the rear panel: The adjustment value ±0 will appear.
3 Push the joystick up/down or turn the SELECT dial to change the adjustment value and then press SET. If you selected the color temperature setting,  You can set the color temperature between 2,000 K and 15,000 K in 100 K increments.2 Press the  button. button.On the screen: The default color temperature value (5,500 K) will be highlighted in orange. On the rear panel: The default color temperature value will appear.
3 Push the joystick up/down or turn the SELECT dial to change the color temperature value and then press SET. The selected color temperature will be set and the camcorder will exit the direct setting mode. On the screen: The selected color temperature will appear next to the white balance icon. On the rear panel: The color temperature value will disappear and the display will return to normal (all displays will reappear).
NOTES Remote Operation Using Wi-Fi Remote After completing the necessary preparations you can adjust the white balance remotely from a Wi-Fienabled device using the Wi-Fi Remote application.1 Press [ A] on the Wi-Fi Remote screen.2 Select the desired white balance mode. If you selected  3 Press the adjustment value  or color temperature [5500K] ( or color temperature [5500K] ( ) and then select the ) and then select the desired value from the list. - You may need to scroll up/down to see all the available values.
The selected value will be displayed on the Wi-Fi Remote screen and will be applied on the camcorder.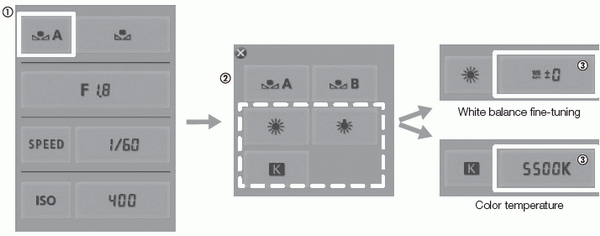
If you selected  3 Point the camcorder at a white object so that it fills the whole screen. 4 Press [ ].• If a custom white balance has not yet been stored, [ ] will flash slowly.• During the procedure, [ ] will flash quickly. When it stops flashing, the procedure is completed and the setting will be applied on the camcorder
NOTES • Using the custom white balance setting:
|
