A wireless network connection will allow you to print wirelessly from any location in your home.
Before you begin
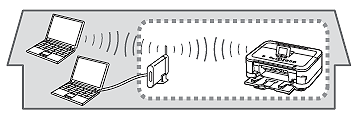
The image below is the recommended installation guideline when you use your printer on a computer connected to a network.
 Before you setup the connection, make sure that the computer and router are powered on and connected to your network.
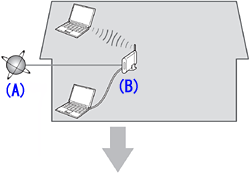
(A) Internet
(B) Access point or wireless router, etc.
Before installing the software make sure to do the following.
- Quit all applications before installation.
- Log on as the administrator, or as member of the Administrators group.
- Do not switch users.
- An Internet connection is required. Connection fees may apply. Consult the internet service provider.
- It may be necessary to restart your computer after installing the drivers.
- If the firewall function of your security software is turned on, a warning message may appear that Canon software may try to access the network. If such a warning message appears, set the security software to always allow access.
Wireless Easy Setup
In most cases, Easy Setup will be used to connect the machine to your access point or router. Before you continue, you must gather the information below.
-
Router Name, Network Name, or SSID: An identifier to identify the specific access point.
-
Network Key, encryption key, WEP key, WPA/WPA2 passphrase, or Pre-Shared key: A password required to set to prevent unauthorized access to communication.
For details on how to check the information, refer to the manual of your access point or router, or contact its manufacturer.
-
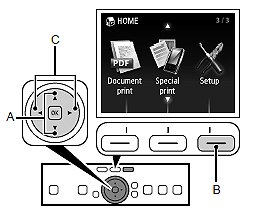
Use the up or down arrow 
 (A) to display Setup, then tap the right FUNCTION button (B).
-
Use the left or right arrow 
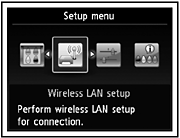
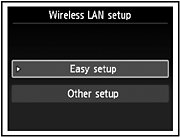
 (C) to select Wireless LAN setup, then tap OK.
-
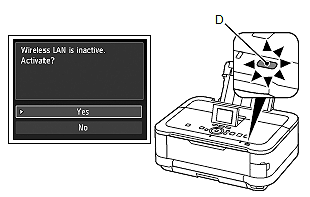
Select Yes, then tap OK.
-
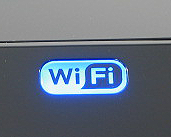
When wireless connection is enabled, the Wi-Fi lamp (D) lights blue.
-
Select Easy setup, then tap OK.
-
Select the access point name you wrote down, then tap OK.
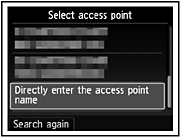
If you are live in an apartment, nearby access points in use may be detected.
-
Make sure that one of the above screens is displayed, then tap the right FUNCTION button.
-
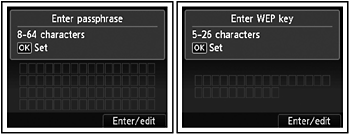
Enter the network key you wrote down, then tap the left FUNCTION button (E).
-
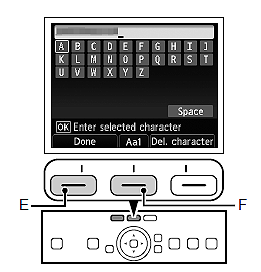
Touch the center FUNCTION button (F) to switch character entry modes.
 Enter upper and lower case letters of the alphabet correctly.
-
Character Entry:
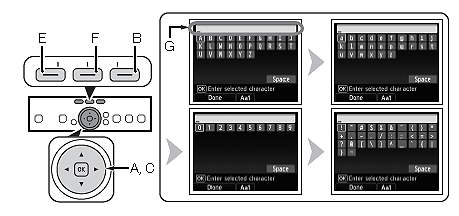
- Press the center FUNCTION button (F) to switch to a keyboard with the characters you want to use.
- Four character sets are available: Upper-case alphabets, lower-case alphabets, numbers, and symbols. Each time you touch the center FUNCTION button, an on-screen keyboard is switched among them.
- Select a character on the on-screen keyboard and use the up, down, left, or right arrow buttons (A) (C) then tap OK to enter it.
- Entered characters are displayed on the upper section (G) of the on-screen keyboard.
- Repeat 1 and 2 to enter more characters.
- After you enter all characters you need, press the left FUNCTION button (E).
- To insert a space, select Space on the on-screen keyboard and touch the OK button.
- To insert characters, select the section (G) of the screen and use the up or down arrow buttons , move the cursor to the character on the right of the target position and use the left or right arrow buttons , then enter characters.
- To delete a character, select the section (G) of the screen and use the up or down arrow buttons , move the cursor to the target character and use the left or right arrow buttons , then tap the right FUNCTION button (B).
-
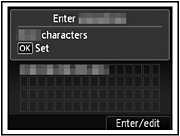
Make sure that the network key is correct, then tap OK.
-
When the above screen appears, tap OK.
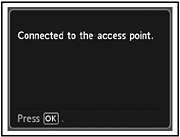
If Failed to connect to the access point appears, tap OK. Make sure that the network key is correct, then enter it again. If a connection still cannot be established, refer to the printed manual: Network Setup Troubleshooting.
Install the drivers (network connection)
The drivers need to be installed on your computer. The installation time depends on your computer.
-
Turn on the computer, then download the MP Driver from our website. After the file finishes downloading, open it. If you're asked to provide permission to continue, select Yes.
You can download and install additional software from our website, such as MP Navigator EX (for scanning) and Easy-PhotoPrint EX (for printing images). These programs are not required to set up your computer to work with the printer across your wireless network.
-
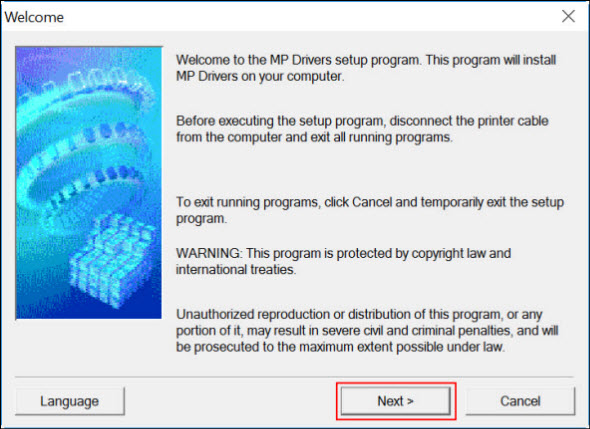
When the setup program begins, select Next.
-
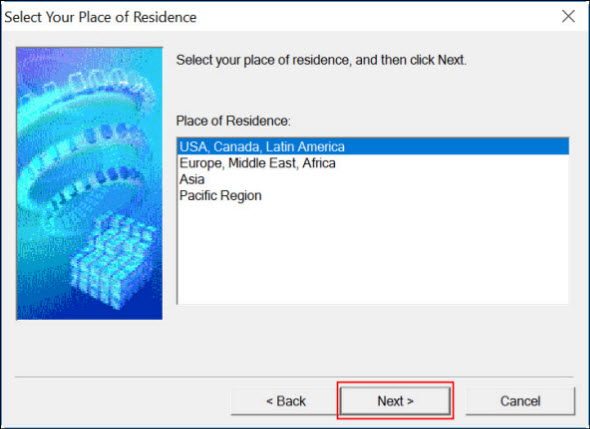
Select your place of residence, then select Next.
-
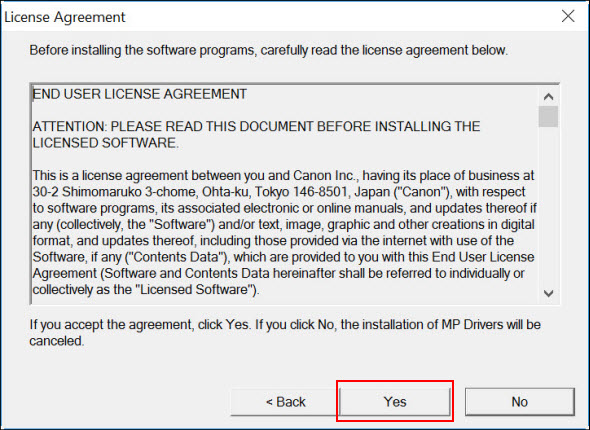
Read the license agreement, then select Yes, the drivers will install.
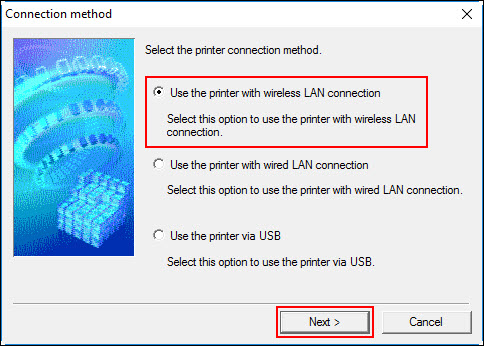
- Select Use the printer with wireless LAN connection, then select Next.
- When the Check Printer window appears, select OK. The computer searches for the printer on the network.
-
Your printer displays in the window. Make sure it's selected, then select Next.
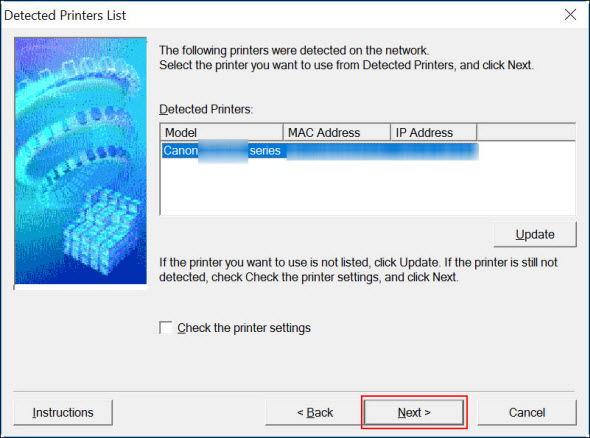
If your printer isn't detected, check any installed security or firewall software to see if it's blocking any ports that the printer uses for network communication. Refer to your security or firewall software documentation for more information.
-
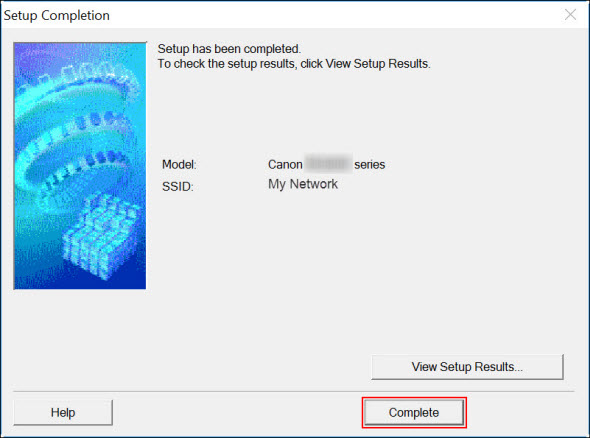
When the Setup Completion screen appears, tap Complete.
Good to know
-
The configuration, router functions, setup procedures and security settings of the network device depends on your system environment. For details, refer to your device's instruction manual or contact its manufacturer.
-
In an office setup, consult your network administrator.
-
If you connect to a network that is not protected with security measures, there is a risk of loss of data such as your personal information to a third party.
-
The machine cannot be used over a wireless and wired connection at the same time.
-
If an error message appears or if you have trouble with the network connection, refer to the printed manual: Network Setup Troubleshooting.
-
Place the machine and computer on the same network segment.
An Ad-hoc connection, which establishes a direct connection to the computer over a wireless connection without an access point, is not supported. Be sure to prepare an access point.
If your product issue was not resolved after following the steps above, or if you require additional help, please create or log in to your Canon Account to see your technical support options.
Or if you still need help, visit our Canon Community by clicking the button below to get answers:

____________________________________________________________________________________________
