This section explains about how to use the supplied software (ZoomBroweser EX) to change the sizes or types of the movies captured. IMPORTANT - To perform this operation, [ZoomBrowser EX 6.7-6.8] needs to be installed or updated beforehand.
- In this section, Windows 7 and [ZoomBrowser EX 6.6] are used as an example to explain the operations. If you are using Windows Vista or Windows XP, the on-screen displays and procedures may differ.
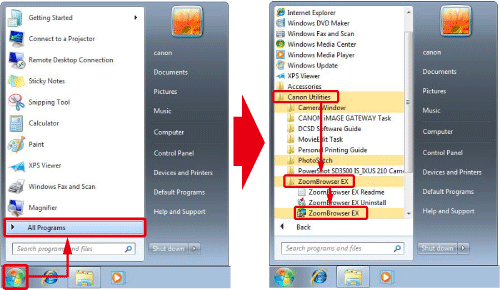
1. Double-click the [ZoomBrowser EX] shortcut icon on your desktop to start [ZoomBrowser EX].
 If you cannot find the [ZoomBrowser EX] shortcut icon on your desktop, click [Start] (  ) > [All Programs] or [Programs] > [Canon Utilities] > [ZoomBrowser EX] and select [ZoomBrowser EX] to start [ZoomBrowser EX].
2. Select the Movie (  ), the Super Slow Motion Movie (  ), iFrame Movie (  ) or the Movies recorded with Movie Digest mode (  ) and click [Export].
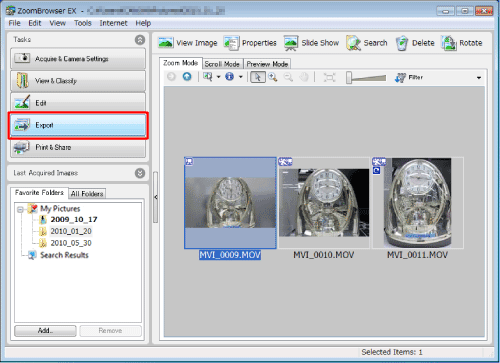 NOTE - To select multiple movies, click the movie images while holding down the <Ctrl> key on the keyboard.
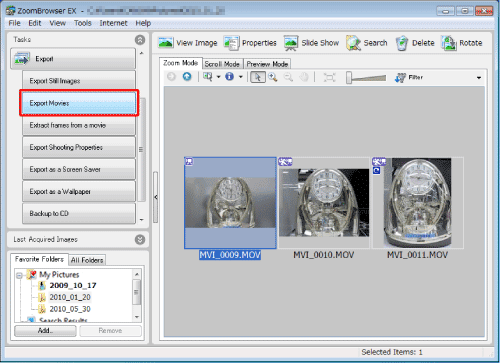
3. Click [Export Movies].
4. The following screen appears.
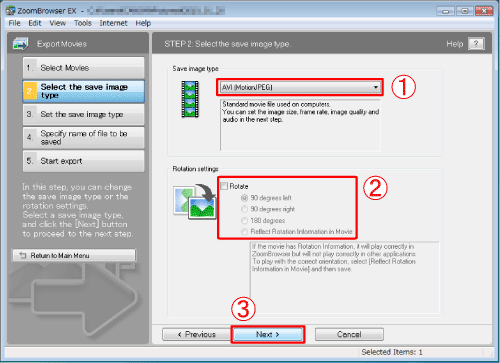  Select a movie file format from the [Save image type] box to export movies. The [AVI (MotionJPEG)] format is generally used in computers, so it has an advantage in compatibility. The [MOV (H.264)] format can be used to reduce the file size while maintaining high image quality.  If needed, select a [Rotation Setting], and then  click [Next].
5. The following screen appears.
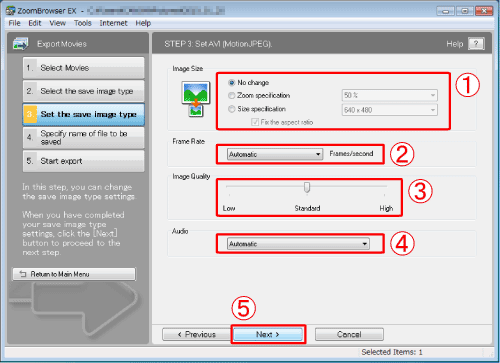 Make [Image Size], [Frame Rate], [Image Quality], and  [Audio] settings. (If [Save image type] is set to [MOV (H.264)], the [Image Quality] option does not appear.) After having set all the items above, click  [Next].
6. The following screen appears.
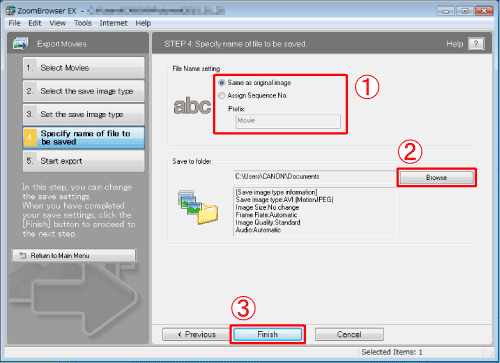 Specify the file name in [File Name setting]. To change the location where the file is saved, click [Browse]. Click [Finish].
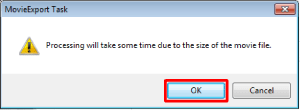
7. If the following window appears, click [OK].
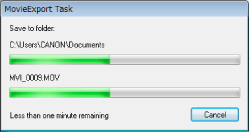
The following window appears while the movie file is being exported.
8. When the file export is completed, the following window appears.
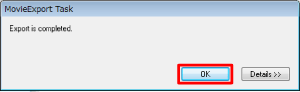 Click [OK] to end the export.
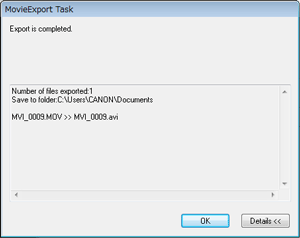
If you click [Details] in the window above, the following screen appears, so you can check the file name and the location where the file is saved again.
 This completes the file export procedure.
| 