You can send faxes directly using the numeric buttons on the printer.
Use the operation panel
-
Turn the printer ON.
-
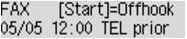
Tap FAX. The standby screen displays.
-
Load documents on the glass or in the ADF (Automatic Document Feeder).
- Adjust the scan settings as needed.
-
To adjust the scan contrast and resolution, press the Menu button. The FAX menu screen displays.
-
Use the left or right arrow 
 button to select FAX TX settings, then press the OK button.
-
Use the left or right arrow button to select Scan contrast, then press OK. The Scan contrast screen displays.

Color transmission is available only when the recipient's fax machine supports color faxing.

Don't open the document cover until the scan completes.
- Use the left or right arrow button to select Scan resolution, then press OK. The Scan resolution screen displays.

The following settings are available on Scan resolution. The * (asterisk) on the screen indicates the current setting.
-
Standard - Suitable for text-only documents.
-
Fine - Suitable for fine-print documents.
-
Extra fine - Suitable for detailed illustration or fine-print quality documents. If the recipient's fax machine isn't compatible with Extra fine (300 x 300 dpi), the fax will be sent in Standard or Fine resolution.
-
Photo - Suitable for photographs.
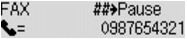
- Use the Numeric buttons to dial the recipient's fax/telephone number.
-
Numeric buttons - Enters the number.
-
Right arrow button - Enters a space.
-
Left arrow button - Deletes the last character entered.
-
Pound sign  - Tap the button once to enter # , or twice to enter P.
-
Select the Color button for color transmission, or the Black button for black & white. The machine starts the scan.
If you load the document in the document feeder, the machine automatically scans the document and sends the fax.
- To send the scanned document, tap OK.
Good to know
-
When sending a double-sided document, load the document on the glass. Double-sided documents can't be auto scanned from the document feeder
-
Faxes may reach unintended recipients if there is a misdial or a wrong number. When you send important documents, we recommend that you first speak on the telephone.
-
When your machine is connected to a PBX (Private Branch Exchange) system, refer to the operating instructions of the system for details on dialing the recipient's fax/telephone number.
-
In case the machine can't send a fax, such as when the recipient's line is busy, it can redial the number after a specified interval. Automatic redialing is enabled by default.
-
Color transmission is available only when the recipient's fax machine supports color faxing.
-
When you send a color fax, documents always scan in (200 x 200 dpi) resolution. The image quality (compression rate) is determined by the resolution you select.
-
If you disconnect the power plug, all unsent documents stored in the machine's memory are lost.
