Changing the Date and Time
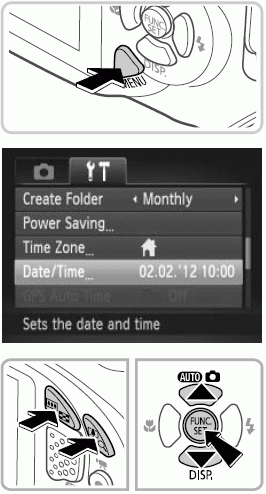
Access the camera menu.
Choose [Date/Time].
Press the op buttons to choose [Date/Time], and then press the m button.
Change the date and time.
Press the n button to close the menu.
Date/time settings can be retained for about 3 weeks by the camera’s built-in date/time battery (backup battery) after the battery pack is removed.The date/time battery will be charged in about 4 hours once you insert a charged battery or connect the camera to an AC adapter kit (sold separately), even if the camera is left off.Once the date/time battery is depleted, the [Date/Time] screen will be displayed when you turn the camera on. Follow the steps on p. 19 to set the date and time.Automatic date and time updating is possible using GPS
