A4 or Letter-sized paper is not loaded in the Auto Sheet Feeder.
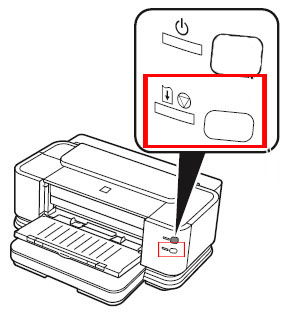
Press the RESUME/CANCEL button on the printer to clear the error, then load two sheets of A4 or Letter-sized plain paper in the Auto Sheet Feeder.
Automatic print head alignment cannot be performed using paper from the Front Tray. For automatic print head alignment, always load paper in the Auto Sheet Feeder.
 Print Head nozzles are clogged.
Press the RESUME/CANCEL button on the printer to clear the error, and then print out the nozzle check pattern to examine the print head condition.
For information on how to print a nozzle check pattern, see Printing the Nozzle Check Pattern for Windows, for Mac OS X.
The Paper Output Slot has been exposed to a strong light source preventing correct Print Head alignment.
Press the RESUME/CANCEL button on the printer to clear the error and move the printer to a darker location.
After carrying out the above measures, if the problem continues after aligning the Print Head again, press the RESUME/CANCEL button on the printer to clear the error, and then perform manual print head alignment. For details on manual print head alignment, see Manual Print Head Alignment for Windows, for Mac OS X.
When printing the nozzle check pattern or performing Manual Print Head Alignment
Other than A4 or Letter-sized paper is loaded.
Press the RESUME/CANCEL button on the printer to clear the error, and load A4 or Letter-sized plain paper in the Auto Sheet Feeder. Then try performing again.
When performing an ordinary print job
Press the RESUME/CANCEL button on the printer to clear the error. Then check the Page Size setting in the Page Setup tab (Windows) or the Page Setup dialog box (Macintosh) in the printer driver and load paper that is the same size as the setting and try printing again.
If this error occurs even when the paper loaded in the printer is the same as the setting, set the printer driver not to detect the width of the paper.
The settings here are also applied under Direct Printing from a digital camera.
|
 Note Note
Select the Detect paper width check box again once printing is complete, and then click Send.
|

1 Open the printer properties dialog box.
See Opening the Printer Properties dialog box directly from the Start menu
2 Click the Maintenance tab.
3 Click Custom Settings to open the Custom Settings dialog box.
4 Clear the Detect paper width check box, and then click Send.
5 When the confirmation message is displayed, click OK.

1 Open the Canon IJ Printer Utility.
See Opening the Canon IJ Printer Utility (Macintosh)
2 Select Custom Settings from the pop-up menu.
3 Clear the Detect paper width check box, and then click Send.
4 When the confirmation message is displayed, click OK.


 Note
Note