"Cropping" is the act of selecting the area you want to keep in an image and discarding the rest when scanning it.
 IJ Scan Utility
ScanGear
IJ Scan Utility
In the Image Stitch window, you can specify a cropping frame on the image displayed in the Preview area.
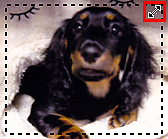
Initial Cropping Frame
No cropping frame is specified. When you select the Adjust cropping frames checkbox, an active cropping frame is automatically specified around the image in the Preview area. You can drag the cropping frame to specify the area.
When you perform a scan, the image in the area specified with the cropping frame will be scanned.
Adjusting a Cropping Frame
The cursor will change into  (Arrow) when it is positioned over a cropping frame. If you click and drag the mouse in the direction of the arrow, the cropping frame will expand or contract accordingly.
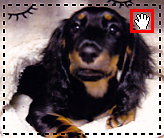
The cursor will change into  (Hand) when it is positioned within a cropping frame. Click and drag the mouse to move the entire cropping frame.
Deleting Cropping Frames
To delete the cropping frame, deselect the Adjust cropping frames checkbox.
ScanGear
On the Basic Mode tab and Advanced Mode tab, you can specify cropping frames (scan areas) on the image(s) displayed in the Preview area of the screen.
When you perform a scan, each area specified with a cropping frame will be scanned as a separate image.
 Note
Note
Initial Cropping Frame
In thumbnail view
No cropping frame is specified. You can drag the mouse over a thumbnail to specify a cropping frame.
In whole image view
An active cropping frame is automatically specified around the preview image. You can drag the cropping frame in the Preview area to specify the area.
Note
Cropping Frame Types
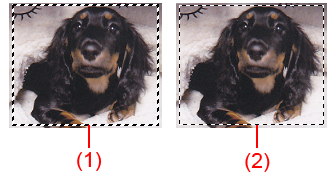
(1) Thick cropping frame (rotating or stationary)
Represents a selected cropping frame. Appears only in whole image view. You can select multiple cropping frames by clicking them while pressing the command key. Output size, image corrections and other settings on the Basic Mode tab or Advanced Mode tab will be applied to all the selected cropping frames.
(2) Thin cropping frame
- In thumbnail view
Output size, image corrections and other settings on the Basic Mode tab or Advanced Mode tab will be applied.
- In whole image view
Represents an unselected cropping frame. The settings on the Basic Mode tab or Advanced Mode tab will not be applied.
Adjusting a Cropping Frame
The cursor will change into (Arrow) when it is positioned over a cropping frame. If you click and drag the mouse in the direction of the arrow, the cropping frame will expand or contract accordingly.
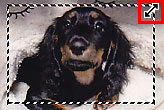
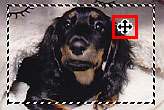
The cursor will change into  (Crosshair Arrow) when it is positioned within a cropping frame. Click and drag the mouse to move the entire cropping frame.
 Note
Note
Creating Multiple Cropping Frames
In thumbnail view
You can only create one cropping frame per image.
In whole image view
Click and drag the mouse in a space outside the existing cropping frame to create a new cropping frame in the Preview area. The new cropping frame will be the active cropping frame, and the old cropping frame will be the unselected cropping frame.
You can create multiple cropping frames and apply different scan settings to each cropping frame.
You can also select multiple cropping frames by clicking them while pressing the command key.
If you select multiple cropping frames and change the settings on a tab at the right of ScanGear, the settings will be applied to all the selected cropping frames.
When you create a new cropping frame, it retains the settings of the latest cropping frame.
Note
Deleting Cropping Frames
In thumbnail view
To delete a cropping frame, click an area outside the cropping frame on an image.
In whole image view
To delete a cropping frame, select it and click  (Remove Cropping Frame) on the Toolbar. Alternatively, press the delete key.
When there are multiple cropping frames, all the selected cropping frames (active cropping frame and selected cropping frames) are deleted simultaneously.

 (Width) and
  (Height) in Input Settings.
 (Switch Aspect Ratio). However,