
Document Stored in Machine's Memory MX432
| Article ID: ART135770 | | | Date published: 05/13/2015 | | | Date last updated: 08/15/2015 |
Description
Document Stored in Machine's Memory
Solution
This article also applies to the PIXMA MX439.
| Document Stored in Machine's Memory ID : 8201357200 _ EN _ 1 | |
| Solution | If the sending faxes is not complete or the machine was not able to print the received faxes, these faxes are stored in the machine's memory. If an error occurred during a fax transmission, the document is not stored in the machine's memory. In the following cases, the machine is not able to print the received fax and will automatically store the fax in its memory.
You can print or delete the faxes stored in the machine's memory. You can also save the received faxes stored in the machine's memory on the USB flash drive.
Refer to [ Printing a Document in Machine's Memory ] within this webpage.
Refer to [ Deleting a Document in Machine's Memory ] within this webpage.
Refer to [ Saving a Document in Machine's Memory to USB Flash Drive ] within this webpage.
Printing a Document in Machine's Memory You can print a specified document in the machine's memory or print all the documents in its memory at a time. When printing a specified document, you specify it by its transaction number. If you do not know the transaction number for your target document, print the list of documents first. - Printing a List of the Document in Machine's Memory - Printing a Specified Document in Machine's Memory - Printing All the Documents in Machine's Memory
- Printing a List of the Document in Machine's Memory Print the list of the documents following the procedure below. 1. Make sure that the machine is turned on. 2. Load paper. -> [ Loading Paper ] 3. Press the FAX button. The Fax standby screen is displayed. 4. Press the Menu button. The FAX menu screen is displayed. 5. Use the   button to select Memory reference, then press the OK button. button to select Memory reference, then press the OK button.
6. Use the button to select Print memory list, then press the OK button.The list of documents stored in the machine's memory is printed.
- Printing a Specified Document in Machine's Memory Specify the document and print it following the procedure below. 1. Make sure that the machine is turned on. 2. Load paper. -> [ Loading Paper ] 3. Press the FAX button. The Fax standby screen is displayed. 4. Press the Menu button. The FAX menu screen is displayed. 5. Use the button to select Memory reference, then press the OK button.
6. Use the button to select Print specified doc., then press the OK button.The document selection screen is displayed. 
7. Use the button to select the transaction number (TX/RX no.) of the document you want to print, then press the OK button.8. Use the button to select whether to print only the first page of the document, then press the OK button.
Only the first page of the document will be printed. The document is still stored in the machine's memory.
All pages of the document will be printed. The screen to confirm whether to delete the printed document in the machine's memory is displayed. If you select Yes using the button and press the OK button, the printed document in the machine's memory is deleted.
- Printing All the Documents in Machine's Memory Print all the documents in the machine's memory following the procedure below. 1. Make sure that the machine is turned on. 2. Load paper. -> [ Loading Paper ] 3. Press the FAX button. The Fax standby screen is displayed. 4. Press the Menu button. The FAX menu screen is displayed. 5. Use the button to select Memory reference, then press the OK button.
6. Use the button to select Print all RX docs, then press the OK button.The confirmation screen is displayed. 7. Use the button to select Yes, then press the OK button.All the documents in the machine's memory will be printed. Each time a document is printed, the screen to confirm whether to delete the printed document in the machine's memory is displayed. If you select Yes using the
Deleting a Document in Machine's Memory You can delete a specified document in the machine's memory or delete all the documents in its memory at a time. - Deleting a Specified Document in Machine's Memory - Deleting All the Documents in Machine's Memory
- Deleting a Specified Document in Machine's Memory Specify the document and delete it following the procedure below. 1. Make sure that the machine is turned on. 2. Press the FAX button. The Fax standby screen is displayed. 3. Press the Menu button. The FAX menu screen is displayed. 4. Use the button to select Memory reference, then press the OK button.
5. Use the button to select Del. specified doc., then press the OK button.The document selection screen is displayed. 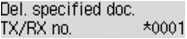
6. Use the button to select the transaction number (TX/RX no.) of the document you want to delete, then press the OK button.The confirmation screen is displayed. 7. Use the button to select Yes, then press the OK button.The specified document will be deleted from machine's memory.
- Deleting All the Documents in Machine's Memory Delete all the documents in the machine's memory following the procedure below.
1. Make sure that the machine is turned on. 2. Press the FAX button. The Fax standby screen is displayed. 3. Press the Menu button. The FAX menu screen is displayed. 4. Use the button to select Memory reference, then press the OK button.
5. Use the button to select Delete all docs, then press the OK button.The confirmation screen is displayed. 6. Use the button to select Yes, then press the OK button.All the documents in the machine's memory will be deleted.
Saving a Document in Machine's Memory to USB Flash Drive You can save the received faxes stored in the machine's memory to the USB flash drive as PDF files using the operation panel of the machine. You can save a specified document in the machine's memory to the USB flash drive or save all the documents in its memory to the USB flash drive at a time. - Saving a Specified Received Document in Machine's Memory to USB Flash Drive - Saving All the Received Documents in Machine's Memory to USB Flash Drive
- Saving a Specified Received Document in Machine's Memory to USB Flash Drive Specify the received document and save it on the USB flash drive following the procedure below. 1. Make sure that the machine is turned on. 2. Insert the USB flash drive into the direct print port. 3. Press the FAX button. The Fax standby screen is displayed. 4. Press the Menu button. The FAX menu screen is displayed. 5. Use the button to select Memory reference, then press the OK button.
6. Use the button to select Save specified doc., then press the OK button.The document selection screen is displayed. 
7. Use the button to select the transaction number (TX/RX no.) of the document you want to save, then press the OK button.The specified document is saved on the USB flash drive.
- Saving All the Received Documents in Machine's Memory to USB Flash Drive Save all the documents in the machine's memory to the USB flash drive following the procedure below. 1. Make sure that the machine is turned on. 2. Insert the USB flash drive into the direct print port. 3. Press the FAX button. The Fax standby screen is displayed. 4. Press the Menu button. The FAX menu screen is displayed. 5. Use the button to select Memory reference, then press the OK button.
6. Use the button to select Save all documents, then press the OK button.7. Use the button to select Yes, then press the OK button.All the documents in the machine's memory will be saved to the USB flash drive.
You can import faxes saved on a USB flash drive to the computer. After saving faxes, connect the USB flash drive to the computer, then import the data. |
 : Indicates the document during transmission.
 : Indicates the document during transmission.
 : Indicates the document sent with sequential broadcasting.
 button or the Tone button, the transaction number displayed on the LCD is switched to transaction time or fax/telephone number.
SIMS Doc Id
8201357200