Selecting the AF Mode In Live View
The AF modes available are [Live mode], [u Live mode] (face detection,), and [Quick mode].
If you want to achieve precise focus, set the lens focus mode switch to <MF>, magnify the image, and focus manually
 | Select the AF mode. |
Live Mode:

The image sensor is used to focus. Although AF is possible with the Live View image displayed, the AF operation will take longer than with the Quick mode. Also, achieving focus may be more difficult than with the Quick mode
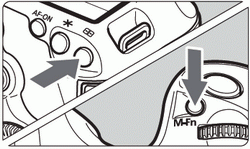
![]() | 1 Display the Live View image. Press the < > button. > button.
2 Move the AF point. |
![]() | 3 Focus the subject. |
![]() | 4 Take the picture. |
 (Face detection) Live Mode:
With the same AF method as the Live mode, human faces are detected and focused. Have the target person face the camera.
![]() | 1 Display the Live View image. Press the <> button. When a face is detected, the < > frame will appear over the face to be focused. > frame will appear over the face to be focused. If multiple faces are detected, <> will be displayed. Use < > to move the <q> frame over the target face. > to move the <q> frame over the target face.
|
![]() | 2 Focus the subject. Press the shutter button halfway and the camera will focus the face covered by the <> frame. When focus is achieved, the AF point will turn green and the beeper will sound. If focus is not achieved, the AF point will turn orange.
If a face cannot be detected, the AF point < > will be displayed and AF will be executed at the center. > will be displayed and AF will be executed at the center.
|
 | 3 Take the picture. |
If the focus is far off, face detection will not be possible. If the lens enables manual focusing even while the lens focus mode switch is set to <AF>, turn the focusing ring to attain rough focus. The face will then be detected and < > will be displayed.
An object other than a human face may be detected as a face.
Face detection will not work if the face is very small or large in the picture, too bright or too dark, titled horizontally or diagonally, or partially hidden.
- The <> focusing frame may cover only part of the face.
Live Mode and
(Face Detection) Live Mode Notes AF operation
Focusing will take slightly longer.
Even when focus has been achieved, pressing the shutter button halfway will focus again.
The image brightness may change during and after the AF operation.
If the light source changes while the Live View image is displayed, the screen may flicker and focusing may be difficult. If this happens, stop the Live View shooting and autofocus under the actual light source.
If you press the < > button in the Live mode, the image will be magnified at the AF point. If focusing is difficult in the magnified view, return to the normal view and autofocus. Note that the AF speed may differ between the normal and magnified views.
If you autofocus in the Live mode’s normal view and then magnify the image, the focus may no longer be correct.
In the u Live mode, pressing the <> button will not magnify the image
In the Live mode or (face detection) Live mode, if you shoot a peripheral subject and it is slightly out of focus, aim the center AF point over the subject to focus, then take the picture.
The external Speedlite will not emit the AF-assist beam. However, if an EX-series Speedlite (sold separately) equipped with a LED light is used, the LED light will turn on automatically for AF-assist when necessary in the Live mode and (face detection) Live mode.
Shooting conditions that can make focusing difficult
Low-contrast subjects such as the blue sky and solid-color, flat surfaces.
Subjects in low light.
Stripes and other patterns where there is contrast only in the horizontal direction.
Under a light source whose brightness, color, or pattern keeps changing.
Night scenes or points of light.
Under fluorescent or LED light sources or when the image flickers.
Extremely small subjects.
Subjects at the edge of the picture.
Subjects strongly reflecting light.
The AF point covers a near and faraway subject (such as an animal in a cage).
Subjects that keep moving within the AF point and cannot keep still due to camera shake or subject blur.
A subject approaching or moving away from the camera.
Autofocusing while the subject is way out of focus.
Soft focus effect is applied with a soft focus lens.
- A special effects filter is used.
If you use AF with any of the following lenses, using [Quick mode] is recommended. If you use the [Live mode] or [ Live mode] for AF, it may take a longer time to achieve focus or the camera may not be able to achieve correct focus.
EF24mm f/2.8, EF35mm f/2, EF50mm f/2.5 Compact Macro, EF100mm f/2.8 Macro, EF135mm f/2.8 (Softfocus), EF28-90mm f/4-5.6 III, EF55-200mm f/4.5-5.6 USM, EF90-300mm f/4.5-5.6, EF90-300mm f/4.5-5.6 USM
Quick Mode: 
The dedicated AF sensor is used to focus in One-Shot AF mode, using the same AF method as with viewfinder shooting.
Although you can focus the target area quickly, the Live View image will be interrupted momentarily during the AF operation.
In AF area selection modes other than 61-point automatic selection AF, you can manually select the AF point or zone. In the < > mode, “61-point automatic selection AF” is set automatically.
| 1 Display the Live View image. Press the <> button. If the AF area selection mode is set to “61-point automatic selection AF”, the Area AF frame will be displayed. In other modes, the AF point will be displayed as a small frame. The larger rectangular frame is the magnifying frame.
|
 | 2 Select the AF area selection mode. |
  | 3 Select the AF point. |
4 Focus the subject. |
5 Take the picture. |
You cannot take a picture during autofocusing. Take the picture while the Live View image is displayed
