Learn how to replace an the ink tanks in your PIXMA MG5420 or MG5422 printer.
Solution
Follow the instructions in this article when you need to replace an ink tank.
About ink tanks
If you remove an ink tank, replace it immediately. Don't leave the machine with an ink tank removed.
Be sure to replace ink tanks one by one when replacing two or more ink tanks.
Use a new ink tank for replacement. Used ink tanks may cause the nozzles to clog and they won't alert you when it's time for a replacement.
Don't remove an ink tank from the package then leave it out in the open. This causes the ink tank to dry out, and the machine may not operate properly when it's reinstalled.
Replace an ink tank
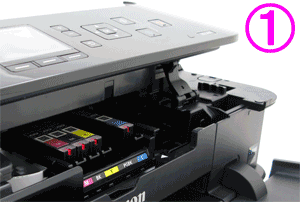
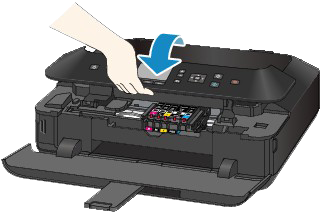
Turn the printer ON and gently open the paper output tray.
Lift the operation panel until it stops. The print head holder moves to the replacement position. Don't hold the print head holder to stop or move it forcibly. If the operation panel is left open for more than 10 minutes, the print head holder moves to the right. If this happens, close then reopen the operation panel.
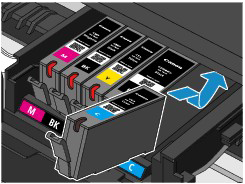
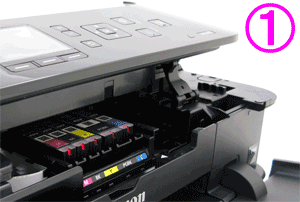
Remove the ink tank with the flashing lamp. Don't touch the metallic parts or other parts inside the machine.
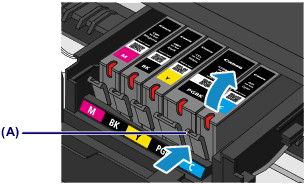
Push the tab (A) and lift the ink tank to remove it.
Don't touch other parts besides the ink tanks. Discard the empty ink tank according to the local laws and regulations.
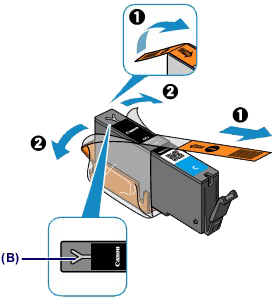
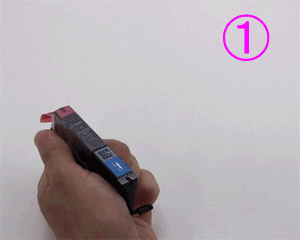
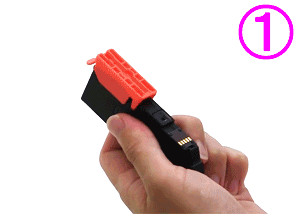
Take a new ink tank out of its package and remove the orange tape .
Completely remove the protective film . If the orange tape remains on the Y-shape air hole (B), ink may splash or the machine may not print properly.
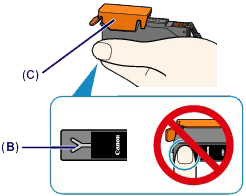
Hold the ink tank with the orange protective cap (C) pointing up and be careful not to block the Y-shape air hole (B).
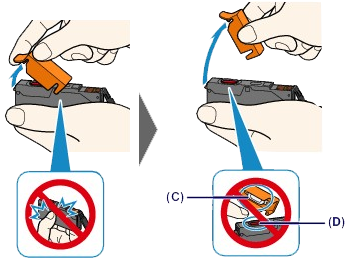
Lift up the tab on the orange protective cap (C) and gently remove it. Don't push the sides of the ink tank. If you push the sides with the Y-shape air hole (B) blocked, ink may splash. Don't touch the inside of the orange protective cap (C) or the open ink port (D). The ink may stain your hands if you touch them. Don't reattach the protective cap (C) after you remove it. Discard it according to the local laws and regulations.
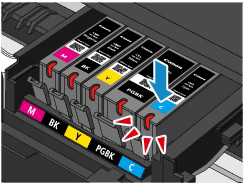
Insert the front end of the ink tank into the print head at a slant.
Make sure the position of the ink tank matches the label.
Press on the top of the ink tank until it snaps firmly into place. Make sure that the ink lamp lights up red. You can't print unless all the ink tanks are installed and are in the correct position.
When you start your next print task, the machine cleans the print head automatically. Don't perform any other operations until the machine completes the cleaning.
If the print head is out of alignment (you see printed ruled lines or similar symptoms), adjust the print head position.

 Don't hold the print head holder to stop or move it forcibly.
 If the operation panel is left open for more than 10 minutes, the print head holder moves to the right. If this happens, close then reopen the operation panel.
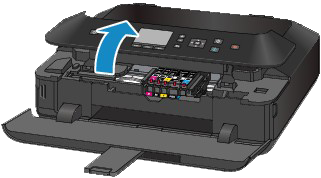
 .
. .
.