|
To trim only part of an image to enlarge it or to change an image taken horizontally to a vertical composition, use the trimming tool in Digital Photo Professional.
The trimmed image will be saved as a trimmed image when converted into a JPEG or TIFF image.
Windows 7 is used in this description, but the procedure is mostly the same if you use Windows Vista, Windows XP or Mac OS X.
1. Starts up Digital Photo Professional, and then select the image to be trimmed.
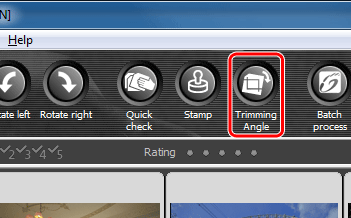
2. Click the [Trimming Angle] in the toolbar to open the trimming/angle adjustment window.
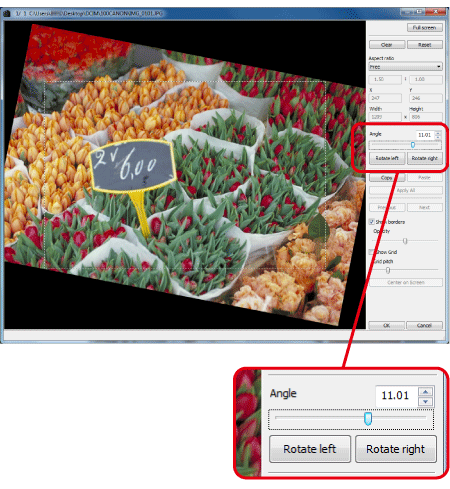
3. Adjust the angle of the image as needed.
- The image can be adjusted in 0.01-degree increments. The possible adjustment range is from -45 degrees to +45 degrees.
- You can rotate the image in 90-degree increments by clicking [Rotate Left] or [Rotate Right].
- If you click the [OK] button after adjusting only the angle of the image, the image will be trimmed at the largest possible trimming range.
NOTE
When correcting lens aberrations, it is recommended to perform [Lens aberration correction] before adjusting the angle of the image.
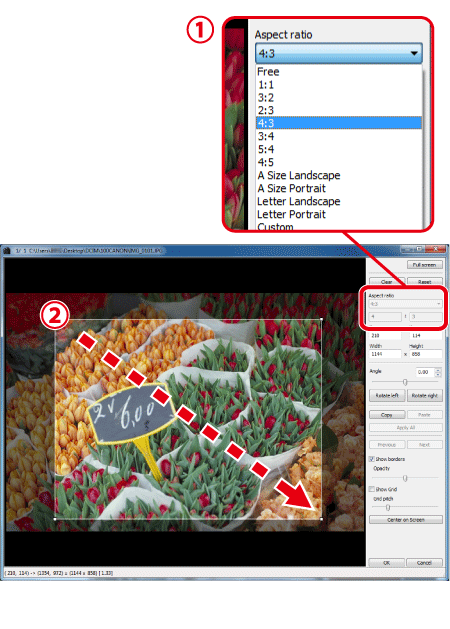
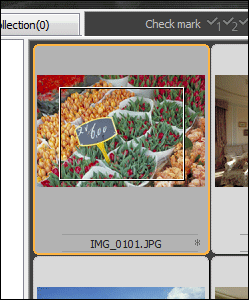
4. When the image has become clear, select an aspect ratio and drag the trimming range.
 Select a trimming ratio.
[Free]: You can trim an image to any size, regardless of the selectable ratio.
[Custom]: You can trim an image at the specified ratio.
 Drag and select the range you want to trim.
The trimming range can be moved by dragging. You can enlarge or reduce the size of the trimming range by dragging the four corners of the trimming range.
5. Click [OK] to return to the Edit Window.
In the main window, the trimming range frame is displayed on the trimmed image.
Display in an edit window
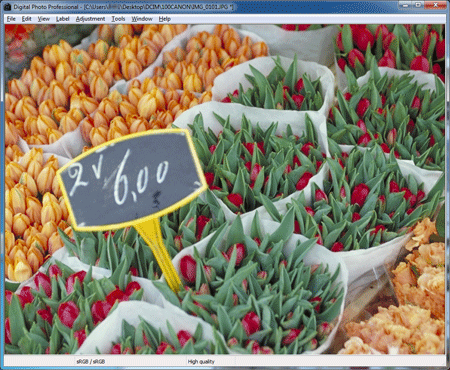
Display in the main window
The trimmed image appears as a trimmed image in the Edit Window and the Edit Image Window, and it is printed as it appears. However, the image is not actually trimmed, so you can always restore the original image by clicking [Reset] in the trimming window or reediting it.
To actually trim the image, convert the trimmed image into a JPEG or TIFF image and save it.
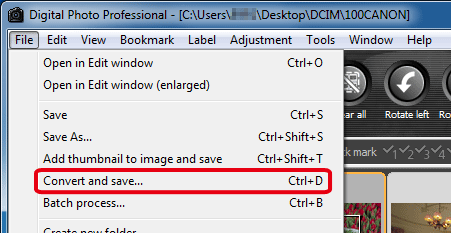
6. From the [File] menu, select [Convert and save].
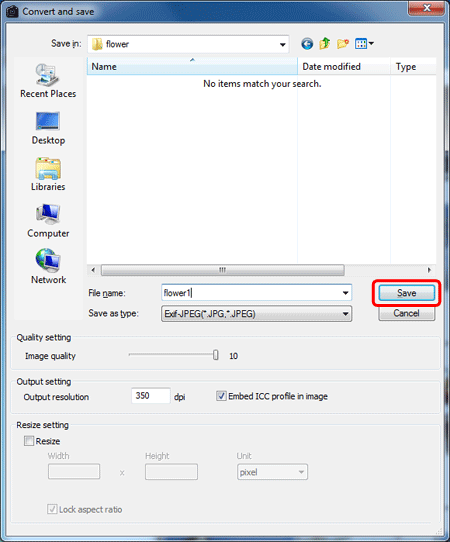
7. When the [Convert and save] dialog box appears, specify the file name, file destination, and image type, and then click the [Save].
This completes the process of trimming images.
|
