Print the nozzle check pattern to determine whether the ink ejects properly from the print head nozzle.
 Note Note  If the remaining ink level is low, the nozzle check pattern will not be printed correctly. Replace the ink tank whose ink is low. If the remaining ink level is low, the nozzle check pattern will not be printed correctly. Replace the ink tank whose ink is low.
 Replacing an Ink Tank Replacing an Ink Tank
|
You need to prepare: a sheet of A4 or Letter-sized plain paper
Make sure that the power is turned on.
Make sure that one or more sheets of A4 or Letter-sized plain paper are loaded in the cassette (lower).
Open the paper output tray.
(1) Holding sides of the paper output tray, gently open it.
The output tray extension will open automatically when the paper output tray is opened.
(2) Extend the paper output support.
 Important Important  If the inner cover is open, close it. If the inner cover is open, close it.
|
Print the nozzle check pattern.
(1) Select  Setup on the HOME screen.
LCD and Operation Panel
The setup menu screen will appear.
(2) Select  Maintenance, then press the OK button.
The Maintenance screen will appear.
(3) Select Print nozzle check pattern, then press the OK button.
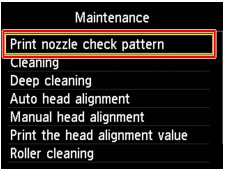
The confirmation screen will appear.
(4) Select Yes, then press the OK button.
The nozzle check pattern will be printed and two pattern confirmation screens will appear on the LCD.
Examine the nozzle check pattern.
Examining the Nozzle Check Pattern
