1. Open [System Preferences] ? click [Print & Fax] or [Print & Scan].
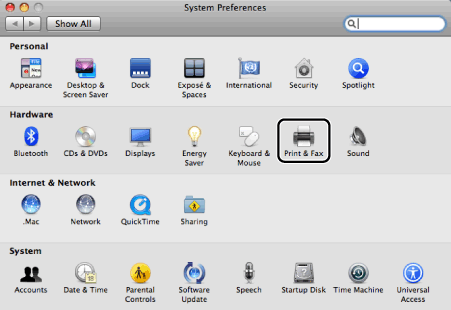
The [Print & Fax] or [Print & Scan] dialog box is displayed.
2. Click the [+] icon.
If you are using OS X Lion, and there are shared printers or Bonjour supported printers on the network, click [+] and select [Add Other Printer or Scanner].
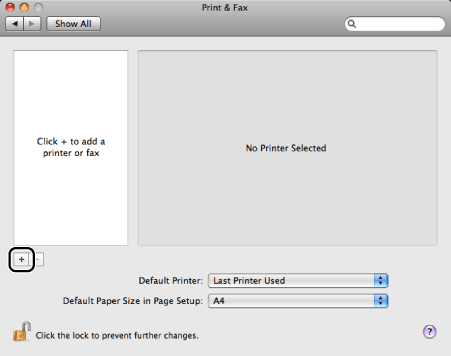
The printer registration dialog box is displayed.
3. Click [Default] or [Default Browser].
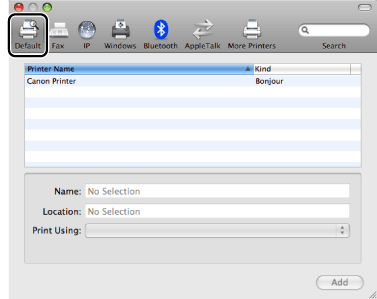
4. Select the printer you are going to use.
NOTE
|
Select a printer that has [Bonjour] displayed in its [Connection] or [Kind] column.
|
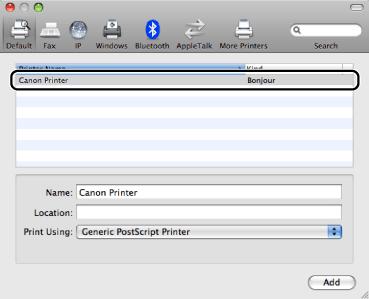
5. If the printer driver corresponding to the printer you are using is not automatically selected in [Print Using], select [Select a driver to use] ? select the printer driver corresponding to the printer model you are going to use from the list.
If you are using Mac OS X 10.6 or later, select the printer driver corresponding to the printer model you are going to use from the list.

NOTE
|
For the printer driver name corresponding to your printer, refer to the Readme file.
|
6. Click [Add]. The option settings dialog box is displayed.
NOTE
|
If you intend to select unidirectional printing, you must configure the options installed in the printer you are using. You can change the option settings after registering the printer.
|
7. Confirm that the printer has been added in the [Print & Fax] or [Print & Scan] dialog box ? close the [Print & Fax] or [Print & Scan] dialog box.
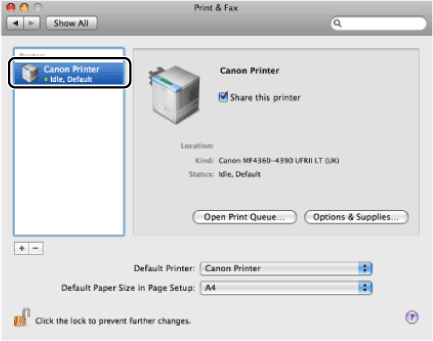
NOTE
|
Confirm that the driver name corresponding to your printer is displayed beside [Kind] on the right-hand side of the [Print & Fax] dialog box. For the printer driver name corresponding to your printer, refer to the Readme file.
|
