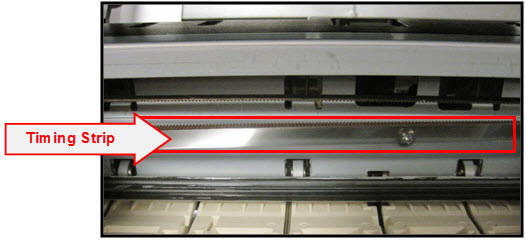
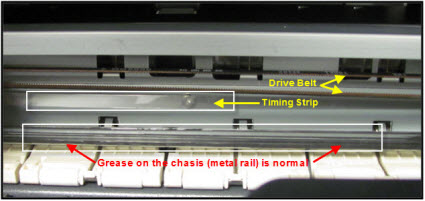
About the timing strip
The timing strip is a clear, plastic strip about 1/4" high that sits horizontally across the inside of the printer. The strip contains thin black vertical lines that help it determine the printer's carriage position.
If you accidentally touch the strip, oil from your hands can transfer and cause poor print quality, including:
-
Misaligned or distorted characters.
-
Vertical lines.
-
Knocking / grinding noise, or
-
Sometimes an inoperable error condition (such as 5100).
It's usually easy to remove the grease from the timing strip using common household items.
You will need:
-
Clean, unused cotton swab.
-
Small amount of Isopropyl Alcohol or window cleaner.
-
Flashlight or other light source.
How to clean the timing strip
 These illustrations display a PIXMA MX870. Your model may look slightly different.
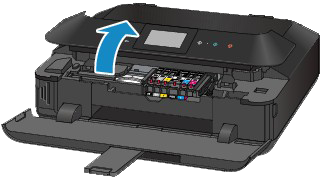
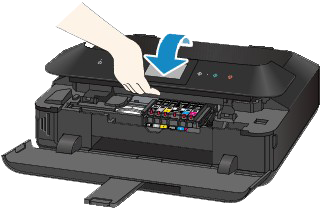
- Hold the sides of the paper output tray, and gently open it.
- Turn the printer on, then open the operation panel. The print head holder moves to the center position.
-
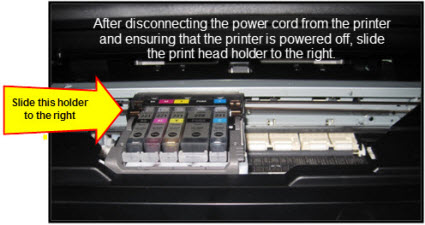
With the panel open, unplug the printer. Be sure the printer power LED is no longer lit.
-
Gently slide the carriage to the right side. Be careful not to force it.

-
Once you slide it to the right, you can access the timing strip.
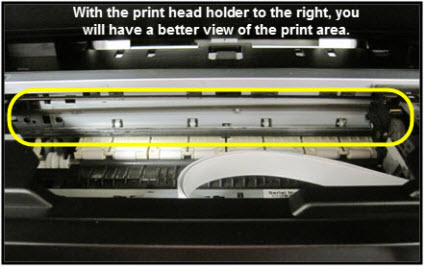
- Use a flashlight to check the timing strip for grease. You may need to view it from more than one angle.
 Grease on the metal rail is normal. Don't remove it. Don't touch the chassis or other areas inside the unit.
-
Moisten a cotton swab with Isopropyl alcohol or window cleaner and carefully remove the grease from the timing strip.
-
When you confirm that the left and center part of the timing strip is clean, gently slide the carriage all the way to the left.
-
Repeat steps 5-6 for the right side until it's also clean.
-
Gently close the operation panel, reconnect to the power, and turn the printer ON. The indicator light blinks steadily while the printer initializes
- A message on the printer displays saying the printer wasn't properly turned off. Tap OK to clear the message and return the printer to standby mode.
- Print a text document and a photograph to check print quality. You can print this page to test since it has both text and images. If print quality is still poor, repeat the steps above.
