Use various characters on the numeric buttons when entering a unit name, recipient's name for memory dial, as well as other information. The following instructions will help you understand how to change between upper and lower case, add or delete spaces, and provides a quick reference list of characters assigned to each numeric button.
Switch the input mode
The printer has three input modes: uppercase mode, lowercase mode, and numeric mode. You can use the numeric buttons to enter characters in each input mode.
 Each time the
  button is pressed, the input mode is switched in the following order: uppercase mode (:A), lowercase mode (:a), then numeric mode (:1).
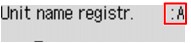
- The current input mode appears in the upper right corner of the LCD on your printer as shown here.
Enter numbers, letters and symbols
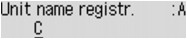
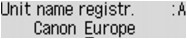
Here's an example about how to enter a unit name using the keypad.
-
Press the button to switch the input mode.
-
Use the numeric buttons to enter the desired characters.
-
To enter a space, press the  button three times.
-
To delete the last entered character, press the Back  button.
Edit entered numbers, letters and symbols
To move the curser, insert a space, or insert / delete a character, follow the actions below.
- Press the
 or
or  button to move the cursor under the position you want to edit.
- To insert a space, press the button three times.
- To insert a character, move the cursor under the character to the right of the insertion position, then enter the character. The character on the cursor will move to the right and the new character will be inserted.
- To delete a character, move the cursor under the character, then press the Back button.
List of characters assigned to each numeric button
|
Button
|
Uppercase mode
(:A)
|
Lowercase mode
(:a)
|
Numeric mode
(:1)
|
Fax/Telephone no.
|
|

|
|
|
1
|
1
|
|

|
ABCƄ€ĂLJ
|
abc楡ᤢ秼/P>
|
2
|
2
|
|

|
DEF̉Ɋ
|
def쪨꼯P>
|
3
|
3
|
|

|
GH I Ï Í Ì Î¼/P>
|
gh i ï¡ ì¡®
|
4
|
4
|
|

|
JKL
|
jkl
|
5
|
5
|
|

|
MNOÒ˜×"Ó•Ô¼/P>
|
mnoñ,¶³òµ'¼/P>
|
6
|
6
|
|

|
PQRSÞ¼/P>
|
pqrs�>
|
7
|
7
|
|

|
TUVÝšÚ›
|
tuv𺹻
|
8
|
8
|
|

|
WXYZݼ/P>
|
wxyz�>
|
9
|
9
|
|

|
|
|
0
|
0
|
|

|
- . SP*1 # ! " , ; : ^ ` _ = / | ' ? $ @ % & + ( ) [ ] { } < > # ! " , ; : ^ ` _ = / | ' ? $ @ % & + ( ) [ ] { } < >
(*1 "SP" indicates a space.)
|
#
|
|
|
Press the Star button to switch the input mode.
|
|
If your product issue was not resolved after following the steps above, or if you require additional help, please create or log in to your Canon Account to see your technical support options.
Or if you still need help, visit our Canon Community by clicking the button below to get answers:

____________________________________________________________________________________________
