On rare occasions, like a print head error or poor print quality issues, it may be necessary to reseat or remove the print head from the printer.
Follow these steps to remove the print head. Later in this document you'll be given instructions to reinstall or install the print head.
Remove the print head:
-
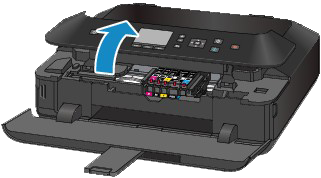
With the printer powered on, then, holding the sides of the paper output tray, gently open it.
-
Lift the entire operation panel open until it stops.
The print head holder will move towards the center to ink tank replacement position.
-
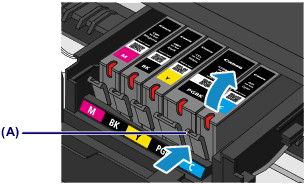
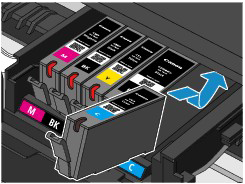
Push the tab (A) on an ink tank and lift it out of the printer.
-
Remove the rest of the ink tanks from the holder.
-
After all the ink tanks have been removed from the holder, press and hold the Stop button for two seconds (or longer) until the print head carriage moves to the replacement position and then release the button.
The carriage will move to the right and then return almost centered with the front opening.
-
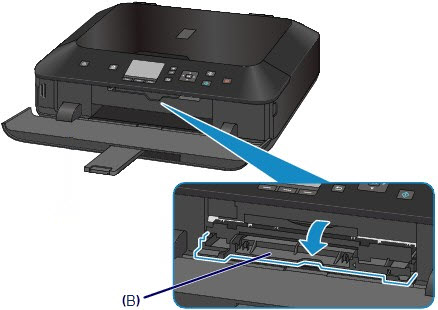
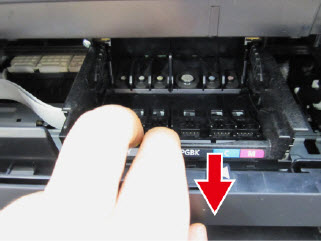
Open the the inner cover (B) and push it down all the way to the bottom.
-
Pull the Head Set Lever towards the front of the machine. You may find resistance when the bottom of the Head Set Lever hits the back of the front edge. The Head Set Lever will move forward as it slides above that front edge.
-
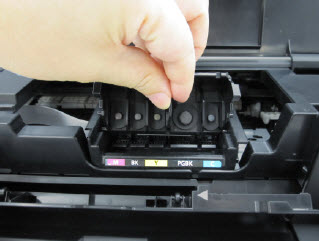
Use your finger tips to grab the top of the center tab and pull out the print head. You will notice the front of the print head will drop face down as you pull it out of the machine.

-
Now go to the section Install (or Reseat) the Print Head.
Install (or Reseat) the Print Head:
-
If you are installing a replacement print head, remove it from its packaging.
-
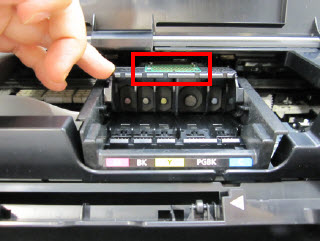
Hold the center tab of the replacement print head, with the front of the print head facing down so you can see the back of the print head (green circuit board). And, ensure the two tabs on the front, bottom corners of the print head are inserted into the rails on either side of the print head holder.
-
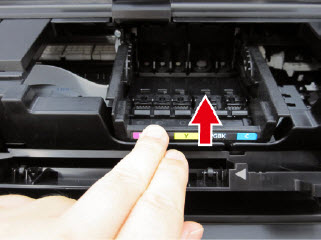
Now slide the replacement print head into the machine.
As the print head slides into the holder, it will start to sit in an upright position.
-
Once the print head is seated in the print head holder, push the Head Set Lever towards the back of the machine.
-
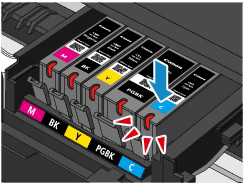
Reinsert the ink tanks into their proper slots.
-
At a slant, insert the front of the ink tank into the print head. Make sure the position of the ink tank matches the print head label.
-
Press on the top of the ink tank until the ink tank snaps firmly into place and make sure that the ink light is red.
-
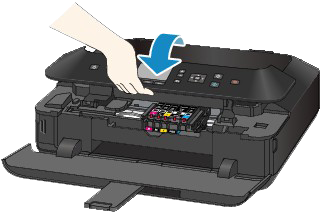
Close the inner cover and then operation panel.
 When closing the cover, be careful not to jam your fingers.
 If the print head carriage returns to home position before the print head is installed, close the inner cover and operation panel and follow the instructions on the display. Then repeat step 3 to get the print head holder into the replacement position.
If your product issue was not resolved after following the steps above, or if you require additional help, please create or log in to your Canon Account to see your technical support options.
Or if you still need help, visit our Canon Community by clicking the button below to get answers:

____________________________________________________________________________________________
