If you are see any of the following, you may need to perform an automatic print head alignment.
Align the print head
-
Replace any ink tanks that are low on ink to make sure the print head alignment sheet prints correctly.
-
Load paper in the lower paper tray (the upper tray isn't used for print head alignment).
-
Turn the printer ON, and open the paper output tray.
-
Press the MENU button on the printer operation panel.
-
Select Setup  , then OK.
-
Select Maintenance  , then OK.
-
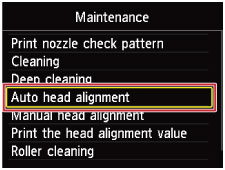
Use the arrow buttons to select Auto head alignment, then OK.
-
Select Yes on the confirmation screen, then OK.
-
The alignment sheet prints, and the print head position adjusts. This takes about four minutes.
 Avoid opening the ink cover while the printer is printing.
-
When the completion message appears, press OK to get back to the Maintenance screen.
Additional help
If print quality is still unsatisfactory, refer to the articles below for additional options.
