| Solution | What is Picture Style? Digital cameras record images after applying an electrical correction process for color tones, brightness, and contours to the signal output from the image sensor. Using Picture Style, you can set what kind of corrections you are going to make before shooting. NOTE Icons used on this page: <  >: Multi-controller / [  ]: Shooting tab 4
Picture Style is a function that makes it easy to set the appropriate characteristics for the images being taken. The effects in the table below are provided. | Picture Style | Picture Style Effects | | Auto |  | The color tone will be adjusted automatically to suit the scene. The colors will look vivid, especially for blue skies, greenery, and sunsets in nature, outdoor, and sunset scenes. | | Standard |  | The image looks vivid, sharp, and crisp. This is a general-purpose Picture Style suitable for most scenes. | | Portrait |  | For nice skin tones. The image looks softer. Suited for close-up portraits. By changing the [Color tone], you can adjust the skin tone. | | Landscape |  | For vivid blues and greens, and very sharp and crisp images. Effective for impressive landscapes. | | Neutral |  | This Picture Style is for users who prefer to process images with their computer. For natural colors and subdued images. | | Faithful |  | This Picture Style is for users who prefer to process images with their computer. When the subject is captured under a color temperature of 5200K, the color is adjusted colorimetrically to match the subject's color. Images will appear dull and subdued. | | Monochrome |  | Creates black-and-white images. | User Def. 1-3
1~3 |  | You can register a basic style such as [Portrait], [Landscape], a Picture Style file, etc., and adjust it as desired. Any User Defined Picture Style that has not been set will have the same default settings as the [Auto] Picture Style. |
If you set the appropriate style for what you want to express before taking pictures (for example, the Portrait setting for shooting people, or the Landscape setting for shooting the sky and deep green trees), there is no need to edit images with retouching software afterwards because they will be recorded with desired characteristics. It also prevents the image degradation that occurs when resaving image files with retouching software. NOTE - In Basic Zone modes, [Auto] is set automatically.
- If the desired color tone is not obtained with [Auto], use another Picture Style.
- <!> can be displayed in the viewfinder when [Monochrome] is set.
IMPORTANT Black-and-white images shot in JPEG cannot be reverted to color. If you want to later shoot pictures in color, make sure the [Monochrome] setting has been canceled.
When developing RAW images, you can adjust them by using the Digital Photo Professional software supplied with your camera so that the Picture Style setting used when shooting is reflected in the image Setting the Picture Style To set the Picture Style, follow the steps below. 1. Set the camera's power switch to <ON>. 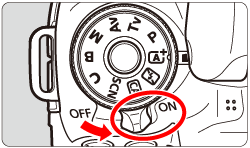 2. Press the <MENU> button to display the menu screen.  3. Under the [ ] tab, select [Picture Style], then press <  >. The Picture Style selection screen will appear.  4. Press the < > keys to select a Picture Style, then press < >. The Picture Style will be set and the camera will be ready to shoot.  This completes the Picture Style setting. For more information on adjusting Picture Styles and registering Picture Styles, please refer to the Related information section.
|
