|
IMPORTANT
- In this section, [PowerShot A3100 IS] is used as an example to explain the operations. Depending on your model, the position of buttons, screen indications, and setting items may vary.
1. Connect the [DIGITAL Terminal] to the PC's USB terminal by using the [Interface Cable] that came with your camera.
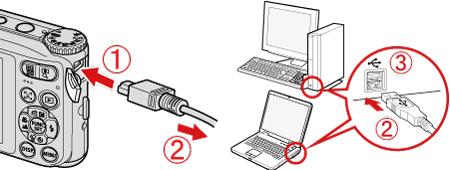
 Camera's [DIGITAL Terminal]
 [Interface Cable]
 PC's USB terminal
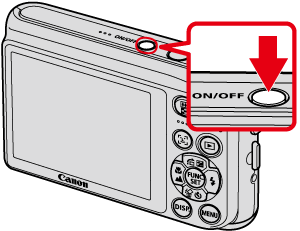
2. Press the <Power> button on the camera.
3. Click the (  ) icon displayed in the [taskbar].

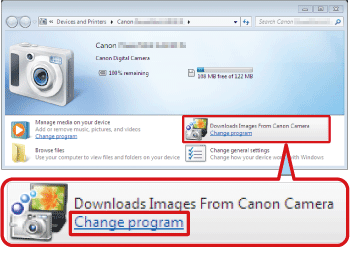
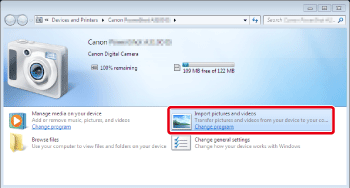
4. The following screen appears.
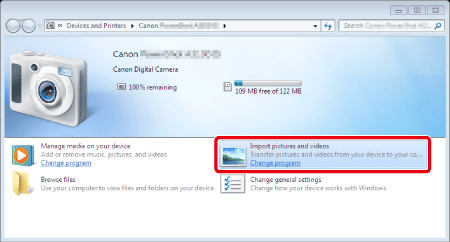
Double-click [Import pictures and videos] (  ).
NOTE
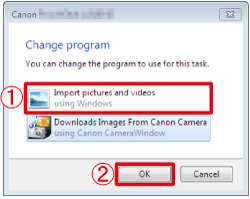
- If [Downloads Images From Canon Camera] (  ) is displayed, click [Change program]. - The following screen appears. Select [Import pictures and videos], and click [OK]. - The following screen appears. Double-click [Import pictures and videos] ( ).
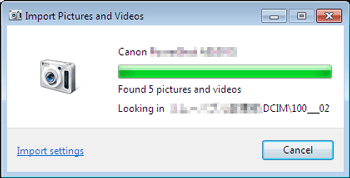
5. The following screen appears.
6. The following screen appears.
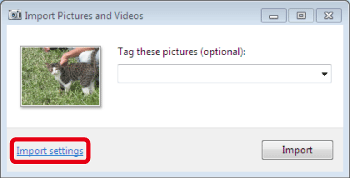
If you want to check the destination where the images will be saved, or the folder name that will be created, click [Import settings]. If you don't need to check these things, proceed to Step 9. (The images are saved in [Pictures] or [My Pictures] by default. The folder name indicates the date the images were imported, such as [2007-10-15])
7. The following screen appears.
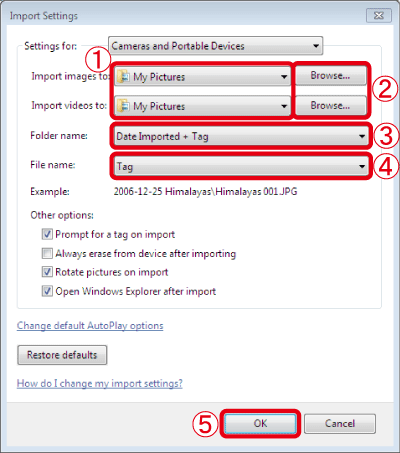
Specify the destination where you want to save the images and video.
If you want to change the destination, click [Browse] to change the destination for saving images.
Specify the way you want the folder to be named.
 Specify the way you want the file to be named.
For the steps above, make each setting if necessary.
When you have completed and confirmed the settings, click  [OK].
If you want to create folders in [Pictures] by the dates that the images are imported, leave the default settings as they are, or make the setting like the ones shown on this screen.
8. The following screen appears when you change the settings.
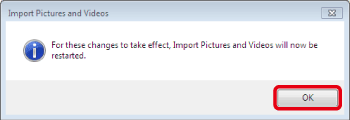
Click [OK].
9. Now you are back to the following screen.
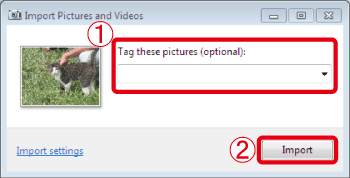
In the [Tag these pictures] field, you can enter a tag for the images. You can also leave the field blank when importing the image.
Click [Import], and the computer will start importing images from the camera.
If you create tags in advance, you can have the computer to pick out and list images that have the same tag even if the images are saved in different folders. For example, if you create a "holiday" tag, even if images with that tag are saved in different folders, you can list all of those images by selecting that tag. By using this option, you can speed up your image searches. For details, please refer to Windows Help.
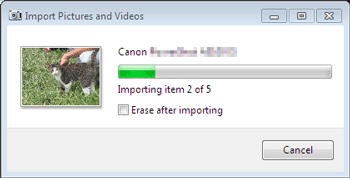
10. The following screen appears, and the computer starts to import images from the camera.
11. The following screen appears after images are imported, and the imported images are displayed.
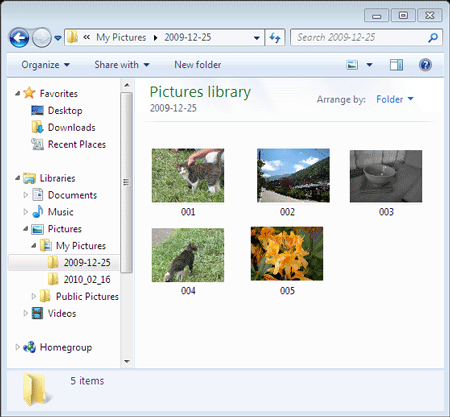
This completes the process of importing images to a PC.
|