| Solution | If printed documents exhibit the following symptoms, adjust the setting of the blue Switch on the Platen. - Image edges are blurred
- Image edges are affected by white banding
IMPORTANT - Always set all of the blue Switches on the Platen to the side for borderless printing. If the Switch are not set correctly, the print quality may deteriorate.
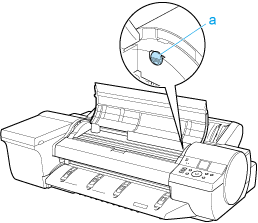
1. Remove any loaded paper that will not be used. 2. Open the Top Cover.
 3. Remove the Cleaning Brush (a).
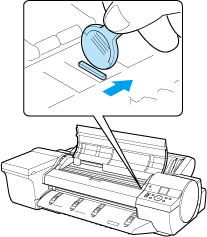
 4. Using the back of the Cleaning Brush, move the first Switch to the side opposite .
 5. Refer to the following table to confirm the number on the Platen (a) that corresponds to the size of paper for printing.
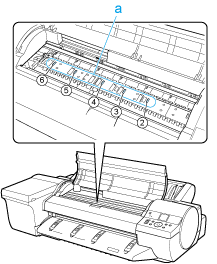 | Number | Dimensions | Paper Size | | 2 | 254 mm (10 in) or 257 mm | 10"x12", 8"x10", or JIS B4 | | 3 | 355 mm (14 in) | 14"x17" | | 4 | 406 mm (16 in), 420 mm, or 432 mm (17 in) | 16-in. Roll (406.4mm), ISO A2, 17-in. Roll (431.8mm), or ANSI C | | 5 | 515 mm (20 in) | JIS B2 or JIS B3 | | 6 | 610 mm (24 in) | ISO A1, ISO A2, or 20"x24" |
6. Using the back of the Cleaning Brush, move the Switch to the side opposite , corresponding to the size of the paper for printing. In this case, note that you will move the switch in the opposite direction from the direction in step 4. NOTE - The Switch only moves number 1 and the number that matches the paper size. Set all of the switches where the number does not match the paper size in switches number 2 and higher to the side.
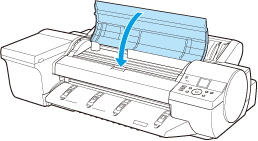
7. Close the Top Cover.
|

