About the operation panel
Many of the printer functions can be performed from the operation panel - making copies, send/receive faxes, scan originals, or print photos on a USB flash drive without a computer.
Panel map
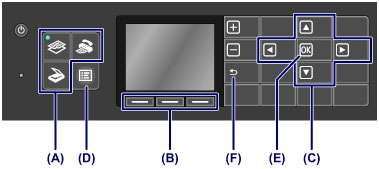
- (A) - Mode selector - Copy, Scan, or Fax mode
- (B) - Function buttons let you choose various functions. The exact function changes with each screen.
- (C) - The arrow buttons
 ,
,  ,
,  , and
, and  are used to navigate the selections highlighted on the LCD screen.
- (D) - Pressing the MENU button displays the menu which provides access to photo print or various copy functions. Also allows access to printer maintenance functions and settings.
General navigation
- On the menu screen or settings screen, use the , , , and button to select an item or option, then press the OK button (E) to proceed with the procedure.
- To return to the previous screen, press the Back button (F).
- The lamp on the selected mode button or MENU button will light up.
- Note: when Numeric buttons are displayed, the Back button appears in a different position.
Function buttons
The number of function menus and their contents vary depending on the screen. Check the function menus displayed at the bottom of the screen, then select the one desired.
- On many screens, Function menus appear at the bottom (G).
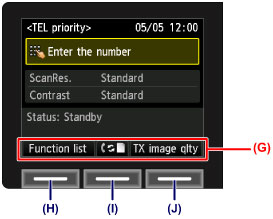
Example: Fax standby screen
- Pressing a corresponding Function button (H), (I), or (J) executes its function.
- In this example,
- Pressing left Function button (H) causes the Function list action - and the fax menu screen appears.
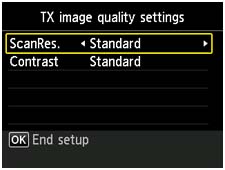
- Pressing the right Function button (J) selects TX image qlty and the transmission (TX) image quality settings screen appears.
MX922 Page
