Reseat or Replace the Print Head on a PIXMA MX722, MX922
Article ID: ART143853
|
Date published: 05/13/2015
|
Date last updated: 01/31/2020
Description
Get video or written instructions on how to reseat or replace the print head.
Solution
View the video below, or if you prefer to follow written instructions, skip to the section after the video to learn how to reset or replace the print head. This video refers to the PIXMA MX922, but the same steps work for the PIXMA MX722.
Written Instructions
There are two parts to the instructions:
Remove the print head.
Reseat or replace the print head.
1. Remove the print head
Turn the printer ON.
Hold the sides of the paper output tray and pull gently.
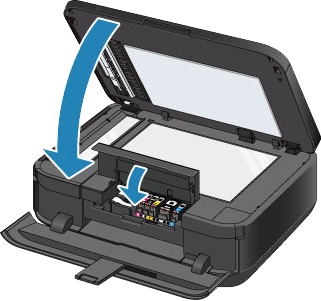
Open the document cover without touching the printer input buttons.
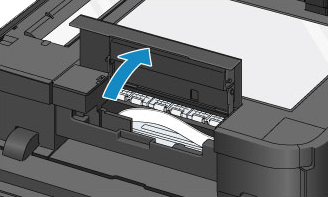
Open the ink cover and wait until the print head holder stops moving. Don't touch the print head or try to stop it yourself.
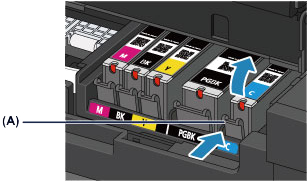
Push the tab (A) on an ink tank and lift it out of the printer.
Remove the rest of the ink tanks from the holder.
Press and hold the Stop button until the print head carriage stops moving. The carriage will move to the right then return almost to the center.
Open the the inner cover(B) and push it down all the way to the bottom.
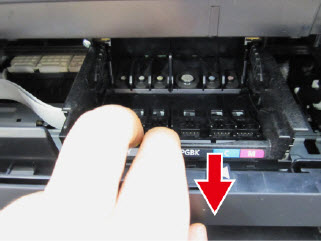
Pull the carriage tray towards the front of the machine. You may find resistance, but the head set lever will move forward as it slides above the front edge.
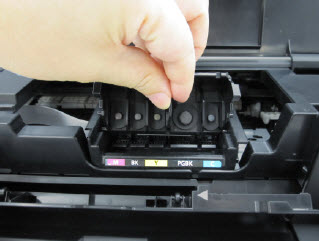
Use your fingertips to grab the top of the center tab and pull out the print head.
.
2. Reseat or replace the print head
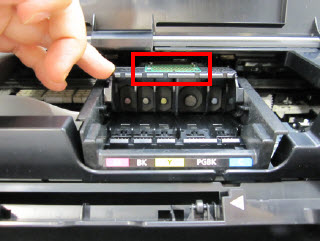
Hold the center tab of the replacement print head, with the front of the print head facing down (so you can see the green circuit board). The two tabs on the front bottom corners of the print head get inserted into the rails on the sides of the print head holder.
Slide the replacement print head into the machine.
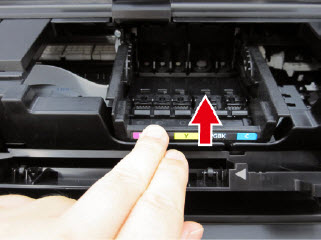
Once the print head is seated in the print head holder, push the Head Set Lever towards the back of the machine.
Close the inner cover.
Insert the ink tanks into their proper slots.
Close the ink cover, then the document cover.
If the print head carriage returns to home position before the print head is installed, close the inner cover and operation panel and follow the instructions on the display.

 This video refers to the PIXMA MX922, but the same steps work for the PIXMA MX722.
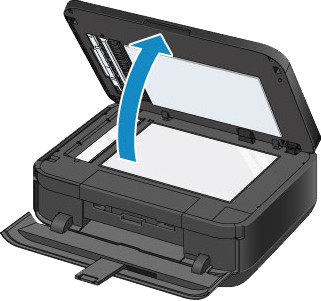

 .
.
 If the print head carriage returns to home position before the print head is installed, close the inner cover and operation panel and follow the instructions on the display.