|
When ImageBrowser EX does not operate correctly, uninstalling (deleting) and reinstalling the software is recommended.
The procedure for uninstalling/reinstalling the software is explained in below.
IMPORTANT
- The following instructions are intended for Mac OS X (v10.8). The screens displayed and setting procedures may differ slightly depending on the version you use.
- The procedures described in this section are for uninstalling [ImageBrowser EX]; however the procedures are similar for uninstalling applications from the [Canon Utilities] folder.
- Please be careful not to accidentally delete any folders with downloaded images that may be contained within the application folder. It is recommended that you save the image folder (create a backup) before uninstallation. Images downloaded to [ImageBrowser] are normally saved in [Go] > [Home] > [Pictures] on the [Menu bar].
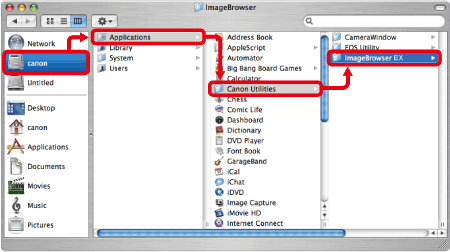
Uninstalling and Reinstalling ImageBrowser EX 1. Click the icon of the hard disk to which the image folder was installed, and then select [Applications] > [Canon Utilities] > [ImageBrowser EX].
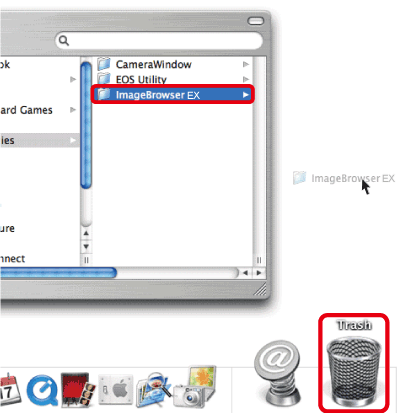
2. Move the [ImageBrowser EX] folder to [Trash].
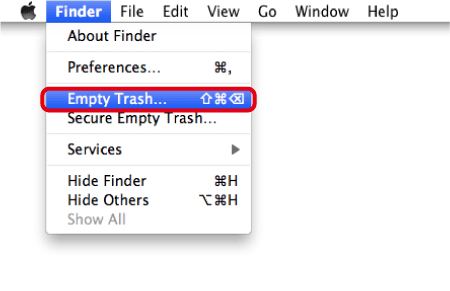
3. From the [Finder] menu, select [Empty Trash].
4. If the [ImageBrowser EX] icon still remains under [Dock], drag the icon to [Trash] to delete.
This completes the process of uninstalling the application.
5. After completing the above procedure, please restart your computer.
IMPORTANT
- If the computer is not restarted after uninstalling ImageBrowser EX, operation problems may occur when the software is reinstalled.
- Refrain from connecting the camera to the computer before completing the reinstallation process, as misoperation may occur. Also check the ImageBrowser EX User guide to make sure the computer meets the system requirements for running the software.
- Using the auto update function of ImageBrowser EX, you can update to the latest version and download new functions via the Internet, so be sure to install the software on a computer with an Internet connection.
- Internet access is required to use this function, and any ISP account charges and access fees must be paid separately.
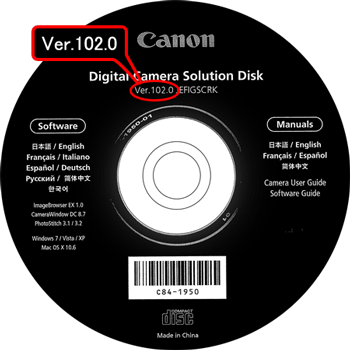
6. Confirm the version information appearing on your Digital Camera Solution Disk, before installing the software.
- If the version number is listed as Ver. 101.0 or earlier or if you do not have a Digital Camera Solution Disk, download [ImageBrowser EX] or [Digital Camera Software] from the Canon home page and follow the instructions displayed. If the [User Account Control] screen is displayed, follow the procedure as described.
- If the version number on your Digital Camera Solution Disk is listed as Ver. 102.0 or later, install using the procedure below.
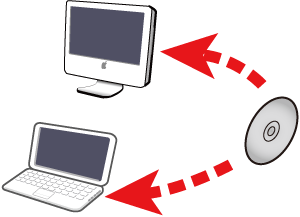
7. Insert the Digital Camera Solution Disk into your computer.
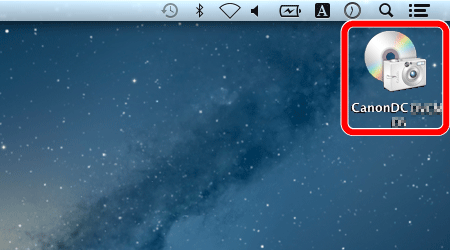
8. Double-click the CD-ROM icon on the desktop.
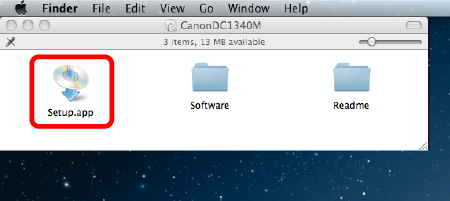
9. The following screen will appear. Double-click [Setup.app].
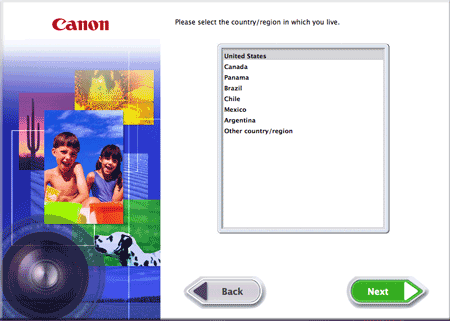
10. Select the area in which you live.

11. Select the country where you live, and then click [Next].
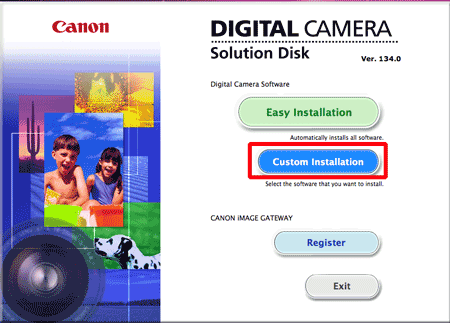
12. Click [Custom Installation] when the screen below is displayed.
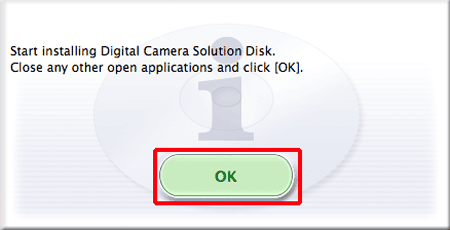
13. Click [OK].
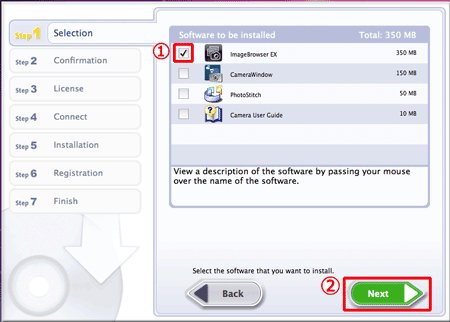
14. When the screen below appears, append  ImageBrowser EX with a checkmark (  ), and then click  [Next].
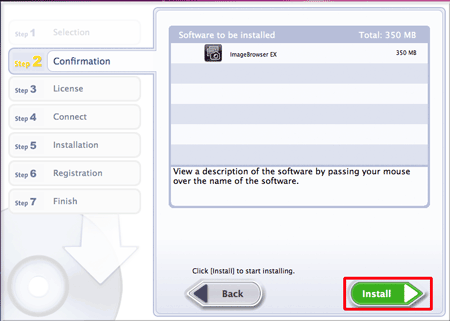
15. Click [Install].
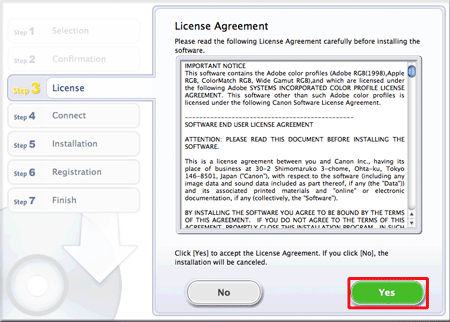
16. Click [Yes] to accept the License Agreement.
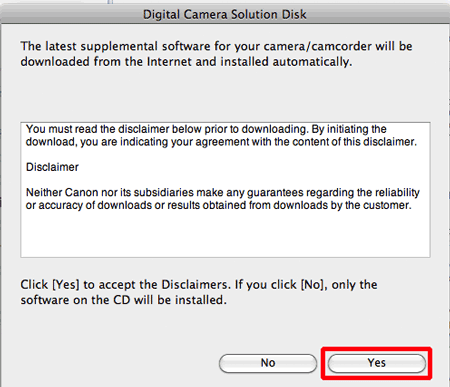
17. When using Digital Camera Solution Disk Ver.102.0 or later, the screen below will appear on computers connected to the internet. If you agree to the disclaimers, click [Yes].
18. The following screen appears.
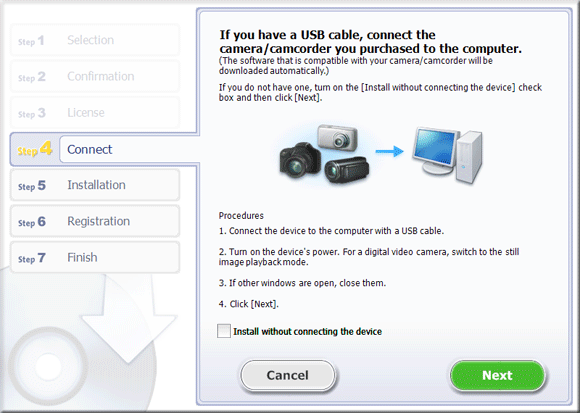
19. Connect the camera to the computer using the interface cable.
*The example below shows the setting procedure for the PowerShot A2600. The position and shape of operational buttons may differ depending on the model you use.
 With the camera turned off, open the cover.  With the smaller plug of the included interface cable in the orientation shown, insert the plug fully into the camera terminal.  Insert the larger plug of the interface cable in the computers USB port. For details about USB connections on the computer, refer to the computer user manual.
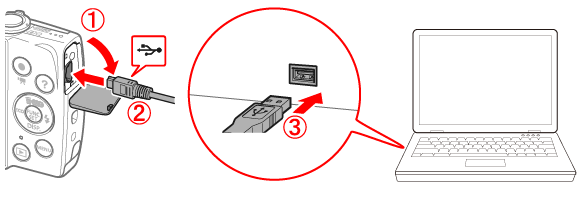
20. Turn the camera on.
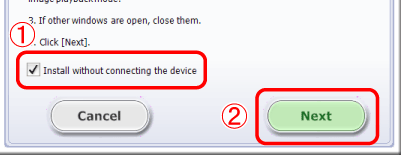
21. Click [Next].
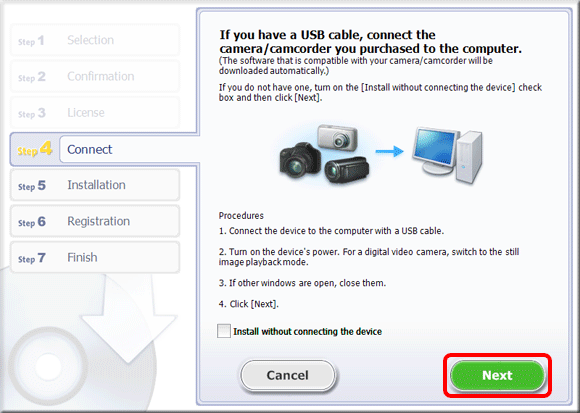
REFERENCE
To do the installation without connecting the camera, select the [Install without connecting the device] check box (  ), and then click [Next]. When the next screen appears, click [OK] and proceed to step 22.
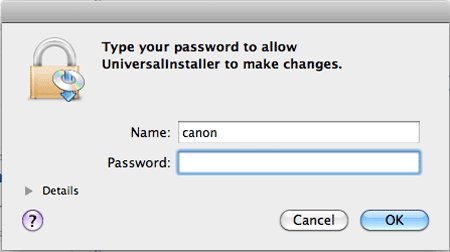
22. If the following screen appears, enter your computers password and click [OK].
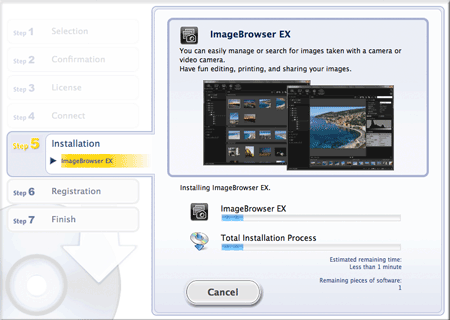
23. The following screen appears, and installation begins.
24. Click [Next].
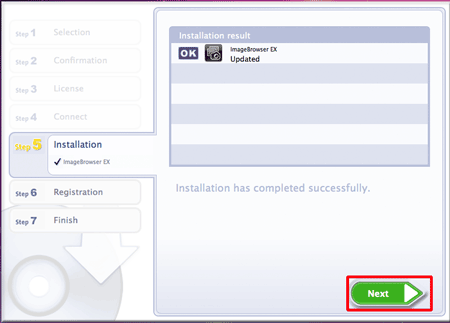
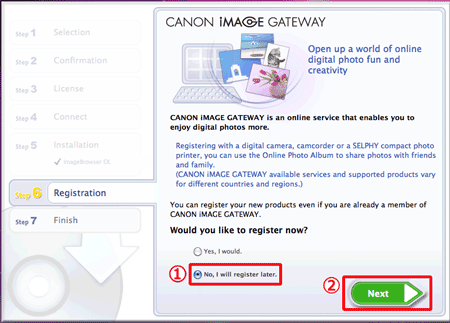
25. The following screen appears.
- In this example [No, I will register later] has been selected, and [Next] has been clicked.
(To register in CANON iMAGE GATEWAY, select [Yes, I would].)
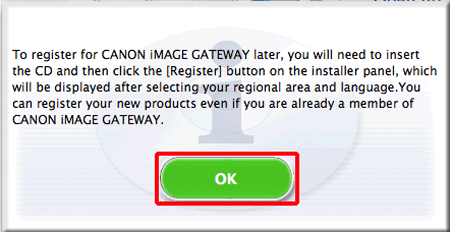
26. Click [OK].
27. Click [Finish].

Problems continue even after ImageBrowser EX has been reinstalled. If the following problems occur even after ImageBrowser EX has been reinstalled, there is a possibility that the database file for ImageBrowser EX may be corrupted.
- ImageBrowser EX does not start.
- Nothing is displayed (images, information, etc.) after ImageBrowser EX is started.
Please follow the procedure explained below to delete the ImageBrowser EX database file, then try restarting ImageBrowser EX.
IMPORTANT
Please note that data information (operational history, etc.) contained in the ImageBrowser EX database file will also be deleted.
1. Before beginning the procedure, make sure to close ImageBrowser EX.
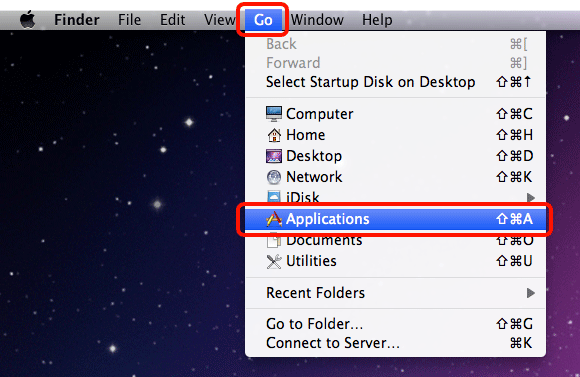
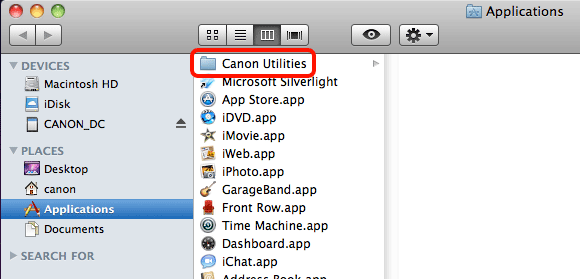
2. Choose [Applications] from the [Go] menu.
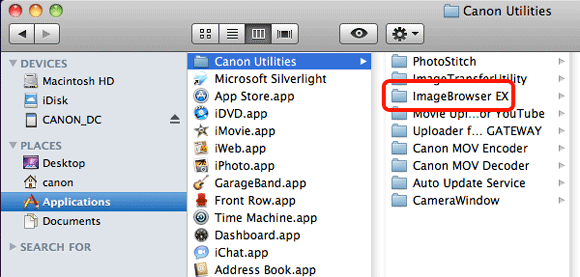
3. Click on the [Canon Utilities] folder.
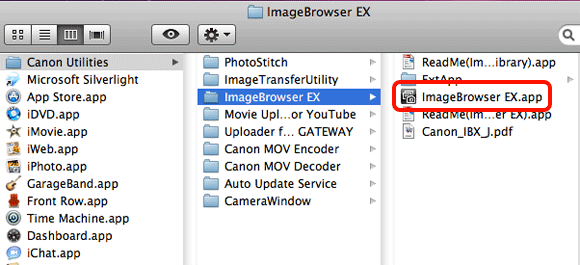
4. Click on the [ImageBrowser EX] folder.
5. While holding the Control key, click on [ImageBrowser EX.app].
(You can also click and hold on [ImageBrowser EX.app].)
6. Click [Show Package Contents] from the menu that appears.
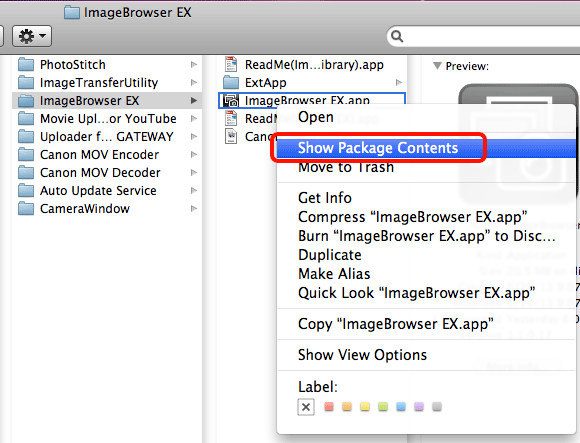
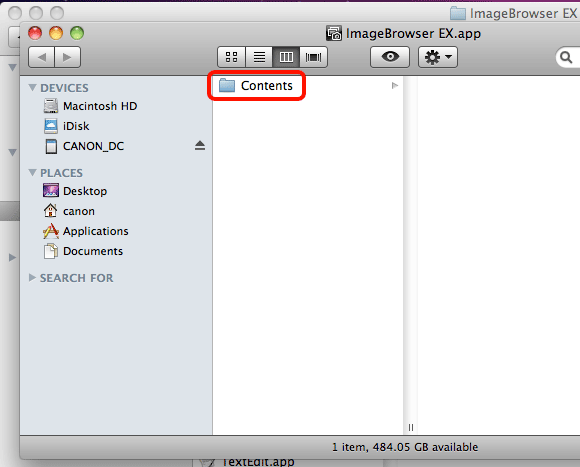
7. Click the [Contents] folder in the window that appears.
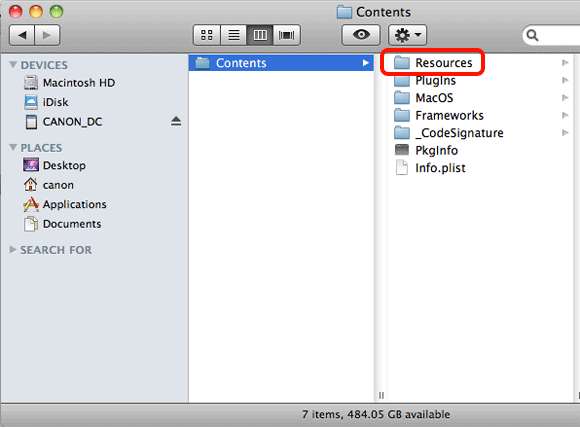
8. Click [Resources].
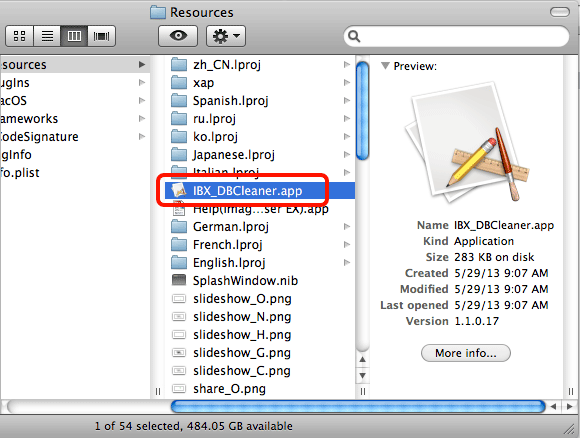
9. Double-click [IBX_DBCleaner.app].
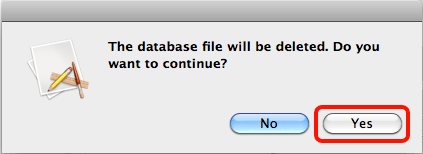
10. Click [Yes] if the following window appears.
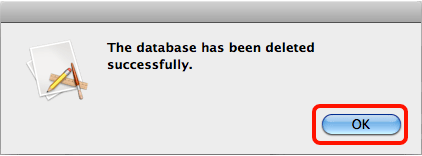
11. Click [OK] if the following window appears.
12. Start ImageBrowser EX.
REFERENCE
After the initial database file has been deleted, a new database file will automatically be created by ImageBrowseEX the next time it is started. This operation may take some time.
|