Download and install the software from the Canon website.
Before you begin
 It may be necessary to connect the camera to the computer when you install the software. If connection with the camera is required, a message will prompt you to connect the camera to the computer. Please use a USB cable (Mini-B size) for connections.
-
With the software, you can update to the latest version, and download new functions via the Internet (some software excluded). Be sure to install the software on a computer with an Internet connection so you can use this function.
-
Internet access is required to use this function, and any ISP account charges and access fees must be paid separately.
-
In this section, Windows 7 is used as an example. The on-screen displays and operations may differ based on the operating system.
-
An account with Administrator privileges is required to install and uninstall software.
-
The camera model names and software names that appear in this explanation may differ from the model you use.
-
The drivers will be installed when you first time you connect the camera to the computer. It might be a few minutes until the images are accessible.
-
If you have several cameras, the content and functions of the software will vary. You must update each camera to its latest version of the software.
Software installation procedure
-
With a computer connected to the Internet, access the Canon website and download the software.
-
Open the downloaded file.
-
The file will be extracted. Double-click the folder to open it.
-
Double-click CanonDCSxxW.exe.
-
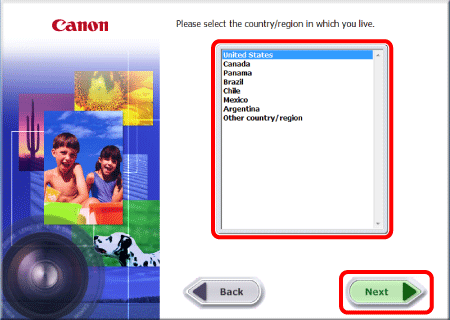
Select the area where you live.
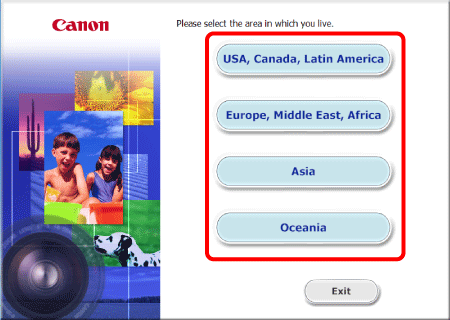
-
Select the country where you live, and then select Next.
-
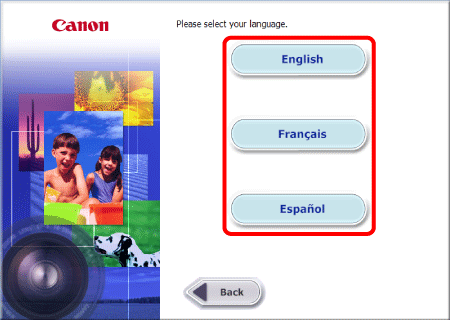
Select your language.
-
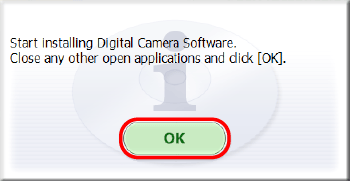
The screen below will appear.
- The screen below will appear. Select OK.
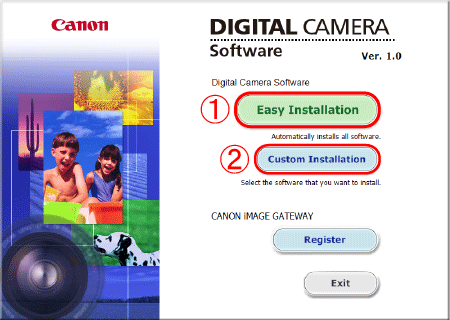
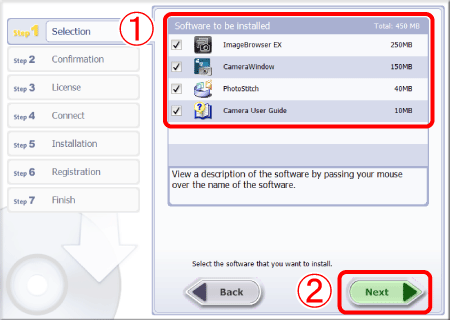
If you selected Custom Installation in Step 8, the screen below will appear after Step 10. The software displayed may differ based on the camera you use.
-
(1) The selected  software applications will be installed.
-
Deselect the checkbox of the software applications that you do not wish to install.
-
(2) Confirm that you have selected all the software applications for installation, then select Next and then proceed with the installation.
-
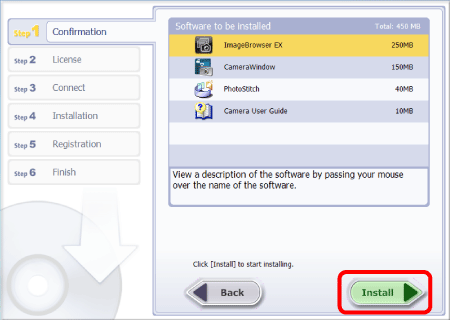
The screen below will appear. Select Install.
-
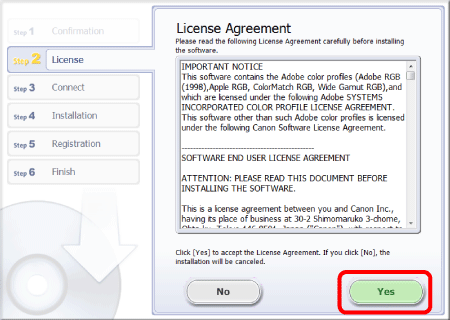
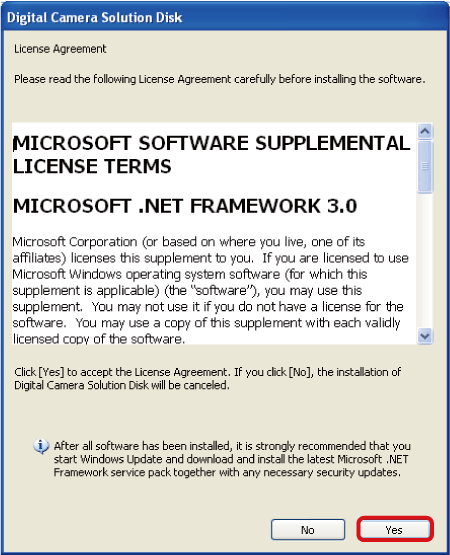
The screen below will appear. Review the information, then select Yes.
-
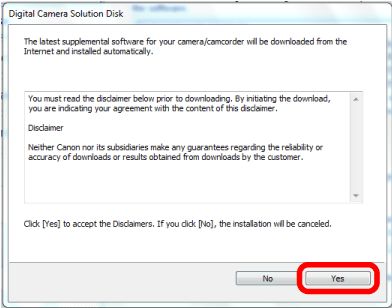
The screen below will appear. Review the information, then select Yes.
-
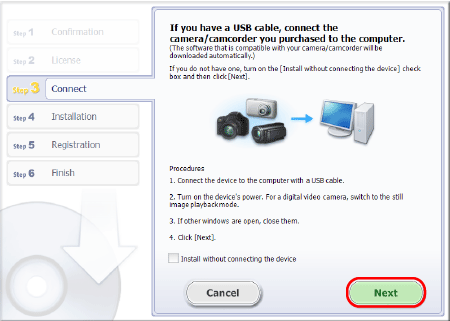
If a message prompts you to connect the camera, connect it to a computer, and then select Next. A message may not be displayed based on the model you use.
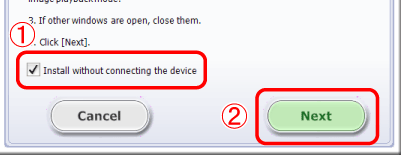
To do the installation without a camera connection, (1) select the Install without connecting the device check box (), and then (2) select Next. When the next screen appears, select OK and proceed to step 12.
-
Connect the camera to the computer with a USB cable.
In this illustration, the PowerShot A2600 is used as an example to explain the operation. The positions of buttons and shape of the model may be different based on the model you have.

-
Turn the camera on.
-
Select Next.
-
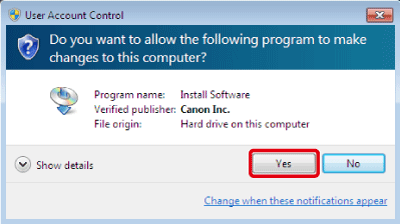
If the window below appears, select Yes.
-
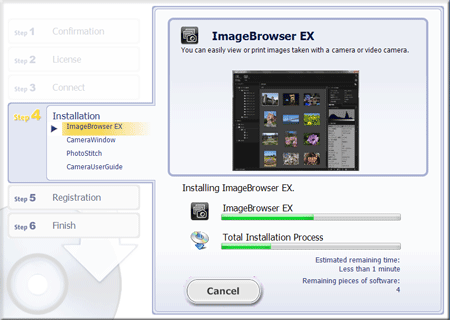
Installation begins.
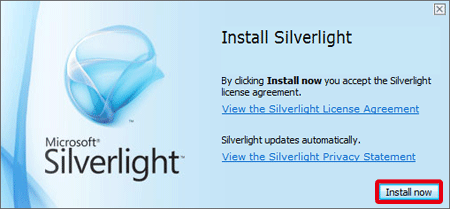
The screen below may appear. Review the content thoroughly, then select Install now. Follow the on-screen instructions for the required operations.
In Windows XP, the window below may appear. Review the information, then select Yes.
-
The screen below will appear. Select Next.

-
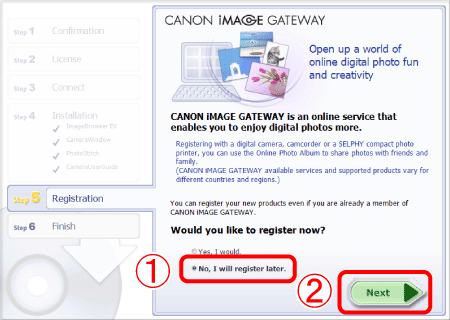
The screen below will appear. If you want to register later, select (1) No, I will register later, and then select (2) Next.
-
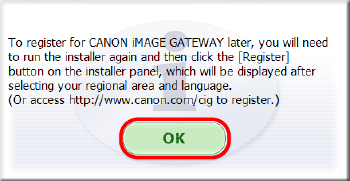
The screen below will appear. Select OK.
-
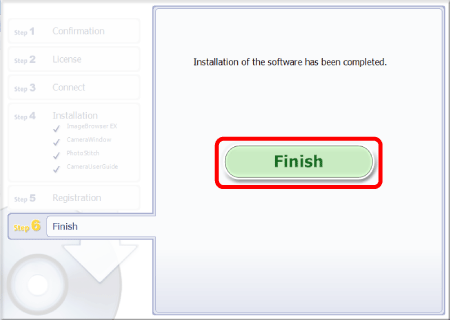
If the screen below appears, select Finish.
If your product issue was not resolved after following the steps above, or if you require additional help, please create or log in to your Canon Account to see your technical support options.
Or if you still need help, visit our Canon Community by clicking the button below to get answers:

____________________________________________________________________________________________
