Load Paper Into Rear Tray
Instructions to load paper into the printer:
Important:
- You cannot print on postcards affixed with photos or stickers.
- Always load paper in portrait orientation (A). Loading paper in landscape orientation (B) can cause the paper to be jammed.

- Flatten the four corners of the paper before loading it.
-Align the edges of paper neatly before loading. Loading paper without aligning the edges may cause paper jams.
-If paper is curled, hold the opposing curled corners and gently bend them in the opposite direction until the paper becomes completely flat.
-Take out only the necessary number of sheets from the package, just before printing.
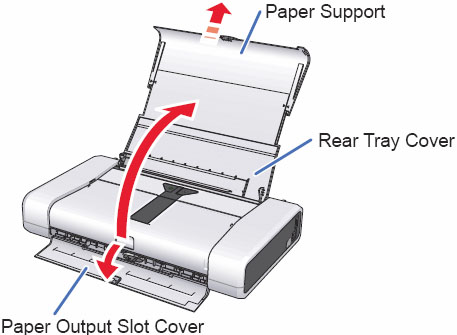
- Open the Rear Tray Cover and pull out the Paper Support completely. The Paper Output Slot Cover will open automatically.
- Set paper, aligned with the right side of the tray, then pinch and move the Paper Guide until it rests against the left side of paper.
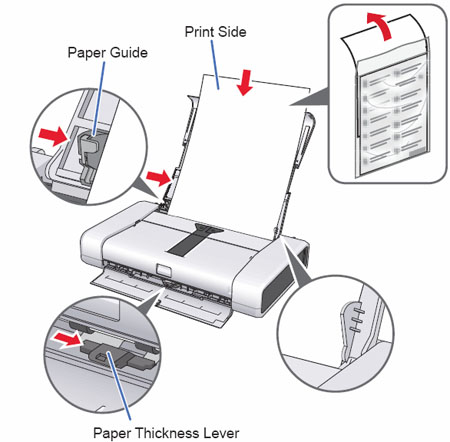
Adjust the Paper Thickness Lever to the appropriate setting.
Note: For envelopes and T-Shirt Transfers, set the paper thickness lever to the left. For paper types other than the above, set the paper thickness lever to the right.
Important: Set paper vertically (short edge first) in the rear tray regardless of printing orientation. If credit card sized Glossy Photo Paper is set in landscape orientation, paper may jam.

Note: Set envelopes with their flaps closed and facing down. If the paper is curled, bend the paper in the opposite direction, and avoid leaving ripples in the paper surface.
