You can print images saved on your iPhone wirelessly, the instructions below will explain how to connect your device to get started.
- Even in places without a router, you can print directly from an iPhone connected wirelessly to this printer.
 Some printer features are not available when printing via Wi-Fi
Before you begin
Using AirPrint
®, you can print directly from an iPhone
®, iPad
®, or iPod Touch
® without installing a printer driver or dedicated application.
Make sure the latest version of iOS
® is installed.
Connect the iPhone®
The example procedure is shown on an iPhone installed with iOS 13.3.1. The setting procedures and screens shown may differ depending on the version you use.
-
Turn the iPhone on.
-
Confirm that the iPhone is not set to Airplane mode.
-
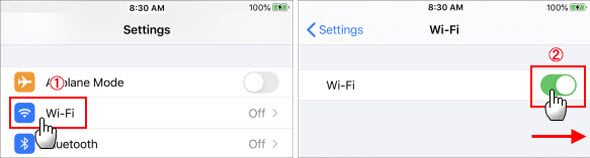
Tap Settings.
-
Tap Wi-Fi (1), and then set the Wi-Fi switch to ON (2).
- Prepare SELPHY.
For more information, please refer to printing images with your new SELPHY CP910 photo printer.
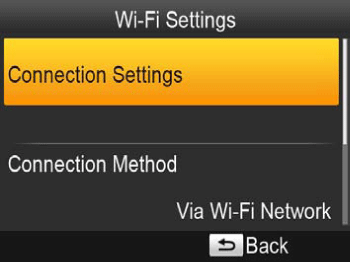
- Access the setting screen.
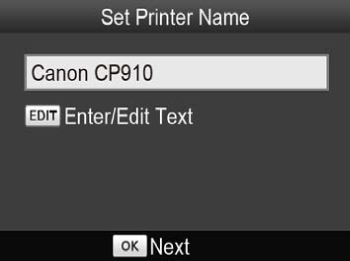
- Check the printer name.
-
Check the displayed printer name and tap OK.
-
When you connect devices via Wi-Fi, this name will be displayed on the target device to identify the printer.
-
You can change the printer name by pressing the EDIT button.
- Choose the connection method.
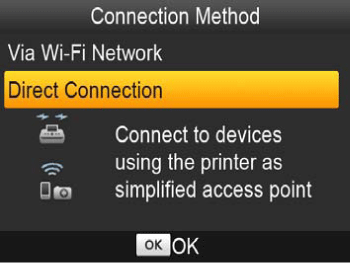
- The screen below displays.
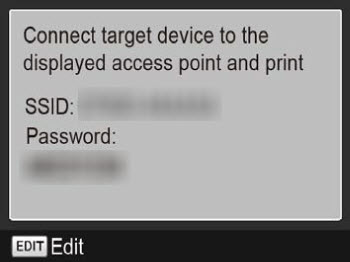
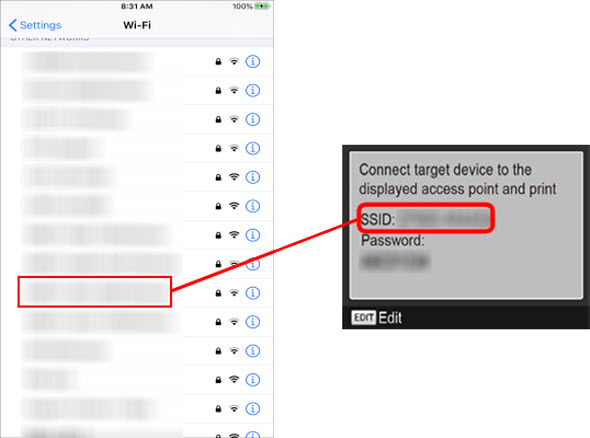
- Use your iPhone to join the network displayed on the printer screen.
-
In the smartphone's Wi-Fi settings, select the SSID (network name) displayed on the printer.
-
Enter the password displayed on the printer into the password field.
When entering the password, please be careful of numbers and letters that may be easily confused ( '1' and 'I', or '0' and 'o').
- After confirming that iPhone and the camera are connected, return to the Home screen.
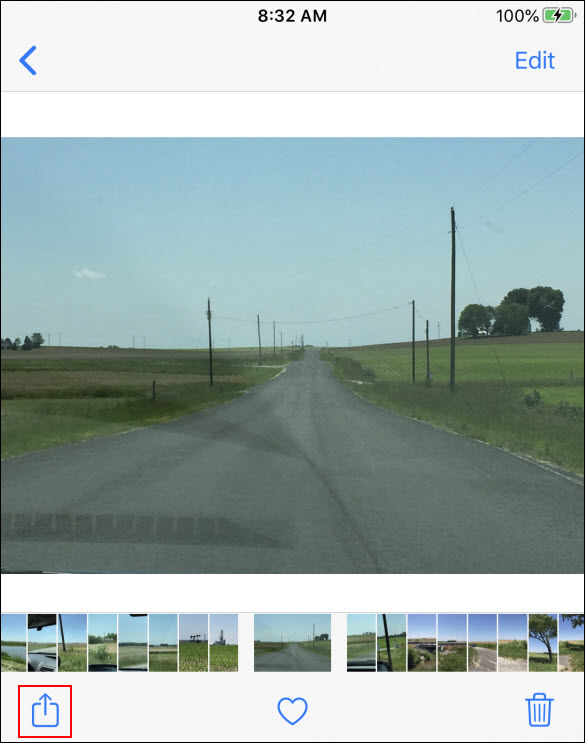
- Use the iPhone application software to select the image you want to print.
- Tap
 to display the menu.
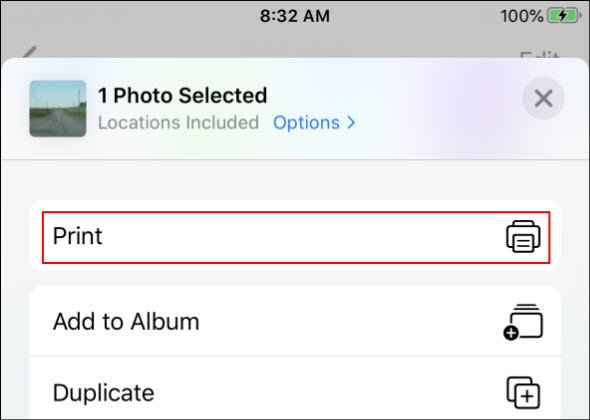
- Tap Print.
- Configure printer options.
- In Printer (1), choose Canon CP910 (2), and specify the number of copies. Then then tap Print (3).
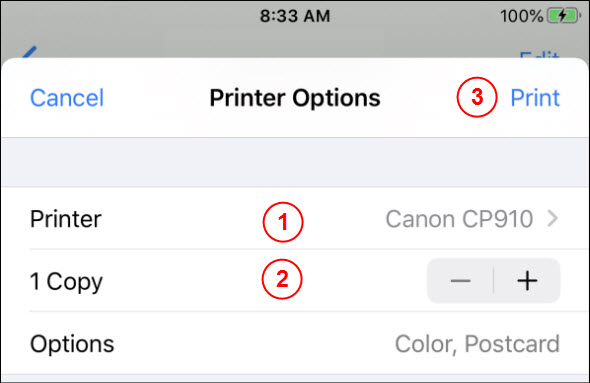
Printer Options may not be displayed depending on AirPrint® compatibility of the application. If printer options are not available, printing is not possible from the application.
- Once printing begins, the following screen displays.
- Do not disconnect the devices or close the application while this screen displays. Images may not print correctly or completely.
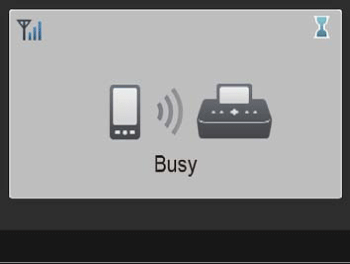
Printing in progress cannot be canceled from SELPHY by using the < > button. Use the smartphone to stop printing.
- The standby screen displays when printing is finished.

The printer does not enable communication between the devices connected to it.
Subsequent Prints
-
Once you have completed the connection settings, the second, standby screen is displayed automatically when you turn on the printer. To print, after the standby screen is displayed, simply use the smartphone as described from step 12.
-
During standby-screen display, you can view the SSID and password by pressing the OK button. You can also change the password on the screen displayed by pressing the EDIT button.
-
Even during standby, you can print images on a memory card by inserting the card to access the image display screen.
If your product issue was not resolved after following the steps above, or if you require additional help, please create or log in to your Canon Account to see your technical support options.
Or if you still need help, visit our Canon Community by clicking the button below to get answers:

____________________________________________________________________________________________

 .
.
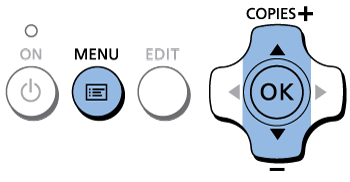
 to select Wi-Fi Settings, then tap OK.