| Solution |
With your camera, you can shoot photos while viewing the image on the camera's LCD monitor. This is called "Live View shooting".
This page describes how to change the focus mode for Live View shooting. For details on how to perform easy Live View shooting in default settings, please refer to the related information.
Please note that some shooting procedures differ between still photos and movies. To shoot still photos, please refer to the instructions for still photos, and to shoot movies, please refer to the instructions for movies.
Part I. Preparing for Live View Shooting
1. Set the camera's power switch to <ON>.
2. Turn the Mode Dial to set the shooting mode.
- To shoot still photos, you can select all modes except for Movie shooting mode.
- To shoot movies, select <
 > (Movie shooting). > (Movie shooting).
To use AF to focus, please proceed to Part II. To focus manually, please proceed to Part III. Part II, and III describe common procedures for still photos and movies.
Part II. Selecting the AF Mode
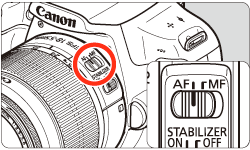
3. Set the lenss focus mode switch to <AF>.
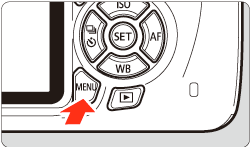
4. Make sure that the camera is ready to take shots, and then press the <MENU> button.
5. Press the <Cross Keys> to select tabs on the MENU screen.
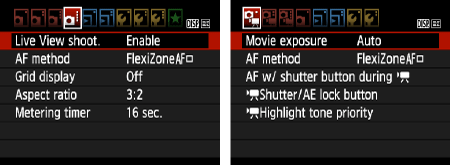
- To shoot still photos, select the [
 ] tab, and then select [Enable] in the [Live View shoot.] option. ] tab, and then select [Enable] in the [Live View shoot.] option.
*In the Basic Zone modes, the menu options will be displayed under the [  ] tab.
- To shoot movies, select the [
 ] tab. ] tab.
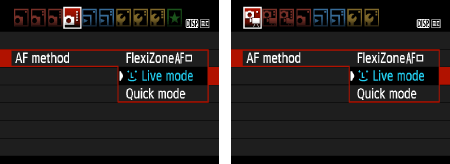
6. Select [AF mode], and then press <SET>.

7. Select the AF mode, and then press <SET>.

NOTE
While the image is displayed on the LCD monitor, pressing the <  > button will enable you to set the AF mode etc. on the Quick Control Screen. For more information, please refer to the instruction manuals that came with your camera.
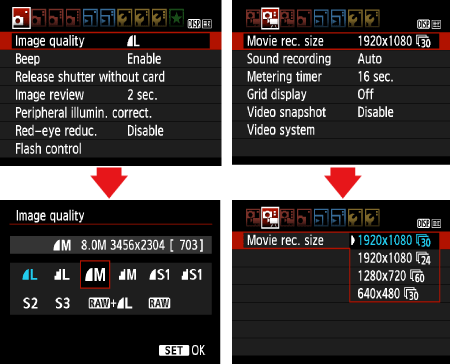
8. Select the image-recording quality for still images or the movie-recording size for movies.
- For still images, select [Quality] from the [
 ] tab, press <SET>, and then select the image quality from the screen that appears. ] tab, press <SET>, and then select the image quality from the screen that appears.
- For movies, select [Movie rec. size] from the [
 ] tab, press <SET>, and then select the recording size and frame rate from the screen that appears. The frame rate switches automatically depending on the [ : Video system] setting. ] tab, press <SET>, and then select the recording size and frame rate from the screen that appears. The frame rate switches automatically depending on the [ : Video system] setting.
For more information on the image-recording quality for still images or the movie-recording size and frame rate for movies, please refer to the cameras Instruction Manual.
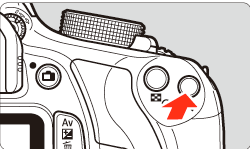
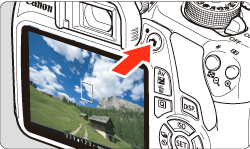
9. To shoot still photos, press the <  > (Live View shooting/Movie shooting) button, or to shoot movies, press the <MENU> button, and then close the menu window. An image will appear on the LCD monitor.
Still Images

Movies
Please proceed to Part II 1 to 3 depending on the AF mode setting.
Part II-1: Using AF (Live Mode) to Focus
Part II-2: Using AF (Face detection Live Mode) to Focus
Part II-3: Using AF (Quick Mode) to Focus
Part II-1: Using AF (Live Mode) to Focus
When [FlexiZone - Single] is set:
The image sensor is used to focus. Although AF is possible with the Live View image displayed, the AF operation will take longer than with Quick mode. Also, achieving focus may be more difficult than with Quick mode.
[FlexiZone - Single] is set by default.
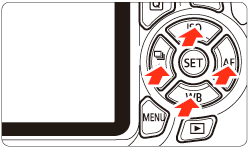
10.  Move the AF point.
- Press the <
 > to move the AF point () to where you want to focus (it cannot go to the edges of the picture). > to move the AF point () to where you want to focus (it cannot go to the edges of the picture).
- To return the AF point () to the center, press <SET>. (If C.Fn-9 has been set, press <
 / / > + <SET>.) > + <SET>.)

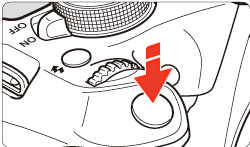
11. Aim the AF point over the subject and press and hold the shutter button halfway.
- When focus is achieved, the AF point will turn green and the beeper will sound.
- If focus is not achieved, the AF point will turn orange.
Please proceed to Part IV.
Part II-2: Using AF (Face detection Live Mode) to Focus
When [  (Face Detection) Live AF] is set: With the same AF method as the [FlexiZone - Single], human faces are detected and focused. Have the target person face the camera.
10. Focus the target face.
- When a face is detected, the [
 ] frame will appear over the face to be focused. ] frame will appear over the face to be focused.
- If multiple faces are detected, [
 ] will be displayed. Press the < ] will be displayed. Press the < > keys to move the [ ] frame over the target face. > keys to move the [ ] frame over the target face.

11. Press the shutter button halfway and the camera will focus the face covered by the [ ] frame.
- When focus is achieved, the AF point will turn green and the beeper will sound.
- If focus is not achieved, the AF point will turn orange.
- If a face cannot be detected, the AF point [
 ] will be displayed and AF will be executed at the center. ] will be displayed and AF will be executed at the center.
CAUTION
Notes when shooting in [ (Face detection) Live mode]
- If the subjects face is significantly out of focus, face detection will not be possible. If the lens enables manual focusing even while the lens focus mode switch is set to <AF>, turn the focusing ring to attain rough focus. The face will then be detected and [ ] will be displayed.
- An object other than a human face may be detected as a face.
- Face detection will not work if the face is very small or large in the picture, too bright or too dark, titled horizontally or diagonally, or partially hidden.
- The [ ] may cover only part of the face.
NOTE
- When you press <SET>, the AF method will switch to the [Live mode]. You can press the <> key to move the AF point. Press <SET> again to return to [ (Face detection) Live Mode]. (If C.Fn-9 is set, hold down the </> button and press <SET>.)
- Since AF is not possible with a face detected near the edge of the picture, the [ ] will be grayed out. Then if you press the shutter button halfway, the center AF point [ ] will be used to focus.
Please proceed to Part IV.
Part II-3: Using AF (Quick Mode) to Focus
The dedicated AF sensor is used to focus in One-Shot AF, using the same AF method as with viewfinder shooting.
Although you can focus on the target subject quickly, the Live View image will be interrupted momentarily during the AF operation.
You can use nine AF points to focus (automatic selection). You can also select one AF point to focus and focus only the area covered by that AF point (manual selection).

10. The small boxes on the screen are the AF points ( ), and the larger box (  ) is the magnifying frame.

11. Press the < > button to display the Quick Control screen. The settable functions will be displayed on the left of the screen.

12. Select the AF point. Press the <  > (Cross Keys) to make the AF point selectable. Turn the <  > (Main Dial) to select the AF point.

13. Aim the AF point over the subject and press the shutter button halfway. (Keep the shutter pressed.)
14. The Live View image will turn off, the reflex mirror will go back down, and AF will be executed. (No picture is taken.)
- When focus is achieved, the AF point that achieved focus will turn green and the Live View image will reappear.
- If focus is not achieved, the AF point will turn orange and blink.

Please proceed to Part IV.
Part III: Focusing Manually
You can magnify the image and focus precisely manually.
3. Once you have completed steps 1 and 2 of Part I, set the lens focus mode switch to <MF>.

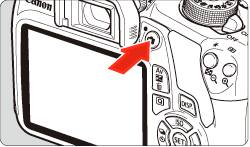
4. To shoot still photos, make sure that the camera is ready to take shots, and then press the < >(Live View shooting) button. To shoot movies, set the Mode Dial to < >.
5. The Live View image will appear on the LCD monitor.
Turn the lens focusing ring to focus roughly.
6. Press the < > key to move the magnifying frame ( ) to where you want to focus. Press <SET> to return the magnifying frame to the center. (If C.Fn-9 is set, hold down the < / > button and press <SET>.)

7. Press the <  > (Magnifying) button to magnify the area within the frame. Each time you press the < > button, the display format will change as follows: Normal view -> Approx. 5x -> Approx. 10x -> Normal view
8. While looking at the Live View image on the LCD monitor, turn the focusing ring to focus manually.
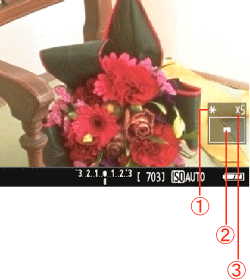
AE lock Magnified area position  Magnification
9. After achieving focus, press the < > (Magnifying) button to check the image composition in normal view.
Part IV : Shooting
After focus is achieved by following the instructions in Part II-III, you can start shooting.
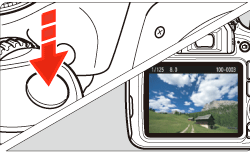
To shoot still photos, press the shutter button completely.
- The picture will be taken and the captured image is displayed on the LCD monitor.
- After the image review ends, the camera will return to Live View shooting automatically.
To shoot movies, press < >.
- To stop shooting the movie, press < > again.
- While the movie is being shot, the "
 " mark will be displayed on the upper right of the screen. " mark will be displayed on the upper right of the screen.
General Notes for Live View Shooting
Please be aware of the following notes for Live View shooting.
WARNING
Do not hold the camera in the same position for long periods of time.
Even if the camera does not feel too hot, prolonged contact with the same body part may cause skin redness, blistering or low-temperature contact burns. The use of a tripod is recommended for people with circulation problems or very sensitive skin, or when using the camera in very hot places.
IMPORTANT
Live View Image
- Under low- or bright-light conditions, the Live View image may not reflect the brightness of the captured image.
- Even if a low ISO speed is set, noise may be noticeable in the displayed Live View image under low light. However, when you shoot, the image recorded will have minimal noise. (The image quality of the Live View image is different from that of the recorded image.)
- If the light source (illumination) within the image changes, the screen may flicker. If this happens, exit Live View shooting and resume Live View shooting under the actual light source.
- If you point the camera in a different direction, it may throw off the Live View images correct brightness momentarily. Wait until the brightness level stabilizes before shooting.
- If there is a very bright light source in the picture, the bright area may appear black on the LCD monitor. However, the actual captured image will correctly show the bright area.
- In low light, if you set the
 : LCD brightness] to a bright setting, noise or irregular colors may appear in the Live View image. However, the noise or irregular colors will not be recorded in the captured image. : LCD brightness] to a bright setting, noise or irregular colors may appear in the Live View image. However, the noise or irregular colors will not be recorded in the captured image.
- When you magnify the image, the image sharpness may look more pronounced than in the actual image.
Custom Functions
- During Live View shooting, some Custom Function settings will not take effect.
For more information on custom functions, please refer to the cameras Instruction Manual.
Lens and Flash
- During Live View shooting, focus preset for super telephoto lenses cannot be used.
- FE lock is not possible when the built-in flash or an external Speedlite is used. Modeling flash will not work with an external Speedlite.
Image Quality
- When you shoot at high ISO speeds, noise (such as dots of light and banding) may become noticeable.
- Shooting in high temperatures may cause noise and irregular colors in the image.
- If Live View shooting is used continuously for a long period, the cameras temperature may rise, and image quality may deteriorate. Always exit Live View shooting when you are not shooting.
- If you shoot a long exposure while the cameras temperature is high, image quality may deteriorate. Exit Live View shooting and wait a few minutes before shooting again.
White [  ] and Red [  ] Temperature Warning Icons
- If the cameras temperature increases due to prolonged movie shooting or under a high ambient temperature, a white [ ] or red [ ] icon will appear.
- The white [ ] icon indicates that the image quality of still photos will deteriorate. It is recommended that you temporarily exit Live View shooting and allow the camera to cool down before shooting again.
- The red [ ] icon indicates that the Live View shooting will soon stop automatically. If this happens, you will not be able to shoot again until the cameras temperature decreases. Exit Live View shooting or turn off the power and let the camera rest for a while.
- Using Live View shooting at a high temperature for a prolonged period will cause the [ ] or [ ] icon to appear earlier. When you are not shooting, turn off the camera.
- If the cameras temperature is high, the image quality of high ISO speed images or long exposures may deteriorate even before the white [ ] icon is displayed.
Shooting Result
- If you take the picture in magnified view, the exposure may not come out as desired. Return to the normal view before taking the picture. In magnified view, the shutter speed and aperture will be displayed in orange. Even if you take the picture in magnified view, the image will be captured in the normal view range.
- If [ : Auto Lighting Optimizer] is set to other than [Disable], the image may look bright even if a decreased exposure compensation or decreased flash exposure compensation is set.
- If you use a TS-E lens (except the TS-E17mm f/4L or TS-E24mm f/3.5L II) and shift or tilt the lens or use an Extension Tube, the standard exposure may not be obtained or an irregular exposure may result.
Notes for [FlexiZone - Single] and [ Live mode] AF Operation
- Focusing will take longer than with [Quick mode].
- Even when focus has been achieved, pressing the shutter button halfway will focus again.
- You cannot focus a moving subject continuously.
- The image brightness may change during and after the AF operation.
- If the light source changes while the Live View image is displayed, the screen may flicker and focusing may be difficult. If this happens, exit Live View shooting and execute autofocus under the actual light source.
- When [FlexiZone - Single] is set and you press the <> button, the area covered by the AF point will be magnified. Press the shutter button halfway to focus while in the magnified view. This is effective when the camera is attached to a tripod and you need to attain very precise focus. If focusing is difficult in magnified view, return to the normal display and use AF. Note that the AF speed may differ between the normal and magnified views.
- If you magnify the view after focusing with [FlexiZone - Single] in the normal view, precise focus may not be achieved.
- If [ : Live mode] is set, magnified view is not possible.
NOTE
Playback and TV set connection
If you connect the camera to a TV set with an HDMI cable and shoot a movie at [1920x1080] or [1280x720], the movie being shot will be displayed in a small size on the TV set. The movie will still be recorded in the movie-recording size that was set.
If you connect the camera to a TV set and shoot a movie, the TV set will not output any sound during the shooting. However, the sound will be properly recorded.
For more information on connecting the camera to a TV, please refer to the cameras Instruction Manual.
|