Installing the Printer driver / software - Windows (SELPHY ES1)
Article ID: ART151527
|
Date published: 05/22/2015
|
Date last updated: 12/29/2015
Description
Installing the Printer driver / software - Windows (SELPHY ES1)
Solution
Installing the CP Printer driver - Windows
Do not connect the printer until the software and printer driver are installed.
Be sure to log on with Administrator privileges (computer system administrator) when installing the software.
Close any programs that are running.
Place the COMPACT PHOTO PRINTER Solution Disk in the CD-ROM drive.
- How to display the installer panel
If the installer panel does not automatically appear, use the following procedure to display it.
Click the Start button and select My Computer.
For Windows 2000, double-click the My Computer icon on the desktop.
Right-click the CD-ROM icon and select Open.
Double-click the "SETUP.EXE"* icon ().
*The ".EXE" extension may not display depending on the computer used.
Click the Printer Driver Select printer button.
Click the printer you are using.
Click Yes to consent to the license agreement and continue the installation.
The install process begins.
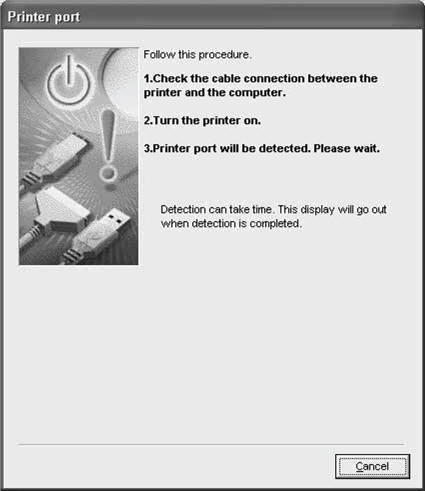
When the screen below appears, connect the printer to the computer with a commercially available USB cable and turn the printer's power on.
Follow the onscreen instructions to proceed.
When a dialog box appears instructing that the installation is complete, click Finish.
Restart your computer when a dialog box appears instructing you to do so.
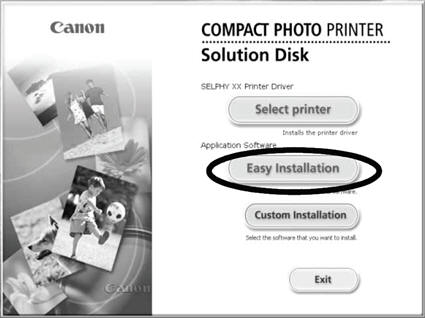
Installing the software to your computer.
Click the Easy Installation button.
Select Custom Installation only if you want to individually select programs for installation.
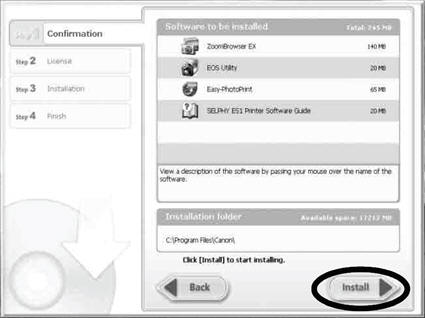
Follow the onscreen instructions and click Install when the screen for confirming the installation details appears.
Follow the onscreen instructions to proceed. When a dialog box appears instructing that the installation is complete, click Finish.
Restart your computer when a dialog box appears instructing you to do so.
When the computer desktop displays, remove the Solution Disk from the CD-ROM drive.