| Article ID: ART151616 |
| |
Date published: 05/22/2015 |
| |
Date last updated: 12/29/2015 |
Description
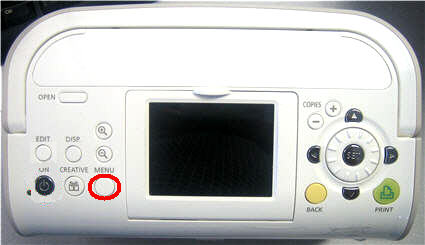
Setting the Red-Eye reduction setting (SELPHY ES2)
Solution
Red-Eye Correction Menu Setting (SELPHY ES2)
- Press the Menu button.
- Use the up or down arrows to scroll down to Print Settings on the LCD menu.
- Press the SET button.

- The 'Printer Settings' screen is displayed. Scroll down to 'Correct Red-Eye'. Once 'Correct Red-Eye' is highlighted, the options 'On Off' are displayed. (Off is the default setting)
- Use the right or left arrow to set this option to 'On' or 'Off' as desired..

- Press the SET button to save the settings.
- Press the Back button to return to the main display.
- Assuming that you have inserted a memory card in the appropriate slot on the printer and located the image you want to print, press the PRINT button to begin printing..
