In order to set the paper size in the multi-purpose feeder, you must load a single piece of paper into the multi-purpose feeder first. Otherwise, if you check the paper size set, it will display A4 for the multi-purpose feeder. Follow these steps to set the paper size correctly.
Solution
Setting the Paper Size in Multi-Purpose Feeder
Before you can set the paper size in the multi-purpose feeder, you must load a single sheet of paper into the multi-purpose feeder.
The paper in the multi-purpose feeder is fed prior to the paper in the cassette.
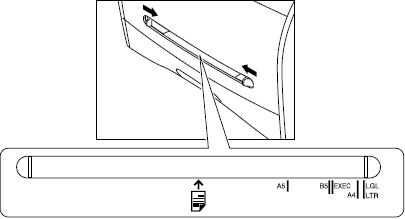
Slide the slide guides to fit the size of the paper you want to load.
If the slide guides are not adjusted correctly or the size of the paper, the quality of your printouts may be adversely affected or jams may occur.
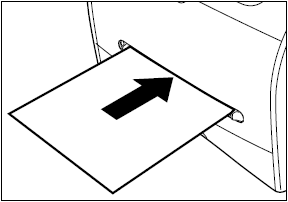
Insert the paper straightly into the multi-purpose feeder with the print side up.
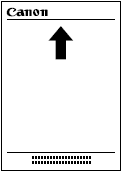
When you load paper with a logo on it, position the paper with the print side up (logo side) and insert it so that the top of the paper feeds first in the multi-purpose feeder.
Specify the paper size.
Press <Menu>, then press <Set>. Press <> or <> to select [2.MP TRAY], then press <Set> twice. Press <> or <> to select the appropriate paper size, then press <Set> twice.
Select [ENVELOPE] for envelopes.
When [FREESIZE] is selected, you can specify vertical and horizontal sizes of the paper in the following ranges:
-[VERTICAL SIZE]: 127 mm to 356 mm (5" to 14")
-[HORIZONTAL SIZE]: 76 mm to 216 mm (3" to 8 1/2")
Specify the paper type.
Press <> or <> to select the appropriate paper type, then <Set>. Press <Stop/Reset> to return to standby mode.

 > or <
 > to select [2.MP TRAY], then press <Set> twice.