Uninstall and Reinstall the Printer Driver (Windows 7)
Follow the steps below to uninstall the printer driver:
Important: You must have Internet access in order to reinstall the printer driver.
- Turn the printer off.
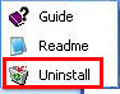
- Select 'All Programs' from the Start menu.
- Select the FAX-JX210P and then select 'Uninstall' from the menu that appears.
Note: Click here if your printer does not appear in the Programs menu.
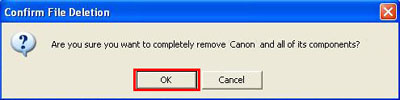
- When the confirmation message shown below is displayed, click 'OK'.
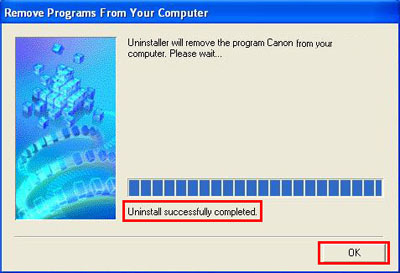
- A window showing the progress of the un-installation is displayed. Wait until the "Uninstall successfully completed" message is displayed, and then click 'OK'.
Note: If you uninstall the printer driver from the Control Panel, the printer model name will remain in the Programs menu. To completely remove all files, including the printer model name from the Start menu, uninstall the printer driver using the procedure described in step 2.
Use the steps below to uninstall the printer driver if your printer does not appear in the Programs menu.
- Make sure your printer is connected and turned OFF (or the power cord is unplugged).
-
Turn on your computer and log on as Administrator.
-
Open the Printers window.
Select 'Devices and Printers' from the 'Start' menu.
-
Click your right mouse button on the FAX-JX210P icon and select 'Remove' from the menu that appears.
-
Click 'Yes' to proceed with the deleting process.
-
Click the 'Server Properties' button at the top of the window.
-
Click the 'Drivers' tab. Select your Canon printer from the list and click 'Remove'.
-
Click 'Yes' to proceed with the deleting process.
Follow the steps below to reinstall the printer driver:
Important: You must have Internet access in order to reinstall the printer driver.
- Quit all running applications before installation.
- You need to log on as the administrator (or a member of the Administrators group).
- Do not switch users during the installation process..
- Make sure the printer is still powered off.
- Access the download site.
Click Here to Access
Note: If you have already downloaded the printer driver, proceed to Step 7.
- Type your model name or number in the search box, select it from the list of models and click the Get Drivers & downloads button
- Files for your version of Windows 7 will show under the Recommended Downloads or Drivers tabs. Click the select button for the file(s) you wish to download.
- Check the 'I have read and agree....' checkbox if you agree with the License terms then click Download to proceed with the download
- Select the 'Save' option if it appears and note the location where the driver file is to be saved.
- After the download is complete, double click the driver file from its download location to start the installation.
- Follow all on screen instructions to complete the installation.
