Scanning Film Using MP Navigator EX
This machine supports 35 mm positive and negative film strips (standard state of developed film, with six frames in each strip). You can scan one frame at a time.
important:
To scan at 4800 dpi or higher, scan from the Advanced Mode tab of ScanGear (scanner driver).

35 mm Film Strip
reference:
The following is explained using Windows Vista procedures.
Scanning Film
1. Start MP Navigator EX and open the Navigation Mode screen.
reference:
Starting MP Navigator EX
- Windows
- Double-click Canon MP Navigator EX 2.1 icon on the desktop.
Alternatively, from the Start menu, select (All) Programs > Canon Utilities > MP Navigator EX 2.1 > MP Navigator EX 2.1.
- Macintosh
- Open the Applications folder on the hard disk on which MP Navigator EX is installed, then open the Canon Utilities folder and double-click the MP Navigator EX 2.1 icon.
2. Point to Scan/Import and click Film.

3. Place the film on the Platen.
4. Click Specify... to set the document size and scanning resolution as required.
When setting is completed, click OK.
important:
Film may not be scanned correctly when Film Type in the Scan Settings dialog box is set to Auto. In that case, select the type of film in Film Type and scan again.
reference:
To scan black and white film, it is recommended that you select Black and White Negative Film or Black and White Positive Film for Film Type in the Scan Settings dialog box.
5. Click Scan.
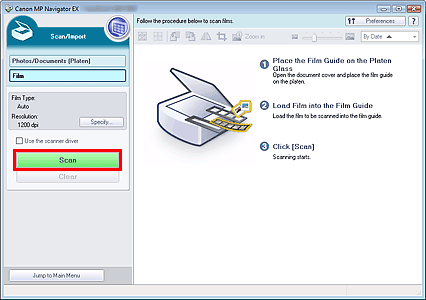
Preview scan starts.
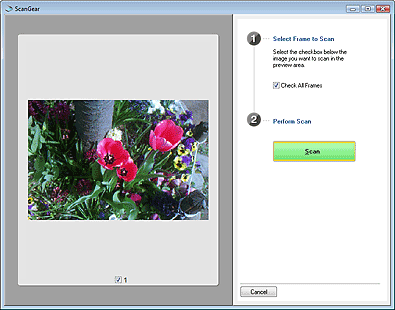
When preview scan of the film is completed, the preview image appears.
important:
- If a message for calibration appears, remove the film, then place the Film Adapter Unit over the first frame of the Film Guide and click OK.
- When the calibration is completed, follow the on-screen instructions to load the film into the Film Guide, then click OK.
reference:
- Preview image does not appear when the Preview before scanning checkbox is not selected in the Scan Settings dialog box. The scanned images appear directly in the Thumbnail window.
6. Select the checkbox of the frame and click Scan.
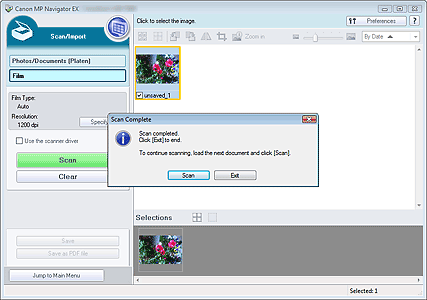
When scanning is completed, the Scan Complete dialog box opens. Select Scan or Exit. To scan another frame, place the Film Adapter Unit over the frame you want to scan, then select Scan. Select Exit to end.
The scanned images appear in the Thumbnail window.
7. Edit the scanned images as required.
Use Edit Tools to rotate images, select a part of an image, etc.
reference:
First select images to edit. (Selected images are outlined in orange.) Drag the mouse or use Shift + arrow keys to select multiple images.
8.Save the scanned images.
Saving
Save images scanned with MP Navigator EX to a computer.
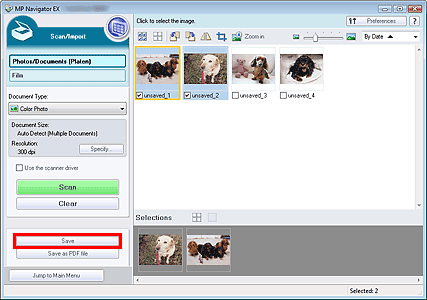
1. Select the checkboxes of the images you want to save, then click Save.
2. In the Save dialog box, specify the save settings.
Specify the destination folder, file name and file type.

important:
You cannot select JPEG/Exif when Document Type is Text(OCR).
reference:
- By default, the following folders are specified as the destination folders.
- Windows Vista: MP Navigator EX folder in Pictures folder
- Windows XP: MP Navigator EX folder in My Pictures folder
- Windows 2000: MP Navigator EX folder in My Pictures folder
- Macintosh: MP Navigator EX folder in the Picture folder
3. Click Save.
Scanned images are saved according to the settings.
To further use/edit the scanned images on MP Navigator EX, click Open saved location in the Save Complete dialog box.
Saving as PDF Files
Save images scanned with MP Navigator EX as PDF files.
1. Select the checkboxes of the images you want to save, then click Save as PDF file.
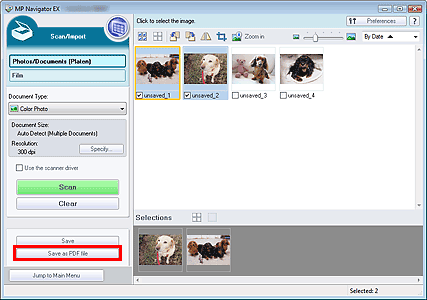
2. In the Save as PDF file dialog box, specify the save settings.
Specify the file type, file name and destination folder.

Select from the following PDF file types:
Save each of the selected images as a separate PDF file.
Save multiple images in one PDF file.
important:
PDF(Multiple Pages) is displayed when multiple images are selected.
Add the scanned images to a PDF file. The images are added to the end of the PDF file. You cannot rearrange the pages of the PDF file to which the images are added.
important:
- Images can only be added to PDF files created with MP Navigator EX. You cannot specify PDF files created with other applications. PDF files edited in other applications cannot be specified as well.
Windows:
- If a password-protected PDF file is edited, the passwords will be deleted. Reset the passwords.
reference:
- By default, the following folders are specified as the destination folders.
- Windows Vista: MP Navigator EX folder in Pictures folder
- Windows XP: MP Navigator EX folder in My Pictures folder
- Windows 2000: MP Navigator EX folder in My Pictures folder
- Macintosh: MP Navigator EX folder in the Picture folder
- You can set passwords for PDF files.(Window)
3. Click Save.
Scanned images are saved according to the settings.
To further use/edit the scanned images on MP Navigator EX, click Open saved location in the Save Complete dialog box.
