
Different ways to receive a document (JX210P)
| Article ID: ART152405 | | | Date published: 05/22/2015 | | | Date last updated: 12/28/2015 |
Description
Solution
Your fax provides you with several modes for receiving documents. To determine which mode best suits your requirements, see the table below.
| (Fax/Tel Mode)/(DRPD) | |
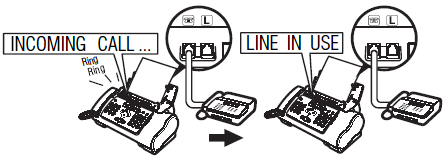
 Pick up the Handset to answer the call. You can not answer with your external device. |
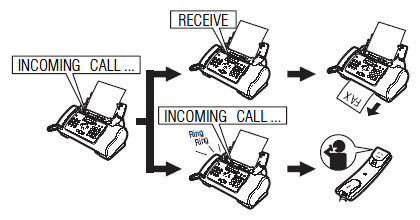
Automatically switches between fax and voice calls. Receives documents automatically and rings for voice calls . (DRPD): The fax rings differently depending on whether a call is a fax or voice call.Subscribe to a DRPD service. Handset or extension phone connected to the fax . |
| (MANUAL MODE) | |
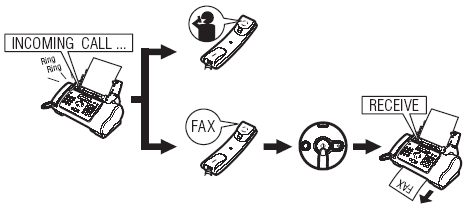 |
Rings for every call, regardless of whether the call is a fax call or a voice call. For a fax call, you have to manually activate reception of the fax . |
| (ANS.MACHINE MODE) | |
 |
Receives documents automatically and routes voice calls to the answering machine. Connect an answering machine to your fax .For the JX510P model, cancel TAM mode. |
| (FAX ONLY MODE) | |
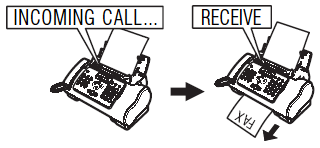 |
Answers all calls as fax calls. Receives documents automatically and disconnects voice calls. Separate telephone line for fax use only. If you want to be alerted when a fax call is received, enable the setting . |
Once you have decided which mode is suitable for your needs, set the mode by pressing [Receive Mode/Resolution].
1. Press [Receive Mode/Resolution].Every time you press [Receive Mode/Resolution], the mode switches.
- Receiving Faxes: <FAX ONLY MODE>
If the Ink Lamp lights up faxes will be received to memory.
- Receiving Documents and Telephone Calls Automatically: <Fax/Tel Mode>
If you set <Fax/Tel Mode>, you can control precisely how the fax handles incoming calls by adjusting the following settings:
- Adjust the time the fax takes to check whether a call is from a fax machine or a telephone (<RING START TIME> setting).
- Adjust the length of time the fax rings when the call is a voice call (<TEL RING TIME> setting).
- Set whether the fax switches to receive mode after the ring time set in <TEL RING TIME> has elapsed (<DEFAULT ACTION> setting).
1. Press [Menu].
2. Use [  ] or [
  ] to select <DATA REGSTRATION>, then press [Start/Copy]. The LCD displays <USER SETTINGS>.
3. Use [ ] or [ ] to select <RX SETTINGS>, then press [Start/Copy]. The LCD displays <ECM RX>.
4. Use [ ] or [ ] to select <FAX/TEL AUTO SW>, then press [Start/Copy]. The LCD displays <RING START TIME>.
5. Press [Start/Copy].
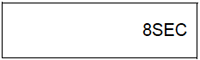
6. Use the numeric buttons, or [ ] or [ ] to enter the time the fax waits before ringing when it receives a call, then press [Start/Copy] twice.
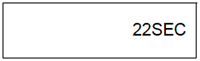
7. Use the numeric buttons, or [ ] or [ ] to enter the time the fax rings while waiting for someone to pick up the Handset, then press [Start/Copy] twice. The LCD displays <RECEIVE>.
8. Use [ ] or [ ] to select <RECEIVE> or <DISCONNECT>, then press [Start/Copy].This setting tells the fax what to do if the Handset is not picked up within the specified ring time set in step 6.
9. Press [Stop/Reset].
Setting ends and the fax returns to standby mode.
- Receiving Documents Manually: <MANUAL MODE>
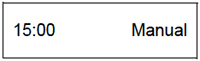
1. Check that <Manual> is displayed on the LCD .
2. When you hear the fax or extension phone ring, pick up the Handset.
3. If you hear a person's voice:
Start your conversation. If the caller wants to send a document after talking to you, ask them to press the start button on their fax machine.
When you hear a slow beep, press [Start/Copy] on the fax to begin receiving the document. Hang up the Handset.
- If the extension phone is located away from the fax, dial 25 (the remote receiving ID) on the extension phone and hang up.
- The fax begins receiving the document.
If you hear a slow beep tone:
Someone is trying to send you a document.
- Press [Start/Copy] and replace the Handset.
- If the extension phone is located away from your fax, dial 25 (the remote receiving ID) on the extension phone and hang up.
- The fax begins receiving the document.
Be sure to replace the Handset after you press [Start/Copy] otherwise the call will be disconnected.
- Receiving Documents with an Answering Machine: <ANS.MACHINE MODE>
Connecting an answering machine to your fax allows you to receive documents and telephone messages while you are out.
<Using Your Fax with an Answering Machine>
Follow these guidelines when using your fax with an answering machine.
- Set the answering machine to answer on the first or second ring.
- When recording an outgoing message on the answering machine, the entire message must be no longer than 15 seconds.
Canceling Receiving
1. Press [Stop/Reset].
Other Features- Saving Ink
You can enable/disable ink-saving feature by selecting <INK SAVER> when [Menu] is pressed.
By enabling this feature, print quality will be reduced. For highest print quality, disable this feature.
1. Press [Menu].
2. Use [  ] or [
  ] to select <DATA REGSTRATION>, then press [Start/Copy].
3. Use [ ] or [ ] to select <PRINTER SETTINGS>, then press [Start/Copy].
4. Use [ ] or [ ] to select <INK SAVER>, then press [Start/Copy].
5. Use [ ] or [ ] to select <ON> or <OFF>, then press [Start/Copy].
6. Press [Stop/Reset].
Setting ends and the fax returns to standby mode.
- Receiving to Memory Temporarily
You can enable/disable memory receiving feature temporarily by selecting <AUTO PRINT> when [Menu] is pressed.
1. Press [Menu].
2. Use [ ] or [ ] to select <DATA REGSTRATION>, then press [Start/Copy].
3. Use [ ] or [ ] to select <PRINTER SETTINGS>, then press [Start/Copy].
4. Use [ ] or [ ] to select <AUTO PRINT>, then press [Start/Copy].
5. Use [ ] or [ ] to select <ON> or <OFF>, then press [Start/Copy].
6. Press [Stop/Reset].
Setting ends and the fax returns to standby mode.
- If you select <ON> in step 5, received faxes will be printed automatically.
- If you select <OFF> in step 5, the fax starts receiving documents in memory. The LCD displays <AUTO PRINT OFF>.
If the <AUTO PRINT> setting is set to <OFF>, the following will not be printed automatically: ACTIVITY REPORT, TX REPORT, RX REPORT, MULTI TX REPORT and MEMORY CLEAR REPORT.
- Changing Calling Volume
1. Press [Menu].
2. Use [ ] or [ ] to select <DATA REGSTRATION>, then press [Start/Copy].
3. Use [ ] or [ ] to select <USER SETTINGS>, then press [Start/Copy].
4. Use [ ] or [ ] to select <VOLUME CONTROL>, then press [Start/Copy].
5. Use [ ] or [ ] to select <CALLING VOLUME>, then press [Start/Copy].
6. Use [ ] or [ ] to change the volume, then press [Start/Copy].
7. Press [Stop/Reset].
Setting ends and the fax returns to standby mode.
- Receiving Documents in Memory While Performing Another Task or When a Problem Occurs
If your fax is performing another task or encounters a problem when receiving a document, it automatically stores the unprinted pages in memory, and the LCD displays <REC'D IN MEMORY> as well as one or more messages.
Once the pages are printed, they are deleted from memory.
- Polling to Receive Documents
The polling feature allows you to request a document to be faxed to you from another fax machine. The sending party only needs to make sure the document is on a fax machine and ready to be sent. Thus, when your fax polls the other fax machine, the document is sent automatically. The fax can poll any fax machine that supports polling.
- Before attempting to poll a fax machine, make sure that the other fax machine supports polling.
- Your fax cannot do polling transmissions.
1. Press [Menu].
2. Use [ ] or [ ] to select <FAX OPTIONS>, then press [Start/Copy].
3. Use [ ] or [ ] to select <POLLING RX>, then press [Start/Copy].
4. Dial the fax number of the fax machine you wish to poll.
Use one of the dialing methods described.
5. Press [Start/Copy].
Your fax begins receiving the document.
Setting Caller IDIf the <CALLER ID> setting is set to <ON>, the caller's name and phone/fax number appear on the LCD when you receive a call.
- <CALLER ID> is only available in some countries.
- To use this feature, you will need to subscribe for a caller ID service (only available in some countries). The <CALLER ID> feature uses the Telcordia or the ETSI EN 300 778-1 protocol. Contact your local telephone company for detailed information on this service.
- If the <CALLER ID> setting is set to <ON>, the machine will not enter the power saver mode .
1. Press [Menu].
2. Use [  ] or [
  ] to select <DATA REGSTRATION>, then press [Start/Copy].
3. Use [ ] or [ ] to select <CALLER ID>, then press [Start/Copy]. The LCD displays <OFF>.
4. Use [ ] or [ ] to select <ON> to enable the <CALLER ID> feature, then press [Start/Copy].
To disable the <CALLER ID> feature, use [ ] or [ ] to select <OFF>, then press [Start/Copy]. Press [Stop/Reset] to return to standby mode.
5. Press [Start/Copy].
6. Use [ ] or [ ] to select the type of <CALL REJECTION> setting (JX510P only) you want, then press [Start/Copy].
You can select from the followings:
- <ANONYMOUS>: The fax rejects calls from any callers who have blocked their phone/fax number from the caller ID service.
- <SELECTIVE>: The fax rejects calls from specific phone/fax numbers you place in <REJECTED NUMBER> list.
- <OUT OF AREA>: The fax rejects calls from any callers in an area that does not have the caller ID service.
- <SHOW IN HISTORY?>: Determine if the fax stores phone/fax number for rejected calls in memory.
7. Use [ ] or [ ] to select <ON> (YES), then press [Start/Copy].
- If you set to <OFF>, the setting goes on to the next <CALL REJECTION> setting.
- If you set <ANONYMOUS> or <OUT OF AREA> to <ON>, select a method to reject calls in <REJECTION METHOD>. Press [Start/Copy], then proceed to step 12.
- If you set <SELECTIVE> to <ON>, register the specific phone/fax numbers you want to reject in <REJECTED NUMBER> list. Follow the steps below.
- If you set <SHOW IN HISTORY?> to <YES> or <NO>, <TEL REGISTRATION> is displayed on the LCD.If you want to finish the <CALLER ID> setting, press [Stop/Reset] to return to standby mode.If you want to continue to set other <CALL REJECTION> settings, press [
 ], and then repeat from step 2 again.
8. Press [Start/Copy].
9. Use [ ] or [ ] to select the number of <REJECTED NUMBER> list (00-09) under which you want to register the phone/fax number, then press [Start/Copy].
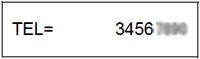
10. Enter the phone/fax number using the numeric buttons, then press [Start/Copy].
11. To assign additional numbers, repeat the procedure from step 9.
To finish, press [Menu], then select a method to reject calls in <REJECTION METHOD>. Press [Start/Copy].
12. Use [ ] or [ ] to select <PLAY MESSAGE> or <DISCONNECT>, then press [Start/Copy].
- <PLAY MESSAGE>: The call will be disconnected after <OUTGOING MESSAGE> is played. If you set <SELECTIVE> to <ON> in step 6, and want to select this setting, <OUTGOING MESSAGE> must have been recorded.
- <DISCONNECT>: The call will be disconnected without notice.
13. Press [Stop/Reset] to return to standby mode.
Documents Stored in Memory- Printing the MEMORY LIST
Your fax can print a list of documents stored in memory, along with the transaction number (<TX/RX NO.>) of each document. Once you know the transaction number of a document in memory, you can print it or delete it.
1. Press [Menu].
2. Use [  ] or [
  ] to select <MEMORY REFERENCE>, then press [Start/Copy].
3. Use [ ] or [ ] to select <DOC. MEMORY LIST>, then press [Start/Copy].
- Printing a Document in Memory
1. Press [Menu].
2. Use [ ] or [ ] to select <MEMORY REFERENCE>, then press [Start/Copy].
3. Use [ ] or [ ] to select <PRINT DOCUMENT>, then press [Start/Copy].
4. Use [ ] or [ ] to select the transaction number (<TX/RX NO.>) of the document you want to print, then press [Start/Copy]. The LCD toggles between <1ST PAGE ONLY?> and <YES=(  ) NO=( # )>.If you are unsure of the transaction number (<TX/RX NO.>), print the MEMORY LIST .
5. Press [ ] to print the first page only, or press [ # ] to print all pages of the document.The fax prints the document.
- Printing All Unprinted Documents in Memory
1. Press [Menu].
2. Use [ ] or [ ] to select <MEMORY REFERENCE>, then press [Start/Copy].
3. Use [ ] or [ ] to select <PRINT ALL NEW RX>.
4. Press [Start/Copy].
The fax prints the documents one at a time, after each the reception number is displayed on the LCD.
5. After printing, the LCD displays <YES=(  ) NO=( # )>.
6. Press [  ] to delete the previous printed documents.If you want to keep the documents in memory, press [ # ].
- Deleting a Document from Memory
1. Press [Menu].
2. Use [ ] or [ ] to select <MEMORY REFERENCE>, then press [Start/Copy].
3. Use [ ] or [ ] to select <DELETE DOCUMENT>, then press [Start/Copy].
4. Use [ ] or [ ] to select the transaction number (<TX/RX NO.>) of the document you want to delete, then press [Start/Copy]. The LCD displays <YES=( ) NO=( # )>.
- If the LCD does not change after you press [ ] or [ ], this means only one transaction is stored in memory.
- If you are unsure of the transaction number (<TX/RX NO.>), print the MEMORY LIST .
5. Press [ ] to delete the document.If you want to keep the document in memory, press [ # ].
6. To continue deleting other documents in memory, repeat the procedure from step 4. To finish, press [Stop/Reset].
- Deleting All Printed Documents from Memory
1. Press [Menu].
2. Use [ ] or [ ] to select <MEMORY REFERENCE>, then press [Start/Copy].
3. Use [ ] or [ ] to select <DEL. PRINTED RX>, then press [Start/Copy]. The LCD displays <YES=( ) NO=( # )>.
4. Press [ ] to delete all printed documents.
If you want to keep the documents in memory, press [ # ]. Press [Stop/Reset] to return to standby mode.